NuTeak brightens a once dim prospect
Issue 77 : Mar/Apr 2011
In 2008, at age 66, I fulfilled a lifelong dream by purchasing my first cruising sloop, a 1979 Hunter 30. Like many good old boats, Time-Out desperately needed a new owner when I acquired her in 2008.
Over three decades of uninterrupted slip life, she probably suffered occasional blown bilge-pump fuses, ubiquitous boat leaks, and such transgressions as wet bathing suits tossed casually on the cabin sole. As a result, the plywood teak-and-holly sole was dull and disintegrating. A sailing friend suggested I replace it with one of the new synthetic flooring materials that are appearing on expensive new yachts. He further suggested the replacement sole should extend past the forward bulkhead and into the V-berth for a more dramatic-looking cabin.
Taking this advice, at the 2010 Atlanta Boat Show I purchased 45 square feet of mahogany-and-holly synthetic flooring from NuTeak. This product consists of 1⁄8-inch-thick, 3-foot-long alternating planks of 3-inch-wide mahogany and 1⁄4-inch-wide holly striping. The NuTeak folks also provided four “sausages” of Bostik moisture-cure adhesive.
Subfloor preparation
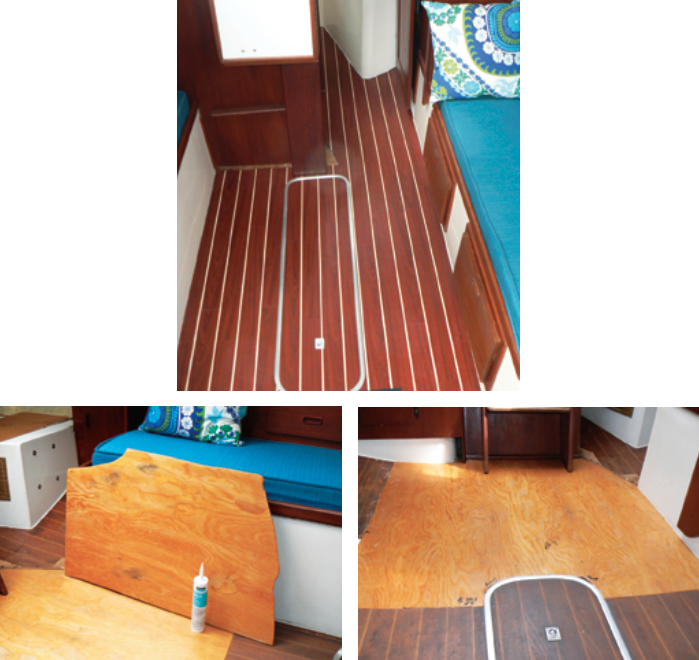
When preparing for the new cabin sole, I decided one 40-inch long, full-width section of the old plywood sole was so badly deteriorated it had to be cut out. This exposed the fiberglass liner. Because I was leaving the rest of the old sole in place as a subfloor, I had to build up the cutout area before applying the replacement material.
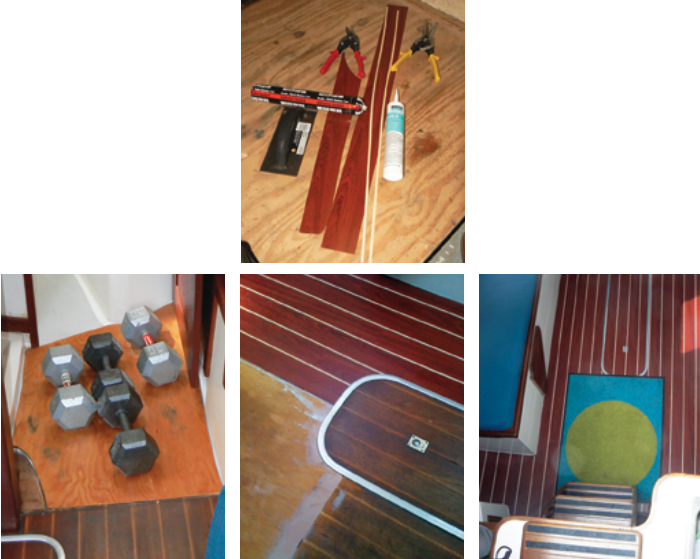
I cut to fit and epoxied 1⁄4-inch marine plywood for the low area and did the same thing in front of the head and into the V-berth. I attached these three new panels to the fiberglass liner with clear Dow Corning Adhesive Caulk 999A, as suggested by Hunter Marine. So the plywood would take the shape of the curved cabin sole, I placed 150 pounds of exercise weights on each subfloor section to hold them in place while the adhesive cured. I then filled the seams between the four pieces of sub-floor with automobile Bondo and sanded them smooth.
Precision cuts
My son-in-law volunteered to take the lead in installing the NuTeak planks. An information technology executive by profession, he had cut his teeth as a craftsman remodeling his own kitchen a couple of years earlier.
We started the NuTeak installation by laying out alternating planks and striping on the port side. Since it’s interrupted by the bulkhead, this section is shorter, so it seemed to be the right place to begin the learning curve.
Every piece had to be precisely cut, trimmed with compound sheet-metal shears, tested, and fine-tuned. The installation literature indicated that the Bostik moisture-cure adhesive had only a 10 minute “fuse,” after which the adhesive skins over. This urgency required that we ensure every panel fit perfectly before we started the cementing process. We used blue masking tape to assemble the pre-fitted pieces into taped mats that could be cemented in place as finished units.
It took us a full day to cut and fit the pieces for the “short” port side. We spent the second day fine-tuning the cuts, cementing in the assembled port-side mat, removing excess adhesive, and making sure every intersection mated perfectly to its neighbor and to the perimeter. It was a frenetic effort. By evening, we were whipped. However, the new port-side cabin sole was outstandingly beautiful, especially when viewed side by side with the remaining old faded sole.
The following Saturday, we cut and fit the entire, far longer, starboard side. With much of the learning curve behind us, we assembled our blue-striped interlocking mats more quickly. When we returned the next morning, we hustled out the adhesive and quickly installed the assembled taped mats from the companionway all the way to the bow. When the last piece was laid, all joints and edges aligned, and the excess adhesive wiped away, the new sole looked fabulous.
A sole to be proud of
The new striped mahogany-and-hollysole brightens up the interior all the way into the V-berth. In addition to looking exactly like fine contrasting natural woods, it visually elongates the cabin. The total cost, including the subfloor, tools, and the NuTeak materials, was just about $1,000. Best of all, the new sole requires no maintenance.
The cabin sole has been in place for a full sailing season. It has been subjected to wet bathing suits, dragged coolers, dropped tools, and at least one flying quiche. Despite these transgressions by Time-Out’s new owners, the new sole remains a showpiece.
David Germaneso works for the state of Georgia. He and his wife, Anita, share their sailing time on Time-Out with family and friends on nearby Lake Lanier.
Thank you to Sailrite Enterprises, Inc., for providing free access to back issues of Good Old Boat through intellectual property rights. Sailrite.com