Synthetic teak covers a patchwork of repairs
Issue 77 : Mar/Apr 2011
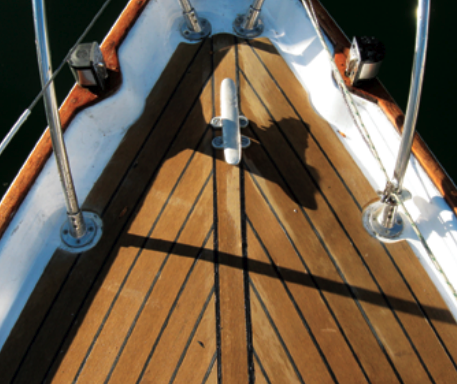
After twice repairing the deck in areas with wet core in as many years, finding yet another area with soggy balsa made me look for a more durable solution. Wings, my 1970 Redwing 30 (a model featured in Good Old Boat, January 2000) has a well-made hull that has withstood the test of time, but the deck was showing signs of its 40 years of exposure to the weather.
Kris Ramsingh of BoatWorks & More had been repairing fiberglass in Trinidad for most of his life. Luckily for me, he moved to Virginia, so I recruited him to help.
We had made the earlier deck repairs by grinding out the old fiberglass, replacing the wet balsa core, and reglassing the affected areas. To finish those areas, Kris created a reverse mold of the original deck’s diamond-pattern non-skid.
To make his mold, he cleaned a section of non-skid and applied a heavy layer of wax. He brushed on gelcoat and allowed it to cure. He then pressed fiberglass cloth wetted with resin onto the gelcoat. Once it cured, he lifted off the fiberglass with the gelcoat casting of the non-skid attached.
After repairing an area of the deck, he would apply gelcoat to the surface and vacuum bag the heavily waxed gelcoat reverse mold on the new gelcoat. When the gelcoat cured and he lifted the mold, the transition from old to new was almost imperceptible.
Having learned from these previous repairs, I took some time to choose a better solution for the third round of deck work. Replacing the entire deck with traditional fiberglass over balsa, followed by gelcoat, would be costly and time-consuming. And replacing the core from below was simply not on my list of options. After researching deck materials, I decided to go with synthetic teak because the technology and technique made sense.
It was not an easy decision. I am a purist at heart and since Wings did not have a teak deck originally, I was reluctant to alter her construction. However, loyalty to tradition had not stood in the way of a CD stereo system, wheel steering, and a roller furler on the headsail. Practicality won, and I began to plan for a synthetic teak deck. My hope is that a more impervious material will make this my last repair for a while.
There were several options on the market: TekDek, NuTeak, Unique Teak, Flexiteek, and PlasDECK. We ultimately used TekDek Flexible, a colorfast and UV-stabilized PVC composite that its manufacturer claims is low-maintenance and durable. It’s reportedly stain-resistant, tolerates power washing, and requires no sealant. It’s assembled using a tongue-and-groove edge. The product is sold in 10-meter rolls and 2.25-meter strips.
You can have the deck delivered prefabricated, in which case you can follow the instructions for templating on the TekDek website. We elected to buy the product in rolls and assemble the deck ourselves. This approach costs substantially less, but I would likely purchase the deck ready to install if I were to do it again. The tongue-and-groove material is not difficult to assemble, but creating a professional appearance is time-consuming.
The devil is in the details: beveling the edges, cutting out areas to accommodate deck fittings, and creating a border. Through most of this project, I found myself wishing we could just roll out the new deck and glue it down: 1-2-3 done. But that was just fantasy.
Template first
We used heavy brown wrapping paper to make templates for the deck and cockpit. Templating a large area is cumbersome and 40-pound brown paper is easier to manage than plastic and more forgiving than cardboard. It helps to practice in smaller areas, such as the cockpit sole, before running paper the entire length of the deck. We creased the paper to make impressions around the edges and traced cutouts for the stanchions, fill caps, and standing rigging. Once the template was back on dry land, it was easy to cut with scissors. I then took the pieces back to the boat for a fitting and accuracy check.
Kris used the template to fashion the PVC deck in sections. Cutting the material to match a template requires a box cutter, but that leaves a cut edge with an unattractive shiny plastic appearance in some spots. We sanded these irregularities along the cut edges to create a smoother contour and followed that by sanding with 100-grit sandpaper, which gave each cut edge a rougher, more authentic wood-like texture. With the help of a heat gun, we were able to bend the sections to match the curvature of the deck.

Prepping the deck
After removing all the non-rigging hardware, we ground the entire deck flush to smooth out the non-skid. Since we were installing the new deck on top of existing fiberglass, a perfectly sound deck might have made this the end of our preparation. However, we had to first grind out several areas with wet balsa core, the problem that had led to this solution in the first place.
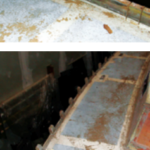
Ultimately, we removed all the fiberglass and core from the cockpit sole and several more areas amidships, both port and starboard, that were each approximately a square foot in area. Grinding out the old deck was effective, but collateral damage to adjacent areas not covered by the new deck required additional cosmetic work. A more precise approach might have been to make shallow cuts through the top skin of the deck with a circular saw, then remove the skin to access the wet core.
Once we’d removed all the wet core, we left those areas open to dry thoroughly. Kris repaired the defects by laying fiberglass mat and polyester resin over new balsa core material. We used microballoon filler to make the deck repairs flush with the original deck and sanded the deck fair.
Wipe, glue, and caulk
When we were ready to start laying the decking, we wiped the entire fiberglass deck clean with acetone. Kris then assembled the PVC deck sections on the boat and installed them with TekDek adhesive TD-5620/23.
The TekDek rolls were several “planks” wide, so the larger areas did not have many joints that required caulking. Where one templated sheet met another, we taped the joint edges and caulked using black TD-5612-B supplied by the manufacturer. Running painter’s tape along the joint edges allowed us to neatly inject black caulk where needed and smooth the caulk line flush with a spreader. This worked fairly well and wider tape made for easier cleanup: any excess caulk that extended beyond the joint could be lifted off with the protective tape. We sanded the synthetic teak with coarse sandpaper to remove any wayward adhesive or caulk.
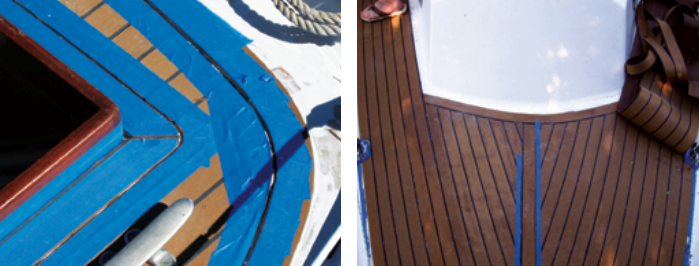
With the decking secured, we scraped off the adhesive that had extruded from the edges. Then we ground and sanded the edges of the TekDek to a bevel. We also used 100-grit sandpaper to scuff the PVC deck surface slightly for a more realistic teak appearance.
In use, I’ve learned spills can be removed with coarse sandpaper and dings (such as with wood or gelcoat) don’t happen. My only complaint: it’s very hot underfoot.
Collateral cosmetics
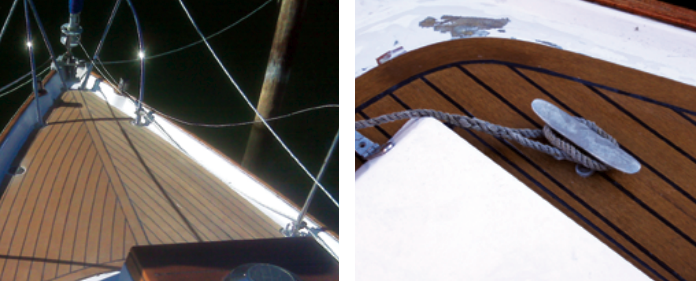
The new deck looked great but, by comparison, the 40-year-old gelcoat adjacent to it did not. The grinding process had exposed the original fiberglass and it was unsightly. It was going to be necessary to restore the gelcoat on the deck.
Fortunately, gelcoat repair is another of Kris’ specialties. In the December cold, we mixed gelcoat and brushed it on the sanded deck margins. The weather slowed the curing, but this proved a blessing for someone working as slowly as I did when gelcoating for the first time.
Once the finished gelcoat was wet-sanded, it looked bright and fresh. Unfortunately, the deck now looks so fresh I feel obligated to respray the gelcoat on the cabin trunk!
Eric Swisher is an Ob-Gyn in Roanoke, Virginia. He sails his 1970 C&C Redwing 30 on Smith Mountain Lake as well as a Hunter 33 on the Chesapeake Bay with SailTime. He often sails with his 6- and 8-year-old daughters who quickly learned to straddle the cockpit with a foot on each bench so they can see over the wheel and steer.
Thank you to Sailrite Enterprises, Inc., for providing free access to back issues of Good Old Boat through intellectual property rights. Sailrite.com