An elegant accessory from an unlikely source
Issue 77 : Mar/Apr 2011
When we lived in Miami, my wife and I enjoyed nothing more than having dinner in the cockpit of Makani, our Ranger 29. We had a nice wooden folding TV table that fit perfectly on the cockpit sole when the tiller was lifted out of the way. The table, though small, worked great and stored away in a nook behind the head. We now live in Annapolis, after having sold the marvelous Ranger to a friend. Our new boat, a 1988 Pearson 31 named Far Away, has wheel steering mounted toward the rear of the cockpit, but she had no cockpit table, and we missed that.
It seemed that a good solution would be to purchase a folding table that attached to the tubes of the steering-pedestal guard. We would put it up to eat and fold it down when done. That would be high-class living. But I quickly found out that folding cockpit tables are priced in the luxury range.
Edson sells a nice teak table for one measly dollar shy of $1,000. I was staggered. Serious searching uncovered smallish teak tables for $350, but even that seemed pretty expensive. A search through craigslist came up empty. It was do-it-myself time. That’s when I realized that even a table-hardware kit ran more than $180 . . . before purchasing the wood. There had to be a more affordable way to create beauty, durability, and utility in a cockpit table.
If I wished to do this myself, I figured I would need:
- A good, table-sized piece of hardwood
- A way to attach it to the pedestal-guard tubes
- Two good-looking weatherproof hinges
- A way to support the table in the up position when in use
- A stowed position for when it was not in use.
Looking for lumber
You can buy teak, but it’s expensive and comes in widths that would have to be joined to make a tabletop. Other hardwoods are available, but they have the same limitations. I don’t have the skills or the tools necessary to do high-end joiner work, especially when the potential is to botch up a really expensive piece of wood. So I planned a circuit of Goodwill stores.
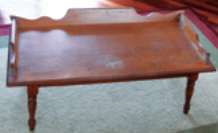
At the first Goodwill store, I found a solid-maple coffee table for $10. The table had more than enough wood to make a cockpit table and the top was big enough that no fancy joinery would be necessary. Problem one solved for $10. If you buy a Goodwill table, choose maple, cherry, or some other fine-grained hardwood that will give you a nice smooth surface.
I did all my cutting before removing the finish on the table so the old finish would protect the surface while I disassembled the table and cut it up. When done, I also had less finish to remove. After removing the legs and three pieces of decorative trim, I marked the wood I needed for my table in areas that were free of screw holes and other blemishes.
Figuring dimensions
Since I would be hanging my table under a teak cup-and-binocular holder that was already mounted on the pedestal guard, I decided to make the table the same width: 14 inches. I considered making it with leaves I could fold open to create a wider dinner surface but, since our habit in the past had been to use the table more as a place for appetizers and wine glasses than for a full dinner service, I decided to keep it simple. A width of 14 inches would be plenty and would leave us room to stand next to the table in the cockpit.
The length I could make the table was a function of two things: the height of the mounting point on the pedestal and the length of the cockpit forward of the pedestal. The table couldn’t be longer than the shorter of those dimensions. On Far Away, the limiting dimension was the height of the mounting point on the pedestal: 29 1/2 inches. Any longer and the table would not fold down without hitting the sole. Since I needed a 3-inch-deep piece to mount on the pedestal and hold one side of the table’s support hinges, I came up with a table surface of 14 x 26 inches.
Also, the tabletop would have to be at least 25 inches above the cockpit sole so my knees would fit comfortably under it.
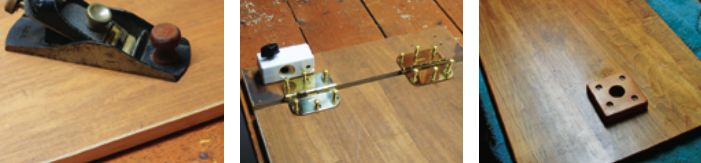
I cut out the 3- x 14-inch mounting block and the 14- x 26-inch tabletop on a table saw. Using a small block plane, I chamfered the edges on three sides of both pieces. The edges I didn’t chamfer were those where the hinges would join the mounting piece to the tabletop. The rounded chamfers are important; unrounded edges on hardwoods can be sharp. I used 150-grit sandpaper to round the edges and corners a bit more. I also sanded the edges of the mounting board.
Tubing clamps
Although I could have screwed the 3- x 14-inch mounting board directly to the pedestal, I don’t like making holes in perfectly good tubing. The teak cup-and-binocular holder was attached with plastic rail clamps made by Helm Industries (item #HR-200 for 1-inch diameter tubing). These were a bit hard to find, but I eventually found them at West Marine for $32.99 each. They show up in the West Marine catalog under “Life Sling Components.” (Note: Helm Industries is no longer in business –Eds.)
These clamps were pricey, but they did the job well. Since I would be using brass hinges, I used brass #10 x 1 1/4-inch machine screws, nuts, and washers from Home Depot to attach the rail mounts to the mounting board.
Thus far, I had a great piece of maple for $10 and two rail mounts for $66. But how would I hinge the tabletop to the mounting board? All the local chandleries (Annapolis has as many boat-supply stores as Seattle has Starbucks) have lovely stainless-steel and brass hinges for marine service. But if a part says it is for marine use, the price will be doubled or tripled. The hinges I liked were solid “marine” brass with rounded corners and cost $20 each. Home Depot had solid-brass 3-inch door hinges that were virtually indistinguishable from the $20 marine hinges for only $7 each.
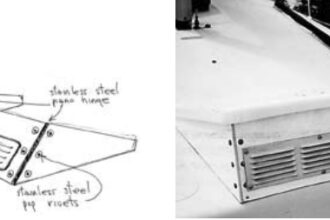
The hinges came with brass screws. I thought through-bolting the hinges to the table and bracket would make the table stronger, so I bolted them on with #10 x 1-inch brass machine screws from Home Depot. Of course, the length of the machine or wood screws you use will be determined by the thickness of your tabletop. I could find only round-head machine screws with straight slots. I’ll keep looking for brass oval-head Phillips machine screws because I think they will look better. The 18 brass machine screws, some brass washers, and the nuts came to less than $10.
I didn’t recess the hinges; I surface-mounted them. If you have better woodworking skills, you may want to recess the hinges.
A leg to stand on
The biggest design problem I had to solve was how to support the table in the ready-to-use position. This stumped me for a couple of weeks. At first, I thought a hinged leg could be attached that would fold down when the table was open. All the tables I found for sale had either a fold-out leg or some sort of brace that fit at a diagonal between the tabletop and the steering pedestal. But, for aesthetics and stability, I wanted the leg set back a bit from the end of the table. That would require the leg to be shorter than the tabletop. With my tabletop only 26 inches long, the leg would end up shorter than 25 inches, making the table too low for my knees. After measuring the distance from the floor to the top of my knees when seated, I had established 25 1/2 inches as the minimum practical height.
I looked at ways to use a folding hatch brace, but everything I found seemed either complicated, expensive, or a nuisance to use. A friend suggested a folding spring-loaded brace of the type used on swing-up table leaves but these are made of steel and, although painted, would almost certainly rust in time. I eventually opted for something much more simple: a removable leg.
I bought a 1-inch diameter x 4-foot dowel at Home Depot for $5.95. To make a socket for the removable leg, I drilled a 1-inch hole in the center of a 3 1/2-inch-square piece of scrap maple from the Goodwill table.
I drilled this hole with a 1-inch bit I already had, but you may want to use a hole saw. If you don’t have a drill press, make sure you hold your drill perfectly vertical when you drill your hole or the table leg will not fit in straight.
I chamfered and radiused the edges of what would become the bottom side of the socket so it would not be sharp and finished it with stain and teak oil. I then screwed this small square socket piece with a hole in it to the bottom of the table, centered side to side and about 2 inches from the end, using four of the brass screws that had come with the hinges.
Before cutting the dowel, I took the table to the boat and installed it on the pedestal guard. With the table mounted at the height I wanted it, I raised the table leaf until it was parallel with the cockpit sole. I leaned the dowel against the table and made a pencil mark on it at the level of the underside of the table. Later, back at home, I cut the dowel with a back saw in a miter box. If you want to put some sort of tip on the base of the leg, remember to do that before you measure for the cut.
I wanted a snug fit between the dowel and its socket so I sanded the dowel lightly at that end. I sanded the rest of the dowel with three grades of ever finer sandpaper, stained it, and rubbed on teak oil as I had done with the tabletop. I tested the dowel in the socket; the table was good and sturdy. I don’t want someone’s hefty Uncle Harry to sit on the table, but no cockpit table is up to that sort of punishment.
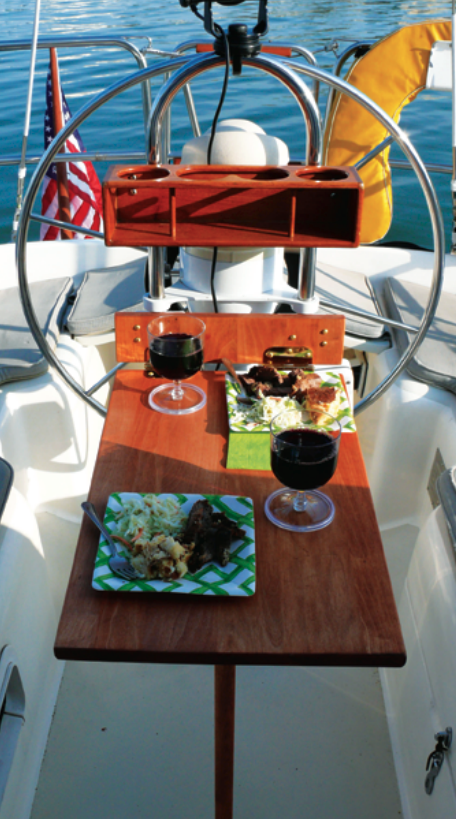
When we want to use the table, I lift the table leaf, slide the dowel into the socket, lower the table, and it’s secure. When it’s time to drop the table, I lift it, remove the leg, and stow it nearby. It isn’t fancy but it works. One of the nice features of this approach is that, if your setup will allow the table to be mounted a little higher, you can make the leg longer than the length of the tabletop, which you can’t do if the leg is hinged to the tabletop.
Sand, stain, and finish
Rather than using chemical strippers on the Goodwill table I used 60-grit sandpaper to strip it to bare wood. That way, no chemical stripper filled the pores of the wood when I was done. I followed the 60-grit paper with finer and finer grit until I finished up with 220-grit, making a beautifully smooth surface.
After vacuuming the entire work area to remove the dust, I rubbed on some “gunstock brown” Minwax stain I had on hand. If you have to buy stain, get the smallest size you can as you’ll need very little.
Once I had rubbed off all the surplus stain (I didn’t leave the stain on very long because I wanted a nice golden color), I let the parts dry overnight. Then I rubbed in three coats of teak oil. Well, actually, every time I went to the basement, I put on a bit more teak oil, let it sit a half hour or so, then rubbed it well. The table probably has eight or nine coats. I like oiled wood because it’s easier to maintain than varnish and doesn’t chip or peel. Since this table will be stored under a canvas steering-pedestal cover, it should hold up well.
I didn’t fit fiddles on the table because we have glasses and plates with rubber feet and don’t plan to use the table under way. If we find ourselves in an anchorage so rough that things fly off the table, we’ll know it’s time to move somewhere calmer. If I were to add fiddles, I’d screw them in from the underside of the table.
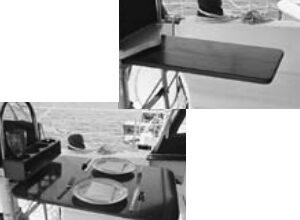
My Goodwill special looks great. It was easy and simple to build and cost almost an even $100 — at least $250 less than anything I could have bought. Now it’s time for some wine and cheese in the cockpit to celebrate. Cheers!
George Lawrence grew up an easy bike ride to Baltimore Harbor and friends with an old rowboat. He has captained a variety of vessels but his most memorable time was an hour at the helm of the 80-foot wooden schooner, White Squall, riding down the trades in Sir Francis Drake Channel.
Thank you to Sailrite Enterprises, Inc., for providing free access to back issues of Good Old Boat through intellectual property rights. Sailrite.com