An inflatable dinghy gets a homemade upgrade
Issue 74 : Sept/Oct 2010
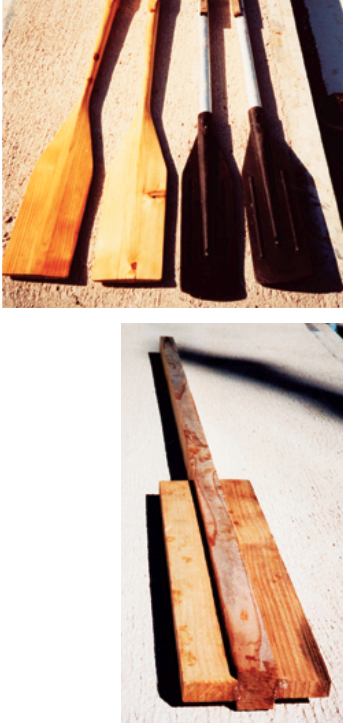
Before my partner, Magali, and I left England on Joass, our 32-foot wooden gaff cutter, in the spring of 1998, we bought ourselves a brand-new 7-foot 6-inch inflatable dinghy. This came with a set of aluminium oars with plastic blades. The dinghy, which was PVC, finally perished in the sun about seven years later, but the oars carried on — despite numerous repairs — to propel her successor, a similarly sized, second-hand Hypalon inflatable that we christened Desdemona.
Over the summer of 2008, our oars began to show their age more and more clearly until, eventually, they failed once too often, leaving us to paddle back to our boat with a short broken end. This convinced us they really were due for replacement.
The design
In the past, I had made several sets of oars for a variety of rowing boats, my favorite being an 8-foot pair made from silver spruce following a design I found in the book Clinker Boatbuilding by John Leather. Making oars for a small inflatable, however, posed a somewhat different set of design problems.
Instead of having oarlocks, as a conventional hard dinghy does, Desdemona’s oars pivot on bolts. This means that, if the oar is to stow properly, the part of it that is outboard when you are rowing cannot be longer than the distance from the pivot bolt to the stern of the dinghy. Combined with the width of the dinghy, this results in a fairly inefficient oar: the inboard part is proportionally too long while the outboard part is too short. It would be possible to make longer oars that could be unbolted and stowed inside the boat when not in use, but we decided this would be too much of a nuisance when Desdemona was being propelled by an outboard motor.
After taking measurements, we came up with dimensions that would maximize the length of the oars without the tips of the blades overhanging the stern of the dinghy. The oars would be 5 feet long with 1 foot 7 inches inboard and 3 feet 5 inches outboard. The blades would be 1 foot 8 inches long and have a maximum width of 4 3⁄4 inches. Where the looms would have holes drilled through them to take the pivot bolts, we would keep them square to maximize the strength. Inboard of this, the looms would be 1 3⁄4 inch in diameter; outboard, they would taper down to a minimum of 1 1⁄8 inch. Tapering the outboard end of the loom, while keeping the inboard end as large as possible, helps to make the oar balanced and easier to row with.
Making the blanks
As our new oars were going to be so small, we decided to use some of the fast-growing light pine supplied by the local building supply store. This had the advantage of being cheap and readily available. For larger oars suitable for a conventional rowing boat, it would have been worth spending more money on higher-quality timber. Silver spruce, which is light and springy, would have been ideal.
Each oar was made from three pieces of wood. The loom, or central section, was 5 feet long and 1 3⁄4 inch square. The two pieces that formed the blade were 1 foot 8 inches long, 1 1⁄2 inch wide, and 3⁄4 inch thick.
To assemble the blank from which we would make an oar, we glued the two blade pieces to the loom with epoxy, initially applying a coat of straight resin and hardener followed immediately by a second coat thickened slightly with microfibers. As we live aboard, we didn’t have any clamps of a suitable size with which to hold the blade sections in place while the glue set, so we used rope loops tensioned with small wedges.
The next step, once the glue was dry and we had removed the clamping system, was to draw a centerline down each side of the oars. Working from this, we marked out the final shape of the blades and the taper of the looms.
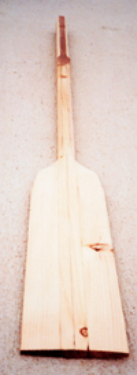
Shaping by eye
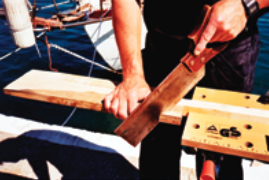
With the exception of an initial cut with a saw to remove the corners at the tops of the blades, we did all the shaping with a smoothing plane and a couple of spokeshaves. I find, when creating two matching objects, it’s easier to work on them simultaneously. When you perform a task on one piece, then immediately repeat it on the other, it’s fairly easy to ensure that they really will end up the same shape and size.
This is the most creative stage of the project and, unless you are working to a specific design, it pays to step back for a good look every so often to make sure you’re pleased with how the oars look. We reshaped the blades a couple of times, tapering them slightly from the tips and easing the shoulders where they merge into the loom, before we were happy with the result.
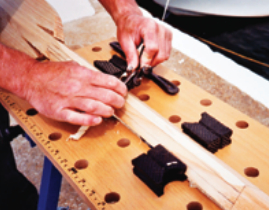
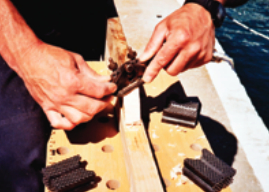
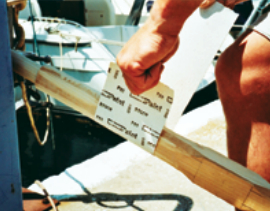
Once you’re happy with the shape of the oars, you have to sand them to remove the flat areas and marks from the cutting tools. On the looms, or for anything else round, an easy way to do this is with a long strip of sandpaper. Pass the sandpaper around the wood and, holding one end of the strip in each hand, move it back and forth, shoeshine style. The sandpaper will remove the high spots and leave you with a smoothly rounded surface.
This method is quick and effective, so take care not to remove too much material. Ignore anyone who derides sanding across the grain as “unprofessional.” I was taught to shape spars this way by an experienced and highly skilled boatbuilder. Just make sure that, once the oars are round, you remove all the cross-grain scratches by careful sanding in the conventional manner following the grain of the wood. For sanding across the grain, a strip of 100- or 120-grit sandpaper is ideal; anything coarser will score the wood too deeply, making it hard to obtain a satisfactory finish.
Finishing off
Conventional oars, which are to be used in oarlocks or thole pins, need to be fitted with a leather. This can be either nailed to the oar with copper tacks or sewn on. In either case, the leather, which should be as thick as possible, needs to be soaked in water for a few hours before it’s fitted. The water makes it flexible and makes it swell up slightly. As it dries, the leather will shrink into place and stiffen.
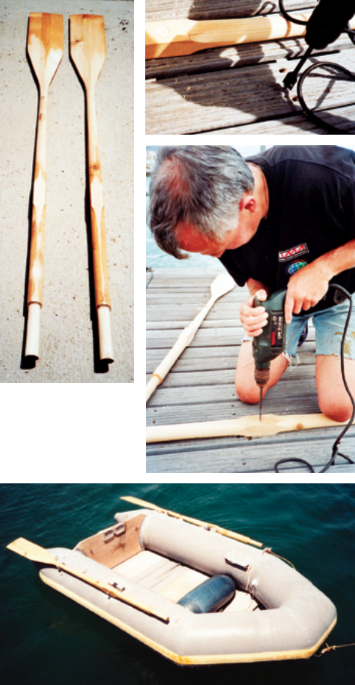
Desdemona doesn’t have oarlocks. Instead, 7⁄16-inch bolts that are hinged to the dinghy’s hull pass through holes drilled in the oars, which are then held in place by nuts. Although this system is quite practical for a small inflatable of this type, it has a couple of shortcomings. First, the hole weakens the oar at its pivot point, exactly where it needs the most strength. Second, the constant wear against the bolt when the boat is being rowed can quickly enlarge the hole and damage the oar. We have tried to overcome the first of these drawbacks by giving our oars a 3-inch square section where they pivot. We hope the extra cross-sectional area this produces will compensate for the loss of strength caused by the hole.
We tackled the second problem by inlaying a stainless-steel 7⁄16-inch fender washer on each side of the oars where the bolts pass through them. To do this, we first found the centers of the flat faces that we had left on the oars by drawing diagonal lines from corner to corner. Using a flat, or spade, bit, we then drilled a recess as deep as the thickness of the washer in each face of the oars, centered on the point where the diagonal lines crossed. As these bits have a central spike, it’s easy to ensure they don’t wander away from the desired position.
If we had possessed a bit the same size as the washers, we would have used it and we could have pushed them directly into place. As it was, the bit was not quite big enough, so we enlarged the recesses slightly using a sharp 1⁄4-inch chisel. When we had achieved a good push fit, we glued the washers into the recesses using rapid epoxy.
Once the glue was set, it was a simple matter to drill the 7⁄16-inch holes through the oars, taking care to keep the drill perpendicular to the face of the oar and using the washers as guides to hold the bit in position. To begin with, we only drilled halfway through the oar, then turned it over and drilled from the other side. This way, any mismatch or discrepancy was minimized and kept in the center of the wood. After drilling the initial holes, we reamed them out all the way through to ensure the oars would pivot freely.
Conclusion
Although we will have to wait and see how they withstand the test of time compared to their aluminium counterparts, so far we are delighted with Desdemona’s new oars. They are comfortable and practical to row with, were inexpensive to make, and smarten up the look of our dinghy.
Richard Toyne and his partner, Magali Bellenger, have been exploring the western Mediterranean aboard Sigfrid, their steel ketch. They finance their voyages by carpentry work, both ashore and on boats (Richard), writing for magazines, and by the sale of handmade jewelry, which is produced on board (Magali).
Thank you to Sailrite Enterprises, Inc., for providing free access to back issues of Good Old Boat through intellectual property rights. Sailrite.com