No coupling, no shaft, no strut, less DIY angst
Issue 91 : Jul/Aug 2013
There may come a time in a sailor’s life when the cherished family member needs to be repowered. I suspected that not all 13 horses of the venerable Volvo MD7A diesel in Natasha, our 1978 Islander Bahama 30, were pulling their weight anymore. Those that were tended to overheat when we were cruising along the coast of British Columbia, where the reliability of the iron genny is critical in the strong currents and light-air conditions common in midsummer.
To keep the frightful cost of a new diesel installation reasonable, I planned to do the work myself. However, I was afraid that installing engine bearers and aligning the shaft and strut would require more than my limited skills. I also wanted to reduce, as much as possible, the noise and vibration coming from the engine compartment. A saildrive unit would address both concerns with a simplified installation and noise-damping isolation engine mounts. I concluded from my research that a 3-cylinder Beta 20 (based on the Kubota 722 block) with a Sea Prop 60 saildrive was the best choice.
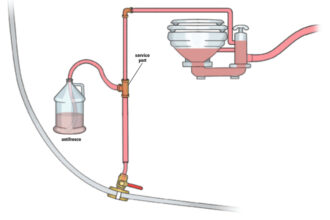
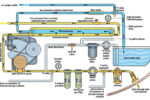
Unlike a “conventional” inboard engine installation with two engine beds, a near-horizontal propeller shaft, and a stuffing box sealing the shaft, a saildrive more closely resembles an outboard motor with the lower unit punched through the bottom of the hull. A complicated and refined fiberglass molding replaces the two engine beds. It supports the engine and the drive, allows the drive to pierce the bottom of the hull, and seals around the vibrating engine and drive to keep the sea in its place.
The first step was to ensure that the replacement Beta unit would fit the relatively small engine compartment under the cockpit sole. Critical measurements were the width of the molded-fiberglass engine bed and the overall height of the engine. I constructed scale-model cardboard mock-ups of the compartment and the engine. They showed that the Beta would fit . . . but just barely. I ordered the engine/saildrive combination from Gartside Marine, the Canadian distributor for Beta Marine, and had the boat hauled out at a local boatyard.
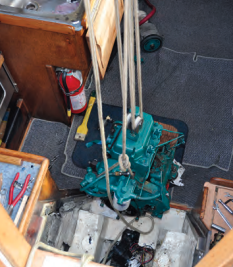

Out with the old
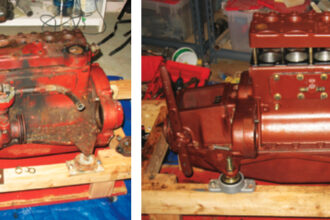
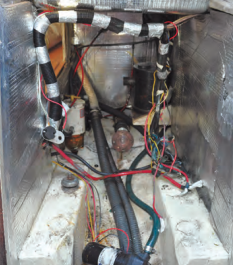
The first event was to remove the old Volvo, along with its shaft, strut, and oil-soaked mahogany engine bearers. With a great deal of trepidation, I used the boom to lower the Volvo over the side. Next, I cleaned up the engine compartment and removed all the associated wiring. The factory wiring for the port side of the Islander crossed through the engine compartment, a pretty standard practice back in the 1970s. As I wanted to eliminate the potential fire risk, I rerouted all the wiring through the stern lockers. The Beta came with its own wiring harness, a simple plug-in — very clean. I purchased The Boat Owner’s Illustrated Electrical Handbook by Charlie Wing as a guide to the re-wiring process, a task much simplified with the empty engine compartment.
When the engine package arrived, work began on the installation process. The manufacturer required the installer (me) to assemble the engine/leg unit onto the bed for alignment. Mounting holes on the bed needed to be drilled and tapped to ensure the entire package was properly aligned. I did this at home, where there was much more room to work. Then I disassembled the completed unit and prepared the engine bed for installation in the boat.
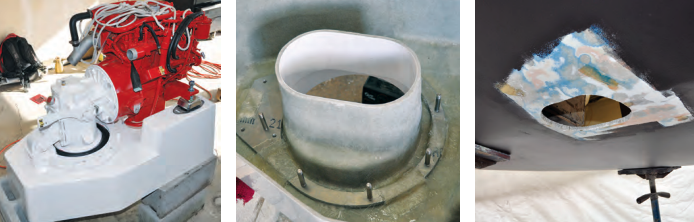
With the limited space in the engine compartment, I had to remove a considerable amount of cabinetry to allow the bed to be glassed in . . . plenty of work with saws and grinders! I also had to seal the holes left in the hull from the original strut bolts, shaft, and raw-water intake. I then trimmed the bed to the contours of the hull using a jigsaw and belt sander, taking small steps to ensure I didn’t remove too much material. I lined up the bed inside the compartment, marked the position, and then (argh!) cut the hole through the hull. (An owner should never have to cut a hole this enormous through the hull himself!) For peace of mind, I hired Blackline Marine, a local premier boat-repair company, to glass in the engine bed. I didn’t want an oversight on my part to result in the bed separating from the hull at an inopportune moment.
In with the new
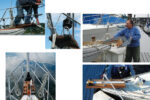
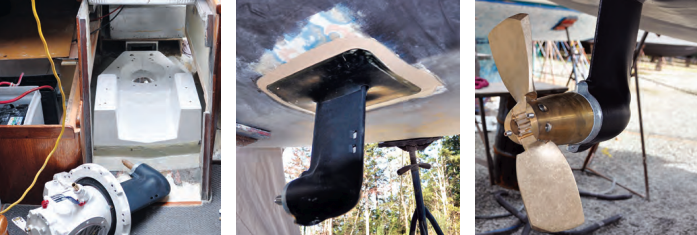
The next step was to install the Sea Prop 60 leg into the bed. This unit was light enough I could carry it to the boat. Space was tight and required that I partially disassemble things just enough to lower the overall height of the unit so I could tilt the leg into the bed. I had to make up the rubber fairing piece around the leg where it entered through the bottom of the hull and glue it into place. Once the leg was bolted down, the hull was again watertight. I painted the bottom with anti-fouling and prepared Natasha for sea. In the interest of saving boatyard costs, I had her launched and towed back to the marina. There was still plenty of work to do, but it could all be done at the dock.
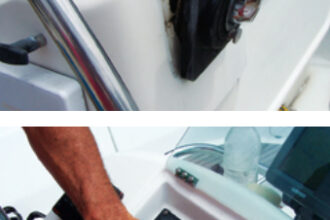
The engine compartment cabinetry had to be reconstructed and glassed into place. I painted the compartment throughout with an interesting and effective sound-absorbing material called Silent Running, then glued foam sound-insulation sheets onto the paint. I also installed the engine-control cabling to the pedestal, the wiring to the new instrument panel, and the fuel lines. Once those pieces were all in place, Gartside Marine lifted the engine into the cabin. From there, it was a fairly simple matter of sliding the engine into the compartment, bolting it to the saildrive unit and engine bed, hooking up the wiring harness, engine controls, and fuel lines, and firing the beast up. The sound of a smoothly running diesel was music to my ears. It was time to go sailing!
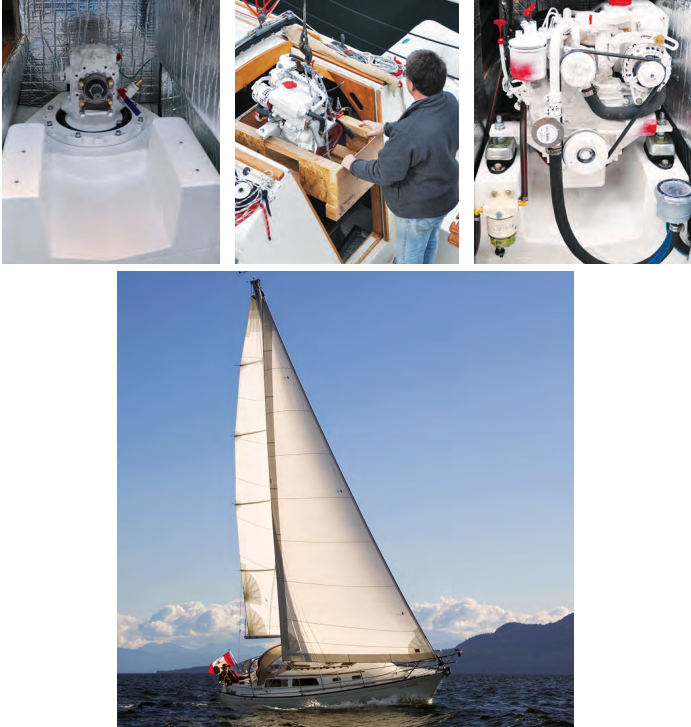
So far we have just over 30 hours on this new iron genny and it has lived up to our expectations. Performance under power with the standard Gori folding propeller has been excellent. Servicing the unit is a joy with all the service points easily accessible at the front of the engine. More important, there is virtually no vibration. The noise level has been greatly reduced in the cabin and cockpit. We can hold a conversation in a normal tone of voice, even at full cruising rpm.
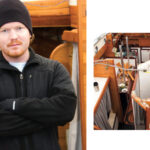
Bert Vermeer and his wife, Carey, live in a sailor’s paradise. They have been sailing the coast of British Columbia for more than 30 years. Natasha is their fourth boat (following a Balboa 20,an O’Day 25, and another Islander Bahama 30). Bert tends to rebuild his boats from the keel up. Now, as a retired police officer, he also maintains boats for a number of non-resident owners and he is an active member of the Islander 36 Association.
Thank you to Sailrite Enterprises, Inc., for providing free access to back issues of Good Old Boat through intellectual property rights. Sailrite.com