For peace of mind, check what’s out of sight
Issue 72 : May/Jun 2010
Some of the mechanical components on your sailboat are so reliable you probably don’t give them a thought. But don’t assume they’ll last forever. Take an hour to inspect these items to ensure they are functioning properly.
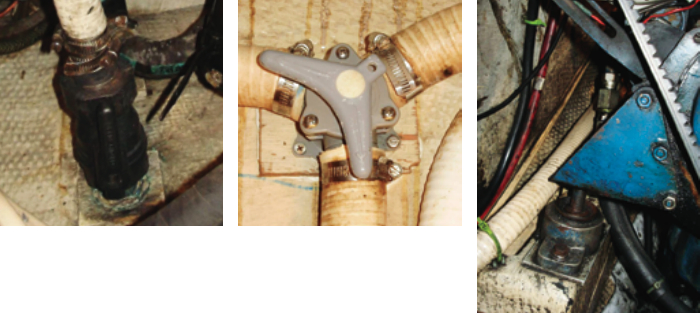
Seacocks – Every below-water through-hull connection should be fitted with a seacock. Seacocks keep seawater on the outside if a hose should fail. If you haven’t exercised yours (from open to closed to open) recently, you should. If a seacock is stiff, work the handle back and forth gently until it moves the full distance. When the handle is in line with the seacock, the valve is open. When it’s perpendicular, it’s closed. You may be tempted to add an extension to the handle for greater leverage. That’s not advisable. The extra leverage could cause the handle to snap off.
When your sailboat is out of the water, you can disassemble the valves and lubricate them with waterproof grease to ease the movement.
Y-valves – These valves are used to divert liquid from one place to another (in waste lines, for example, to divert sewage overboard or to your holding tank). Like seacocks, these valves can stick and should be exercised from time to time . . . gently.
Engine control cables – These are the shielded cables that run from the shift lever and throttle controls to your transmission case and engine fuel pump (diesel) or carburetor (gasoline). If your shift or throttle is getting stiff, the cable may be due for replacement. Run your hand over the cable cover (usually red plastic). Check for cracks, abrasions, or other deformities. Moisture may be causing deterioration to the cable inside the cover. If a cable seizes up, you’ll be unable to work the cockpit control. Replacement cables are not expensive.
Hose clamps – Even a small sailboat has a few dozen hose clamps securing hoses to barbs on engine cooling lines, fuel lines, water lines, and cockpit drains. You probably check the ones that are most visible. But look around for the ones hiding behind and underneath obstructions and equipment. Look for hidden clamps in the engine compartment. Grab an appropriate-sized nut driver and torque them down. Don’t use an extra-long extension on a socket set to tighten the clamps. That much tension isn’t necessary and could snap them.
While most hose clamps have stainless-steel straps, the tightening screws are not likely to have been made of stainless steel. These screws can corrode and rust through. While 100-percent stainless-steel hose clamps are available, they cost four to five times as much as regular clamps. They may be a wise investment for those located in hard-to-access locations. If you have any suspect clamps, replace them with new ones.
Hoses – Run your gloved hand up and down the rubber hoses that supply seawater to the engine and dispose of it. Check the exhaust hose and any hydraulic hoses. Investigate any abrasions, bulges, or stiff sections. Replace suspect hoses.
Running lights – Your running lights probably get minimal use. From a safety and legal aspect, however, they are important. Lack of use and moisture can cause their contacts to corrode. Remove the bulbs, spray a little WD-40 into each socket, reassemble, and test.
Engine mounts – These are the posts that hold an inboard engine to the hull. If your engine seems to be bouncing around a bit, they might be loose. There are usually two at the front of the engine and two more toward the rear. There are two nuts on each post. The lower nut supports the engine. The upper nut locks it down. Torque the upper nut clockwise. As long as you’re there, tighten the bolts that secure the mount to the hull.
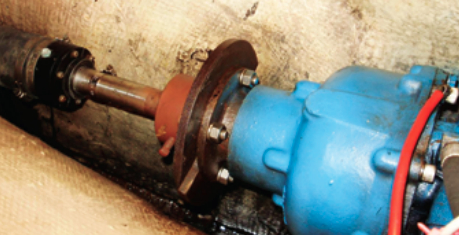
Shaft coupling – Two plates secure the propeller shaft to the transmission. One side of the plate is secured to the transmission. The other half is secured to the shaft. The two halves are bolted together. Make sure the halves are bolted together tightly. Check the gap between the two halves with a feeler gauge at 90-degree intervals. The width of the gap should vary by no more than 0.001 inch for each 1 inch of the diameter of the coupling (a 4-inch coupling should not vary by more than 0.004 inch on each measurement). A large variation in this gap might mean the engine and shaft are not properly aligned, which can cause vibration and other problems.
Miscellaneous – While you’re poking around, look for bolts, nuts, and screws that that vibration may have loosened over time. Put a wrench or screwdriver on every one you can spot to make sure key parts (like those that hold the engine to the transmission) are tight. Make sure a lock washer is properly installed.
Investing a little of your time inspecting these mechanical components will pay off in a big way by ensuring you have fewer hassles and problems when you’re under way.
Bob and Joyce Tigar began their marriage and sailing on small inland lakes in the Midwest in the late 1960s on a board boat. They next moved to larger sailboats on Lake Michigan. Since moving to southeast Florida 12 years ago, they sail their Morgan Out Island 33, Diversion, on annual trips to the Bahamas, adventures in the Florida Keys, and weekend excursions around southeast Florida.
Thank you to Sailrite Enterprises, Inc., for providing free access to back issues of Good Old Boat through intellectual property rights. Sailrite.com