Converting light fixtures to use LEDs
Issue 72 : May/Jun 2010
All the lighting on my sailboat now uses light-emitting diodes (LEDs), which consume only about one-tenth of the battery power the old incandescents did. What’s more, every single light is now brighter than it was with incandescent bulbs.
I’d been thinking about making the conversion for several years but waited until the price of LEDs dropped and a wider range of products became available. Many people have experimented with this and failed, because the LEDs weren’t bright enough. Manufacturers have now figured out how to arrange several individual LEDs within different bulb types to meet a variety of purposes. With help from these latest LED bulbs, I figured out how to convert my lights successfully.
I converted:
- Two overhead dome lights in the
cabin – $22 each - A white running light at the stern – $12
- A combined red and green running
light at the bow – $7 - A masthead anchor light – $20
These were so affordable because I was able to use all the existing light fixtures. Even though the price of the LED bulbs was a little steep ($83 total),it was a fraction of what new LED fixtures would cost. These new LEDs have an estimated life of 50,000 hours. They’re very shock-resistant, and create less battery drain than one incandescent even if all the LEDs are lit at the same time.
Before you start your own conversion, you’ll need to know what kind of bulbs are in your present fixtures. They’re probably one or more of these:
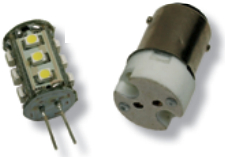
- 1142 – These bulbs have a metal base 15 mm in diameter with two contacts. There are two pins on the side of the base opposite each other, near the bottom. The metal base does not conduct electricity; it just holds the bulb in place. The two contacts at the base carry power to the bulb. This bulb requires both a positive and negative wire. These are very common in boat lighting.
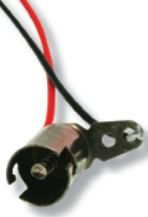
- BA9 socket – This socket holds a miniature bayonet-base bulb 9 mm in diameter with a single contact. Here, the metal base provides one side of the circuit. These are also very common in boat lighting.
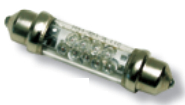
- Festoon or bullet – These bulbs have a double-ended torpedo shape with metal ends and a glass center. Festoons come in various lengths and widths. The ends of the bulb fit between spring-loaded contacts in the fixture. Depending on how the LEDs are arranged within the bulb, festoon LEDs can aim light in one direction or all around.
Overhead dome lights
Let’s start with the easy conversions. My overhead lights in the cabin were standard circular 5-inch-diameter fixtures made by Sea Dog with a toggle on-off switch on the side. Removing the lens, I found an 1142 base and a 10-watt bulb in each.
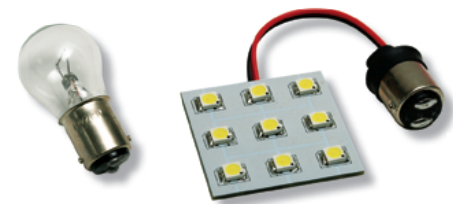
I replaced these with a great LED solution: an 1142 base wired to a 1 1⁄2 -inch panel holding nine high-power LEDs. The panel provides a 120-degree spread of light. All I had to do was insert the base in the socket and let the panel of LEDs rest on the glass lens of the dome fixture. LEDs don’t get hot, so putting the panel on the dome lens won’t create a problem.
I used a cool-white LED bulb. A warm white LED would be closer in color to an incandescent bulb but would seem less bright.
Stern light
My stern and bow navigation lights were made by Hella, and each of them used a 10-watt festoon bulb. The stern light fixture has a clear lens. The bow fixture has a split red/green lens. Each bulb was 42 mm in length and 10 mm in diameter.
The stern light was as easy as the interior dome lights. I just removed the old incandescent and replaced it with a 44 mm festoon bulb containing 12 LEDs in banks of three lined up in four directions. It is now much brighter. The difference in battery drain? Ten watts before the conversion; one watt now.
In most fixtures that take 42 mm festoon bulbs, you can use a 44 mm bulb. The contacts just spring a little wider. Do it if you can because 44 mm LED replacements contain more LEDs than the 42 mm size. Two millimeters is about 1⁄16 inch.
Combination bow sidelights
The red/green navigation light at the bow was a little more complicated. Most people who’ve tried this conversion give up because the LED just isn’t bright enough. When you put a white LED behind a red or green lens, the lens filters out most of the light. It only lets the red or green light through, so most of the bulb’s brightness is blocked.
This seems counter-intuitive, but if you put a red LED behind a red lens, all the light goes through. The same goes for a green LED behind a green lens. So, converting bow lights requires two LED bulbs in place of the single incandescent. But how do you put two bulbs in a spot that was made for one? There are several ways, depending on the type of original bulb. The one you use will depend on the bulb that’s there now and how much room is inside the fixture.
For a festoon-bulb fixture, I came up with a simple solution.
The festoon bulbs I used were 44 mm long and 11 mm in diameter. Each contained nine LEDs mounted on a panel, all facing the same direction, all red in one, all green in the other. The trick was to arrange them to give light across the arc required in a sidelight and fit both bulbs to a single-bulb fixture.
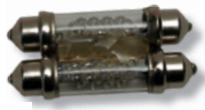
Under the Navigation Rules, each sidelight must show through an arc from the bow to 112.5 degrees aft of the bow. This means that the panel within the bulb should aim in the center of that arc, or 56.25 degrees aft of the bow.
I laid the bulbs side by side and turned them until the LED panels were oriented correctly, then taped them to the workbench across their metal ends. (Note: The 60-degree angle of a 60-30-90 triangle is a good guide for this. The lens on the fixture will make the cut-off at 112.5 degrees. –Eds.) I then glued the bulbs together using hot glue, taking care to apply glue only to the glass portion of the bulb. Solder would not be a good idea here as temperatures high enough to melt solder can fatally damage an LED panel unless applied very briefly.
Next, I cut a 36 mm length of 3⁄8-inch hardwood dowel. I used a miter saw and was careful to cut it square. In the center of each end of the dowel, I drilled a 3⁄32-inch hole to a depth of 1⁄2 inch and put a #4 brass screw (stainless steel would work as well) into each end of the dowel.
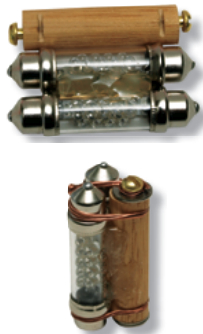
This is delicate work, sort of like tying fishing flies. I found a bench vise was almost a necessity.
With the brass screws in each end of the dowel, I laid it beside a bulb and marked where the metal bulb caps sit. With a hacksaw, I cut narrow notches in the dowel at each of these points. The notches are to hold copper wire.
I laid the joined bulbs on the bench with the LEDs facing down, added some more glue on the back side of the bulbs, and stuck the dowel to the bundle with the notches facing up. I added more glue between the bulbs and the dowel, but was careful not to block the light path for the LEDs.
At this stage, the assembly looked sort of like the space shuttle with two fuel tanks attached.
I held the dowel in the bench vise while I applied the wiring. I wrapped stranded copper wire (22- or 20-gauge works well) around the bundled dowel and bulbs with the wire in the dowel notch, then twisted it tight with the twist between the two bulbs.
I cut off one of the strands at the twist, then brought the other strand to the brass screw, wrapped it around the screw, and tightened the screw. I did this for both ends and used small washers under the screw heads for security.
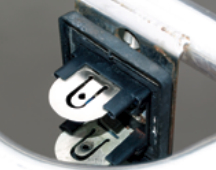
The height of the screw head is important to ensure good electrical contact. The screws, when tight, needed to be 44 mm from head to head, which I adjusted with washers. The screw head fits into a depression or hole in the spring-loaded fixture contact. Both of the bulb ends will probably make contact in the fixture but, if they don’t, the screw will complete the circuit and the wire ensures that the 12-volt supply runs from the screw to both bulbs when the switch is thrown.
If your bow navigation light uses a 15 mm or 9 mm bulb, you’ll have to rewire it to make two sockets and figure a way to anchor the new LED bulbs so they stay pointed in the right direction. The same places that sell LEDs also sell pre-wired sockets. The wiring is extremely simple and bayonet-based LED bulbs come in a greater variety than festoon bulbs.
Whether you use festoons or bayonets, make sure you have red LEDs behind the red lens and green LEDs behind the green lens. If you reverse them, very little light will be visible through the lenses.
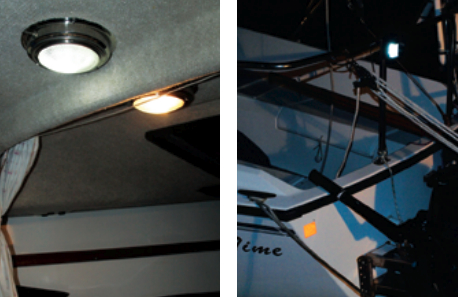
While I have no way to measure the difference, I’m sure my new LED navigation lights are brighter than the original incandescents. With the original bulbs, I had to lean over the stern or bow rail to make sure they were burning. The replacement LEDs are so bright they light the outboard at the stern and cast a red and green glow at the bow.
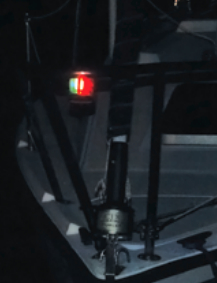
Understand that with LED bulbs, the number of LEDs in the bulb usually determines how bright the light appears. Some manufacturers’ LEDs are brighter than others, but the primary way to measure brightness is the number of LEDs per socket. Go as bright as you can. Cool white will appear brighter than warm white.
Be aware that your modification will not be U.S. Coast Guard-certified. The Navigation Rules require, for boats of less than 39.4 feet in length, visibility at a distance of 2 nautical miles for white stern and all-round lights and visibility at a distance of 1 nautical mile for red and green sidelights. For more details, drawings, and animated illustrations, check the BoatU.S. website www.boatus.org.
Test your lights after conversion to make sure they conform to Coast Guard regulations. Document the results with photographs and a witness. If another boat should hit yours, you don’t want the other captain to claim that he couldn’t see you because your lights didn’t meet specifications.
Anchor light
One of the major power drains when we spend a night on the boat has always been the anchor light at the top of the mast. The Navigation Rules require it to burn all night. So the next time I need to lower our mast, I’ll replace my masthead light bulb. Meanwhile, I’ve made a temporary anchor light with the LED bulb that will eventually go in the top of the mast. It’s an 1142 base and 15 LEDs that shine in all directions. Very bright.
For some reason, I couldn’t find this bulb as a unit. But all I had to do was stick the two wires coming out of the 360-degree, 15-LED panels into the base and it was complete. I had an old 1142 socket from a previous fixture I repaired (they’re also available at the websites that sell LEDs and from boating stores).
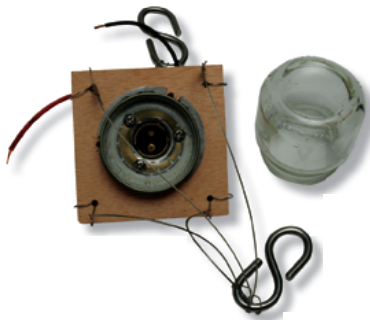
I mounted the socket on a 3-inch-square piece of plywood, drilling a 3⁄4 -inch hole in the center of the wood and a baby-food-jar lid. The lid is screwed to the wood. The jar protects the LEDs from weather. The plywood platform is suspended by fishing leader wire at each corner that connects to a stainless-steel S-hook above the jar. I closed the S by crimping it in a bench vise.
On the underside, I connected the socket’s wires to 10 feet of double-stranded 16-gauge electrical wire. This leads to the socket at the base of my mast where the original masthead light is plugged in. When I use the temporary anchor light, I unplug the fixed masthead light and plug in the temporary light.
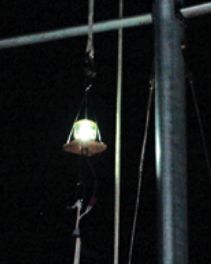
I also attached a 1⁄4 -inch Dacron line under the temporary light. I use this line to hold the light in position when it’s raised and to pull it back down. I don’t want to use the power wire for this.
The temporary anchor light can also serve as a deck light if I hang it upside down. It is bright. Also, I no longer worry about how much the anchor light is draining the battery over night.
The best selection of bulbs and prices I found was at . But this industry is changing so fast, an even better place may open tomorrow. Search “LED boat lights” online and you’ll find dozens of places to shop.
Clarence Jones is a writer, news media consultant, photographer, sailor, tinkerer, and inventor. He and his wife, Ellen, live on, work from, and sail their Precision 21 from Anna Maria Island in the mouth of Tampa Bay, Florida.
Thank you to Sailrite Enterprises, Inc., for providing free access to back issues of Good Old Boat through intellectual property rights. Sailrite.com