Practical ways to comply with the law
Issue 83: March/April 2012
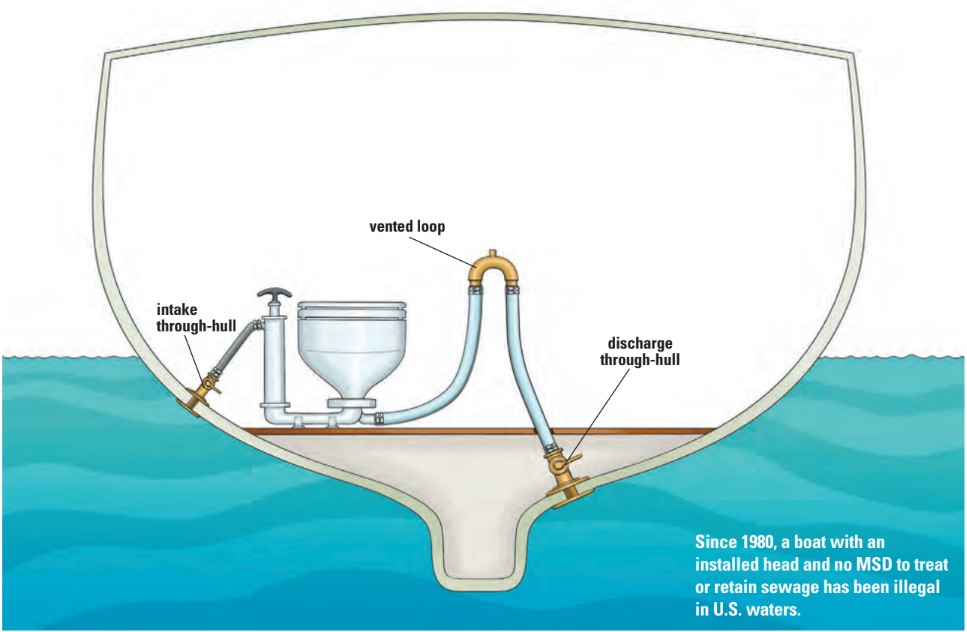
If you own a boat and your head discharge hose is connected directly and only to a through-hull fitting (as shown below), you’re in violation of the law and long overdue for corrective measures.
In response to the American public’s growing concern with air and water pollution, President Nixon issued an Executive Order in 1970 creating the Environmental Protection Agency (EPA). Two years later, Congress enacted the Clean Water Act of 1972 (CWA) and authorized the EPA to administer, police, and monitor compliance with the new law.
The CWA addresses a wide variety of water-pollution problems, including sewage discharged from boats on navigable U.S. waters. This includes coastal waters, which are defined as waters up to 3 miles offshore. The law also provides for “no discharge” by boats operating on enclosed lakes and reservoirs, on rivers not capable of interstate navigation, and on the Great Lakes. Additionally, states may petition the EPA to declare certain other waters “no discharge zones” (NDZ) if the discharge of treated sewage would be harmful. In short, any boat with an installed head must have an operable U.S. Coast Guard-approved marine sanitation device (MSD).
There are three types of Coast Guard-approved MSD. Type I and Type II MSDs are essentially miniature waste-treatment plants whose discharge effluent meets federal standards for bacteria content and contains no visible floating solids. An approved Type I or II MSD must have a label verifying that it meets Coast Guard and EPA regulations and standards as required by the CWA. A Type III MSD (holding tank) retains sewage for shore-based disposal or discharge beyond the 3-mile offshore limit. A Type III does not require a certification label.
Originally, the law required all boats with installed heads built from 1977 onward to have an operable approved MSD. In 1980, the law was amended to include all boats with installed heads, requiring even boats built before 1977 to have an operable MSD.
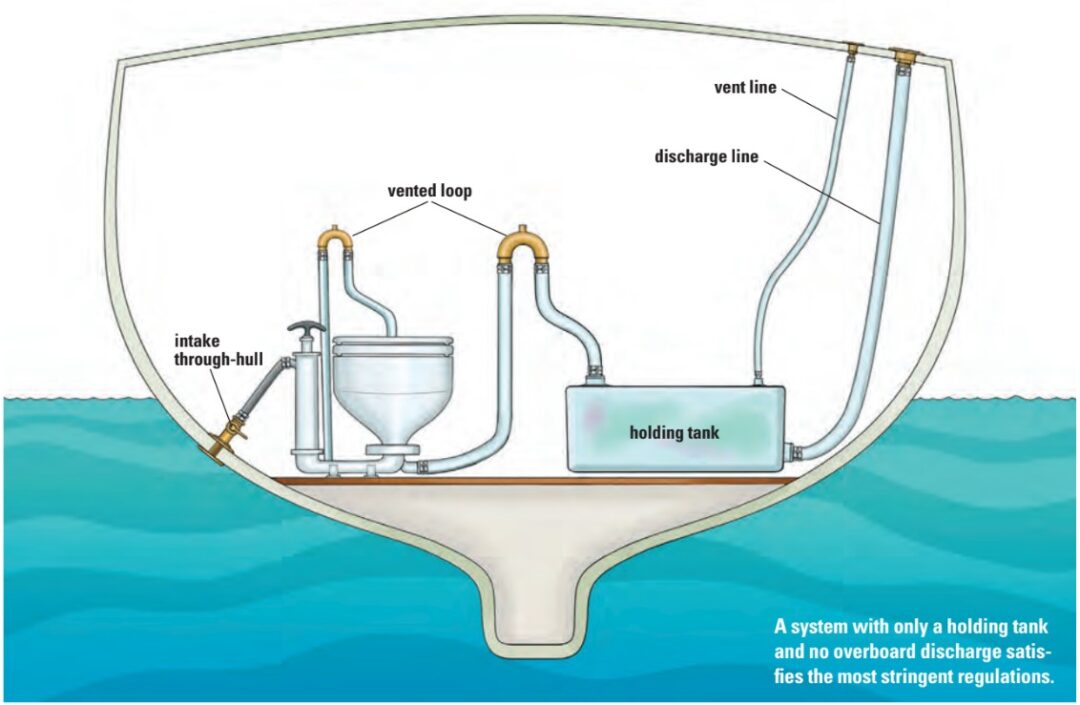
Even though it’s the law and noncompliance incurs severe penalties, good old boats still exist that were not built with an approved MSD and need to add one. In these instances, installing a holding tank (Type III MSD) is the most common means used to bring a boat into compliance with all sewage discharge laws. A holding tank has the advantage of being the only MSD universally acceptable to all governing authorities. It also removes the complication of treating sewage. A holding tank is the least expensive of the three MSDs and can be installed in a few hours by a do-it-yourselfer.
Location and tank size
The location of the boat’s existing head often dictates the placement options for the holding tank. Potential holding tank locations for heads situated forward include beneath the V-berth, in the keel cavity, on the floor of a hanging locker, beneath a settee, or even in the head compartment itself. Heads installed aft can potentially use cockpit lockers and spaces beneath quarter berths.
Before settling on a location for your holding tank, consider the ease of installation, future access, and the stowage space that might be lost. Since sewage weighs more than 8 pounds per gallon, the contents of a small 10-gallon holding tank can weigh up to 90 pounds. This much weight can affect boat trim, and it should also dictate the strength of supports and restraints required to hold the tank in place under extreme conditions. Visualize the tank’s restraint system. Will it be sufficient when pounding into waves or in an abrupt grounding? Multiply the weight of the tank and its contents when full by a safety factor of two to estimate the total weight to be restrained.
The size of the holding tank is dictated by the boat’s intended use — as a daysailer, weekender, or extended-range cruiser — and the number of crew. Sewage and flushing water per person per day can range from 3 to 5 gallons, so take into account the distance between pumpout stations or, if applicable, distance to areas (outside the 3-mile limit) where overboard discharge is legal.
After determining the tank’s location and size, select a suitable construction material.
Plastic (linear polyethylene) tanks
The most common material used for making holding tanks is linear polyethylene. This plastic is strong, lightweight, and inexpensive. Poly tanks are rotationally molded and, therefore, have no seams. They typically have a wall thickness of 1/8, 1/4, or 3/8 inch. Thicker walled tanks offer greater rigidity and higher resistance to odor permeation. For a tank up to 35 gallons, choose a minimum wall thickness of 1/4 inch.
One advantage of choosing a poly tank is that they are available in a wide range of sizes (volume) and shapes. Another is that they are translucent, so you can see the level of the contents. Many manufacturers of poly holding tanks now include molded-in feet, which make mounting them easier and more secure. Disadvantages include susceptibility to freeze damage, if left full during winter months, and the potential for puncture by sharp objects.
Flexible tanks
Flexible tanks can often be used when other rigid tanks, regardless of the material of construction, will not fit in the space available. Several configurations and sizes are available although the range is not as extensive as with poly tanks. Most come with predetermined openings. However, many manufacturers will entertain customization. The cost of these tanks is about the same as for poly tanks. Their one big advantage is their flexibility. On the downside, however, flexible tanks are susceptible to odor permeation and they are prone to leakage due to chafe and to flexing at the plumbing connections.
Fiberglass tanks
Fiberglass-reinforced plastic (FRP) tanks, while not common, are among the most reliable. Much like the hulls in which they often serve, they are durable and impervious to liquid and odor penetration. Fiberglass holding tanks should be fabricated with vinylester or epoxy resin because they resist osmotic attack, a problem that is a real possibility in holding tank interiors. These resins also produce a stronger laminate than polyester resin. While the finished cost may be more than for a plastic or flexible tank, an FRP tank is relatively inexpensive as a “do-it-yourself” project and can be custom-fit to the space available.
Metal tanks (aluminum)
Aluminum tanks are resistant to odor permeation, easy to fabricate, and can be built to fit any space. Aluminum exhibits greater resistance to corrosion than many theoretically noble metals. It has more chloride-ion resistance than most steels and, therefore, is often used in seawater applications. However, aluminum is best suited for neutral pH applications and corrosion is accelerated under both alkaline (high pH) and acidic (low pH) conditions. The use of aluminum should be avoided in highly alkaline or acidic media. Waste (caustic effluent) and additives and cleaning agents (often acids) greatly aggravate the corrosion of aluminum, so it’s not a good choice for a holding tank. In addition, aluminum tanks are the most expensive.
Hoses and piping
Hose types and their materials of construction vary widely. However, selecting the proper hose is quite easy. According to the U.S. Coast Guard, the only legal requirement is that “the correct hose for the intended purpose must be used and installed in accordance with the hose manufacturer’s recommendations.” (See “Hoses 101,” Issue 83.)
Sewage hoses are constructed from materials that reduce the chance of odor permeation. Their interiors are smooth, thus reducing the chance of blockage. They are usually wire- or fabric-reinforced to withstand the pressure and/or vacuum developed by the head pump, macerator, or vacuum pump at the pump-out station. Prices can range from a low of $5 per foot to close to $20 per foot. When it comes to sanitation, it definitely pays to install the best hose.
Rigid PVC pipe is inexpensive, strong, and impervious to odors. It’s widely used in sewage applications on shore, so it’s only natural that it be considered for use in this instance. Unless the sewage runs are straight and extremely long, however, don’t consider PVC. Short runs with any bends require the use of many inline radius fittings. These must be cemented and can create the potential for leaks, not to mention a lot of “bumps” in the line where sewage can lodge and create a blockage. It’s also necessary to soft-couple the PVC pipe to anything rigid (tank, through-hull, or head) with enough hose to absorb shock and allow flexing.
Fittings
Make all sewage piping runs as straight as possible. Avoid the use of elbows, couplers, increasers/reducers, and adapters. Use curved hose, rather than fittings, where possible. If a fitting must be used, “sweep” fittings are preferable to elbows. Reducing the number of fittings reduces the potential for blockage.
Use in-tank fittings made of the same material as the tank. For example, plastic fittings are recommended for installation in plastic holding tanks because the materials have similar coefficients of expansion.
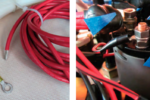
Use two stainless-steel hose clamps at each connection. Avoid clamps that are either nickel-plated or slightly magnetic, as these are susceptible to corrosion.
Vent fittings are available in a variety of materials. Since they are isolated from the tank by means of a plastic vent line, their selection is based on personal preference.
Heads on most boats are installed below the waterline. This creates the potential for leakage past the head’s suction or discharge valves. Once this siphoning begins, it can sink the boat if not discovered in time. To avoid this, install a siphon break (vented loop) above the heeled waterline on both the intake (between the pump and the bowl) and discharge hoses.
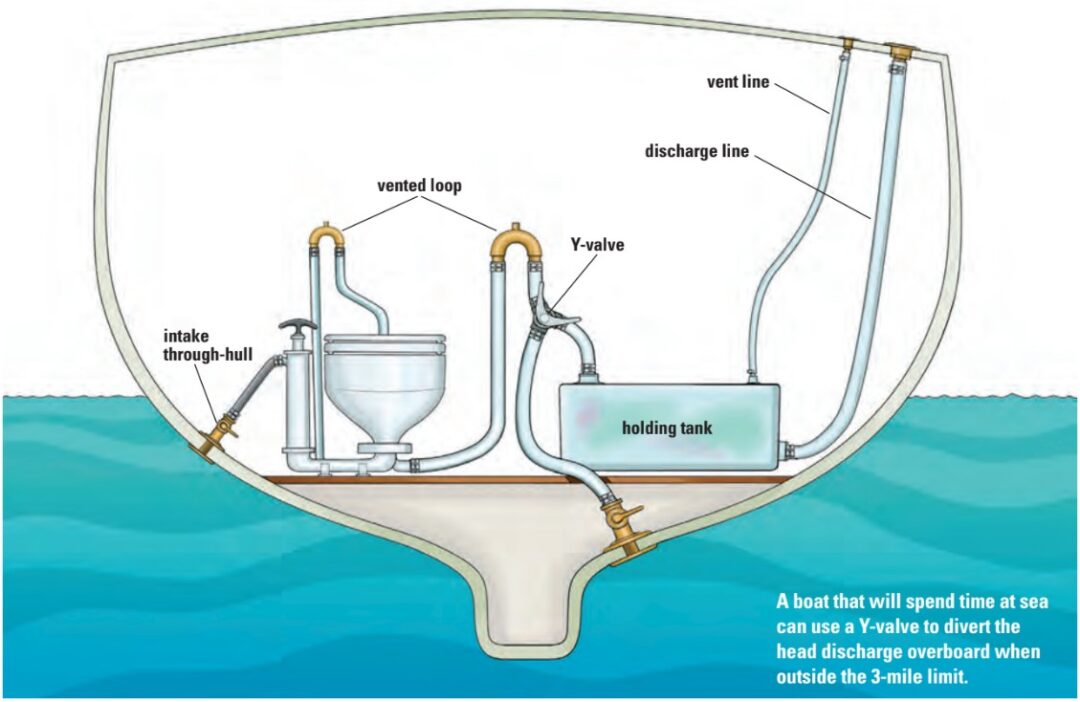
Some systems incorporate a Y-valve that can be set to direct sewage either into the holding tank or directly overboard (see below). If this is the case on your boat, when sailing in no-discharge zones or within the 3-mile offshore limit, Y-valves must be secured to prevent overboard discharge. Methods currently acceptable for securing a valve include a padlock, a non-reusable wire/lead seal, or removal of the valve’s handle.
Installation
Before cutting anything, lay out the proposed system’s piping and other components. Check on both sides of partitions and bulkheads to be sure the installation will not cut into fuel or water tanks, wiring, piping, or hull stringers. If tabbing must be cut, provide additional reinforcement so the boat’s structural integrity won’t be compromised.
Carefully think through your system design. Examine the area where the tank is to be located. Ensure that the tank will not be punctured by sharp objects, such as protruding screws. To minimize the potential for chafe and corrosion, use a non-absorbent, non-abrasive material such as neoprene between all tank supports, bracing, strapping, and the tank itself. This is a must for metal tanks.
To reduce the likelihood of odor permeation, consider what piping will be filled with sewage between pumpouts. Work toward reducing the number of these “wet” sections of piping. Eliminate tight bends. Use gradual sweeps to minimize clogging. Keep the number of fittings and connections to a minimum. Lastly, provide for easy access to fittings, connections, and components for maintenance and periodic inspection.
Building a good waste-holding system and complying with the law is the right thing to do. It doesn’t have to be expensive and is well within the ability of the average do-it-yourselfer.
Installation tips
Following these simple tips will help ensure a trouble-free waste system.
- Once you have determined the location for the deck pumpout fitting, drill a pilot hole through the deck from inside the boat. This is the best way to avoid hitting wiring and other vital parts. Remove any core material from around the hole and fill the void with thickened epoxy. Bed the fitting to prevent water leakage.
- Rather than using screws, through-bolt the pumpout fitting. A screwed fitting can loosen from the repeated forces of connecting the deck fitting with the pumpout facility.
- Heat the ends of hoses with hot water, an electric hair dryer, or heat gun so they fit more easily over pipe nipples. Liquid soap can be used as a lubricant on rigid fittings.
- Use cable ties to support piping along its entire run to eliminate movement. This also reduces the possibility of connections becoming loose due to vibration and the boat’s motion.
- Provide chafe protection where hoses run through bulkheads.
- Don’t over-tighten clamps. They can cut into hoses and cause leaks. Make sure that the clamp mechanisms are offset from each other when tight.
- A vented loop in the discharge line can be a source of foul odors. Run a small hose from the siphon-break vent fitting to the holding-tank vent line or to a separate vent fitting located above the heeled waterline. If neither is possible, install a vent-line filter.
Gregg Nestor, a contributing editor with Good Old Boat, has had a lifelong interest in all things aquatic. He and his wife, Joyce, are currently refitting, upgrading, and sailing a 1994 Caliber 35.
Thank you to Sailrite Enterprises, Inc., for providing free access to back issues of Good Old Boat through intellectual property rights. Sailrite.com