When the going gets cold, the cold insulate
Issue 58 : Jan/Feb 2008
How quickly we forget. Winter is much like childbirth to me: you must forget just how bad it really is or you would never put yourself through it again. Having lived in North Dakota, Maine, and Maryland for almost 20 years, Dave and I swore we would never be cold again once we set off cruising with our three sons on our 34-foot sailboat six years ago. This spring, while in the Virgin Islands, shortly after our oldest son graduated from “boat school,” he received notification that he had been accepted to the University of North Carolina in Wilmington. Even though we had spent two gloriously warm years in the Caribbean, we felt it was our parental obligation to at least return him to the correct continent, rather than simply putting him and his belongings on an airplane. We told ourselves that maybe it was time to go back to the States, spend some time with family, and work a season back in the real world. After all, winter could not possibly be as bad as we remembered.
It was worse. By October, Nick was safely tucked away in a warm college dorm and we had decided to go to Hilton Head, South Carolina, for a winter work stop. We were also waking up once a week to condensation on the inside of the hull, in our lockers, and dripping on our heads from the hatch over our V-berth. If we were going to survive a stateside winter, something had to change.
Like all of his good ideas, this one did not strike Dave like a thunderbolt. Rather, it revealed itself only as needed at each stage. The problem was simple enough: a solid, handlaid fiberglass boat will sweat. The solution, therefore, should be equally simple: insulate it.
House insulation
Wooden boats generally do not have the problem of condensation like fiberglass boats. The wood in these boats acts as insulation. Our fiberglass 1978 Creekmore, however, needed all the help she could get to combat the effects of the cold. Dave had been a carpenter for years so he was familiar with Celotex insulation. Having installed it on the outside of many houses, he decided to try it on the inside of Eurisko. For this purpose, he chose 1⁄2-inch Celotex insulation, which comes in 4- x 8-foot sheets.
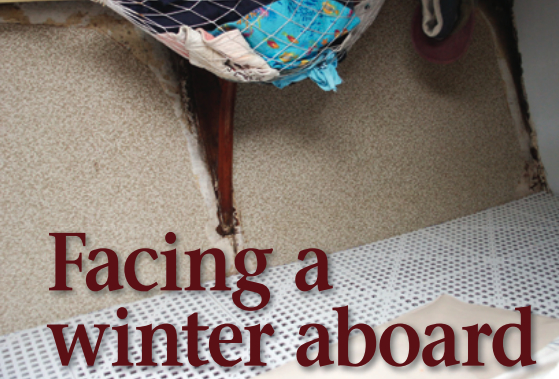
Since the sides of the V-berth along the hull are relatively flat, we decided to start there to see how well the insulation could be cut to fi t and whether we could find some attractive way to hide it. (What we already had on the inside of the hull was far from attractive, but once he installed the Celotex with the reflective side showing, I realized I would not like living in what resembled the inside of a tin can for the next six months. He assured me that we would worry about aesthetics later.)
We removed the cushions from the area and he measured the four sides of the first wall. Of course, the sections of the hull to be covered, though relatively flat, were not square. By using a bevel gauge, he determined the angle of one corner and transferred it to the Celotex along with the lengths of each side (see sidebar). After he marked the dimensions he used a straightedge and a utility knife to score one side of the board. Once one side of the Celotex is cut, it snaps easily along that line. Keeping the insulation folded at a 90-degree angle, you can cut along the foil hinge. This prevents you from having to cut the entire 1⁄2 inch of insulation and possibly through to whatever it is resting on. All of the work was done on board, since we were at anchor, so we had to use methods that protected the workspace as much as possible.
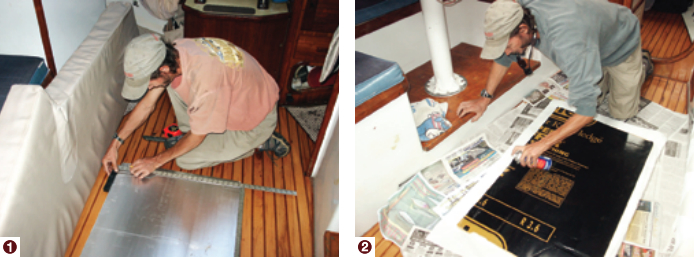
Decreased space
We measured the Celotex to cover all the way to the bottom of the V-berth cushions, which decreased the space available for the cushions by 1 inch, but this had no noticeable effect, other than increasing the difficulty of making the bed. Putting sheets on a V-berth is never easy anyway, so we considered it a minimal sacrifice.
To our surprise, when carefully cut and measured, the Celotex fit so well against the hull that each piece was able to remain in place with just the help of the cushions. We did not have to attach the insulation to the hull at all, though we were prepared to try contact cement if necessary. Now that we were sure the panels could be cut to fit and would stay in place, it was time to consider a covering for them.
While wandering through the fabric store, we used process of elimination. Nothing with any cotton in it was considered, since cotton mildews easily. Though we were not sure how long we would use these boards, they had to last at least through the winter. Sunbrella was expensive and anything vinyl would be cold to the touch. Our choices were narrowed to an outdoor furniture fabric, which has the benefit of being mildew-resistant, is thick enough to hold a glue, and is easy to work with. To my great pleasure, it came in a neutral color with an interesting design. I was thrilled with the choice, but still worried that the end product would look exactly like what it was: a cloth-wrapped piece of insulation. Dave repeated the mantra he reserves for when I have doubts about projects, and cannot yet visualize the end result: “Patience.”
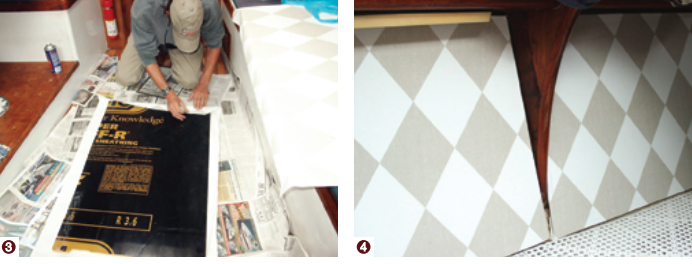
Cheapest glue
Since we were not willing to invest much money into a project that we were making up as we went along, we bought the cheapest spray glue we could find. We covered the deck with a blue tarp to protect it from overspray. After placing the cloth on top of the first panel we cut it to size, leaving an extra 3 inches on each side as a hem to be folded over. We then flipped the fabric over so the side to be glued was up and sprayed the fabric and Celotex with the glue. We waited for the glue to get tacky, per the instructions on the
can, then flipped the fabric back over the panel. I held one end off the insulation while Dave pressed down on the other end, smoothing out the creases as he went. After the first section was completed, we realized how important it is to remove any piece of dirt from the insulation before spraying the glue. The tiniest bump was visible once we put the fabric over it.
Once the cloth covering the visible side was attached, we flipped the piece over, sprayed the edges of the Celotex and the overhangs of the fabric and glued them to the back. Only after all of the panels were installed in the V-berth did I break into a smile and say, “Wow, what a wonderful idea you had!”
After all these years spent witnessing the miracles Dave can perform on a boat, I wonder why I am ever surprised. Total cost for insulating the V-berth was one sheet of Celotex, two cans of spray glue, and three yards of fabric: $30. Time invested: two hours.
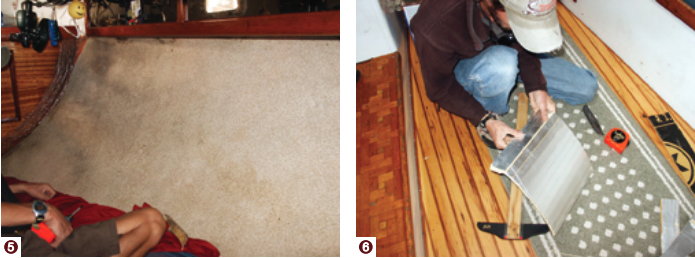
The aft cabin
Our aft cabin contains the boys’ bunks. The biggest difference in using this process in their spaces was the curve of the hull. Since even the slight curve in the sides of the V-berth was too much for the Celotex to conform to; we needed a different approach for the aft cabin. Dave decided to kerf cut the back of the Celotex to help it conform to the curved cabin side. Once he transferred the lengths and angles for each panel in the aft cabin, he cut out the insulation. On the back side he made horizontal cuts every 6 inches and snapped the Celotex along those lines leaving the foil hinge. Once he had kerf cut the back, the insulation conformed to the shape of the hull yet was still one piece. Yet because these pieces were held together by the foil on the front side the sections were easy to handle. If there had been more of a curve he would have made the cuts closer than 6 inches apart, but eventually the board becomes less manageable and will not hold its shape well enough to stand against the hull without glue or fasteners. If the hull has a compound curve you can kerf cut in both directions, making small squares on the back.
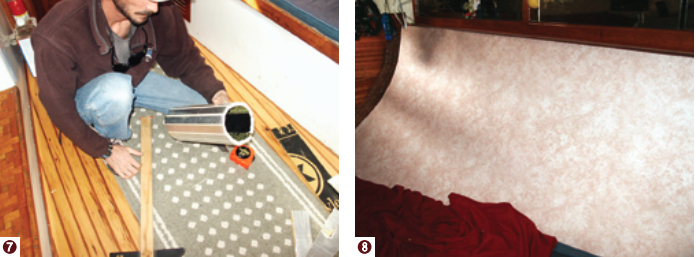
Again, the closer together they are, the more closely the insulation will follow the curve of the hull, but the harder it will be to work with and to cover each section. The project worked just as well in the aft cabin, though it was slightly more expensive since this space is bigger than the V-berth.
When we finished insulating these areas we had a lot of scraps of Celotex left over so we started putting insulation in every space where it would fit. We put the bigger pieces behind the ceilings on the hull in the saloon. After measuring the distance top to bottom and between the frames, Dave cut out each piece, then cut a horizontal kerf every 6 inches. We removed the top two boards and slid the Celotex down the hull behind the rest of the boards through that opening.
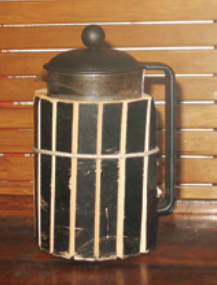
Nothing wasted
Every remaining scrap of Celotex has been put to good use in lockers and on the back of hanging locker doors and hatch covers for use at night. Dave even cut a piece of insulation with vertical kerfs and wrapped it around our French press to keep the coffee warm while it brews.
There are many types of board insulation available, but Celotex has several advantages. It has a foil covering on both sides, which makes it easier to cut to fit since you can kerf cut it. The foil acts as a reflective heat barrier, increasing its R value to 3.6 (as a reference, the R value of plywood is 0.62). Spray glue sticks well to the smooth foil surface. We started with the cheapest spray glue we could find (Elmer’s brand). We used two $5 cans for the V-berth, but when we returned to buy another for the aft cabin, the only available brand was a 3M product at $8 per can. We were amazed at the difference in glues. The 3M brand had a much nicer spray pattern, was easier to use to completely cover a large surface, and seemed to bond better.
Our choice of fabric to cover the Celotex was based on the pattern as well as on the material. Since we use pilot berths rather than the V-berth when we are offshore, the checkered pattern was acceptable for the V-berth. We chose a more subdued pattern for the boys’ berths to reduce its ability to make them seasick.
When choosing a pattern, imagine it bouncing around in front of you. If it is likely to confuse your eyes, then it could contribute to seasickness. Avoid small designs, narrow stripes, busy patterns, and bright colors. When determining how much fabric to buy, take into consideration how the patterns will meet on adjacent sections and opposite sides of the hull. Keep your pattern layout in mind when cutting the fabric for each panel. As an added touch, I made throw pillows with the extra material.
Not permanent
Though I am pleased with the visual results and I am sure this project will help with our heating costs this winter, this is not what I consider a permanent fix. What we have been dreaming of for years is wooden ceilings along the hull in the berths similar to what is in the saloon, but time constraints and our budget preclude that option for now.
The Celotex panels serve their purpose extremely well: they were cheap, quick, easy, attractive and can be easily changed. If we decide to remodel and change the color scheme of the V-berth, or if the fabric gets stained or ripped, it will take less than an hour to replace the fabric for each section. When the time comes to put wooden ceilings in the V-berth, we will leave the insulation there and simply cover it. Once we come to our senses and return to more tropical climes, the insulation will help keep the cabin cooler in the summer. For now, though, the Celotex panels are the perfect solution to a cold and wet problem.
Connie McBride , her husband Dave, and their three sons left Maryland in 2002. Aboard their 34 Creekmore, Eurisko, they have sailed the U.S. East Coast, Bermuda, the Bahamas, and the Caribbean islands.
Thank you to Sailrite Enterprises, Inc., for providing free access to back issues of Good Old Boat through intellectual property rights. Sailrite.com