Acrylic goes behind bars for its own protection
Issue 78 : May/Jun 2011
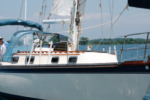
One interesting aspect of socializing with other cruising sailors is discovering how they go about fitting out, maintaining, and modifying their vessels. Almost invariably there’s something interesting to see and, every so often, you come across a really good idea that has resulted in a smart and effective solution to a problem. This was the case with our friends Nick and Hazel Teale and the way they improved and upgraded the hatches on their steel ketch, Golly.
To increase the light in the cabins, Golly has varnished iroko hatches with substantial acrylic panels in them. Nick and Hazel found this arrangement perfectly satisfactory when sailing by themselves because they knew not to step on the hatches. Guests, however, would often step on the hatches’ unsupported acrylic.
When the aging acrylic came due for replacement, they decided to modify the hatches at the same time.
Design
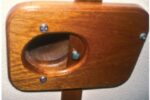
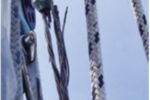
In their original form, each hatch’s acrylic panel had been flush fitted into a rabbet in the top of the hatch and held in place with wooden battens screwed down to the top of the hatch. The ends of the battens were miter cut but, instead of being joined, were left about 1⁄4 inch apart so water could drain out at the corners.
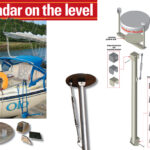
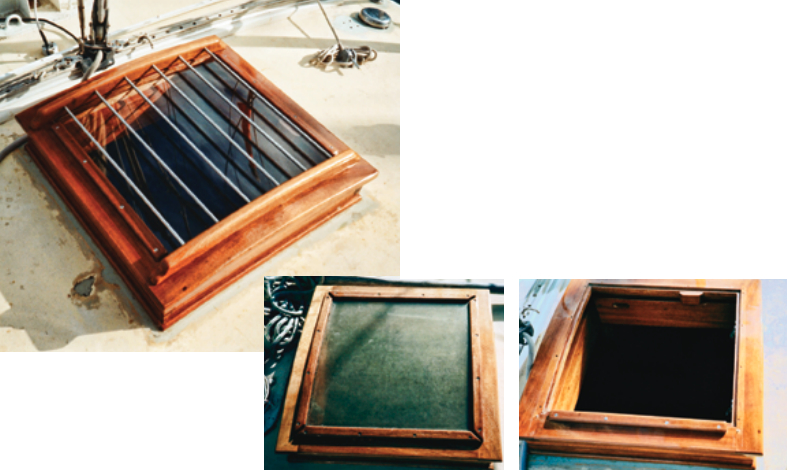
In the new design, the battens on either side of the hatch would be retained, but with their ends now cut square. The battens at the forward and aft ends would be replaced by wooden combs, which would have stainless-steel bars fitted between them to protect the acrylic and make it obvious that the hatches should not be walked on.
Preliminary work
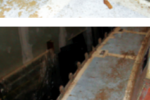
The first step was to remove the old acrylic and retaining battens. Nick and Hazel discarded the forward and aft battens and cut the ends of the lateral battens square, then rubbed down all the wood and revarnished it.
Once this was done, Nick made the combs. He cut them from strips of 7⁄8-inch-thick iroko and shaped them so they fit snugly to the curved top of the hatch.
To mark the curved shape of the hatch onto the combs, Nick carefully clamped the wood in place and transferred the shape with a pencil and a scribing block.
Scribing with a block is an easy technique that can be used to mark curves, such as deck camber. To do this, lay a pencil on top of a small block of wood. As you slide the block along the curved surface, hold the pencil on the block so its point marks the straight piece of wood. The pencil will follow the curve, transferring the shape to the piece of wood.
Although this method is acceptable for tracing slight curves, like that of the deck camber, it cannot be used for more complicated shapes because, even though the pencil mark is at precisely the same distance away from the surface, the angle of the block changes as it follows the curve. For marking out tight or complex curves, such as where a bulkhead joins the hull, the curve should be marked out using a pair of dividers or a pencil compass, as described by Paul Ring and Tony Allport in their articles in the January 2010 issue.
With the curve of the hatchtop marked on the new timber, Nick cut out the combs with a jigsaw and shaped
them with a spokeshave. He made them 1 1⁄4 inch deep, with a decorative duck-bill shape at the ends.
The final stage of the preliminary work was to drill the combs to accept the stainless-steel bars. These were 1⁄4 inch in diameter and purchased cut to length from a local supplier. Nick drilled the holes for the bars halfway between the top and bottom of the combs and to a depth half the thickness of the timber. He spaced them evenly, with half a space at each end. Initially, he had anticipated using five bars in each hatch, but they appeared a bit too far apart to his eye, so he added an extra one, making six.
Assembly
Nick first tested everything by dry-fitting the parts, then began the final assembly in which he bedded all the parts on silicone sealant.
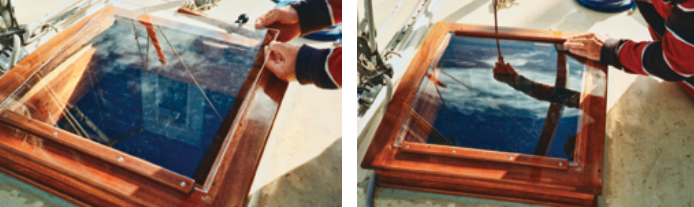
He started by screwing one of the wooden battens in place, on the starboard side of the hatch. He then slipped one side of the acrylic under it, carefully flexed the acrylic to shape, and screwed the other batten down to secure it on the port side.
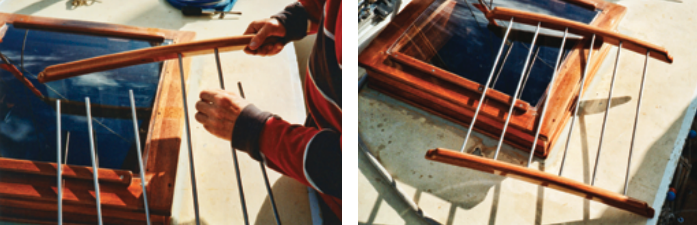
Next, he fitted the metal bars into the combs and secured the combs to the hatch top so they held down the fore and aft edges of the acrylic, fastening them with screws from the underside of the hatch top.
It would be extremely difficult to sand and re-varnish the combs while they’re in place. With this in mind, Nick chose a silicone sealant with low adhesive properties, so the bars and combs can be easily removed by undoing the screws from underneath and carefully prying them off.
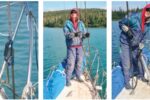
Richard Toyne and his partner, Magali Bellenger, have been living aboard Sigfrid, their 34-foot 6-inch steel ketch, for several years while exploring the Mediterranean Sea. To finance their voyages, they write for magazines, Richard does carpentry work ashore and on boats, and Magali sells jewelry she makes on board.
Thank you to Sailrite Enterprises, Inc., for providing free access to back issues of Good Old Boat through intellectual property rights. Sailrite.com