Damp skivvies provoke an impromtu pit stop
Issue 88 : Jan/Feb 2013
We put up with many inconveniences when sailing because we like to go where cell phones don’t ring. But wet underwear? That forced our hands.
We sail a 21-year-old Caliber and have never had structural issues. Sails got old, engines needed overhauling, things like that . . . but water getting into the boat? Oh sure, there had been clues: the rumpled book that lay against one of the chainplates over the winter (condensation, right?) and the time we found water on a shelf after a hard sail (maybe just a porthole not fully shut?).
Then a surveyor put his moisture meter on the deck while the boat was still in her cradle. The starboard deck between our upper and aft lower chainplates was damp (the underwear lives on a starboard shelf), but he said, “The deck is solid so just rebed ’em. Piece of cake.” He gave a final thump of his hammer and clambered down the ladder.
One thing we are good at is procrastinating so, assuring ourselves we would get the chainplates tended to soon, we set sail for the summer. Then the underwear got wet. We had stuck our heads in the sand long enough. It was time to go to work.
We needed just three things: supplies, a dock, and expertise. We had a tube of caulk on board. There were no docks to be found, but we cruise Lake Huron’s North Channel so there were plenty of protected anchorages. Expertise was the biggest problem. We had never tackled a job like this. Ever.
Extraction and inspection
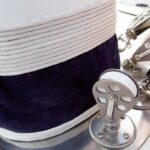
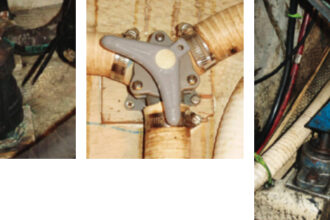
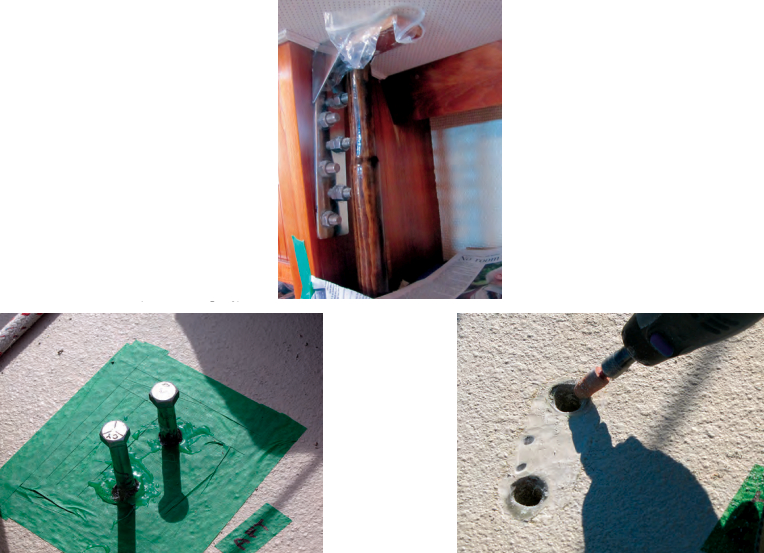
Our shrouds attach to 1⁄2-inch square U-bolts with shoulders that compress a plate to the deck. The U-bolts pass through the deck and then through heavy L-brackets that are bolted to bulkheads.
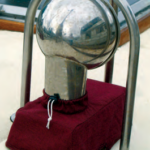
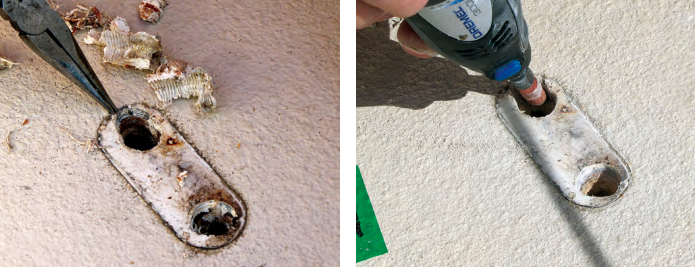
On a flat-calm day we tackled the starboard upper shroud first. After securing our main and spinnaker halyards to the starboard toerail to support the mast, we lined the toerail with cockpit cushions to keep all dropped items on the boat. We marked the number of turns on the turnbuckle and then loosened it. After removing the nuts under the deck, we levered out the U-bolt. It came out hard. We decided that was a good sign.
While there was residual caulk in the holes through the deck, there was none under the deck plate, which in fact had a smidge of dirt and rust under it. After digging and grinding out the old caulk (never set sail without a Dremel tool!), we discovered the wood of the deck core was rock solid. (Thank you, Mr. Surveyor.) We also discovered that the original deck holes had been over-drilled by 3⁄16 inch and the aft hole was significantly oval in shape. We were puzzled about what might have caused that. Sloppy workmanship by the builder? Crummy repair job by a previous owner? The U-bolt working itself back and forth within the over-drilled hole? We decided the oval-shaped hole was a bad sign.
So, we wondered, do we just put in some sealant and bolt her back together or go for it?
We went for it.
A proper repair
Fortunately, we had some hardware-store fast-set epoxy and plenty of painters tape. Our goal was to create an epoxy cylinder from the outer skin of the deck to the inner skin. We were hopeful this would prevent any future leaks from penetrating the deck core and at most only soak underwear inside the boat. In the process, we would convert the oval deck hole to circular. We assumed there were better ideas out there, but we were on our own.
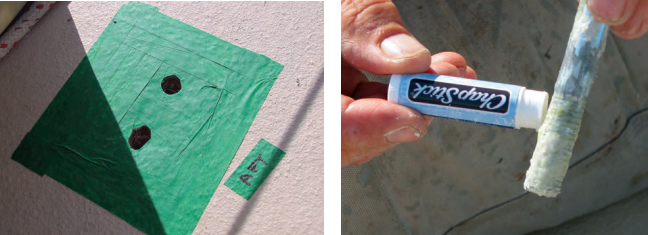
We blocked a piece of wood enclosed in a plastic bag under the L-bracket inside (epoxy won’t stick to plastic bags) and taped around the deck holes with the painters tape (another thing we are good at is spilling stuff). We prepped the holes with acetone, mixed the epoxy, and poured it into the holes, filling each hole about halfway.
To be sure our new holes would align with the L-bracket beneath, we inserted 1⁄2-inch-diameter bolts through the epoxy-filled holes, pushing each one into a hole in the L-bracket. (We first coated the bolts with lip balm to keep the epoxy from gluing them there forever.) The bolts also served as plungers, pushing the epoxy into all the recesses of the oval holes and the core. We topped up the holes with a tad more epoxy, waited several minutes until the epoxy was firm but not solid, then very slowly rotated the bolts counter-clockwise until they were out. Then we opened a bottle of chardonnay.
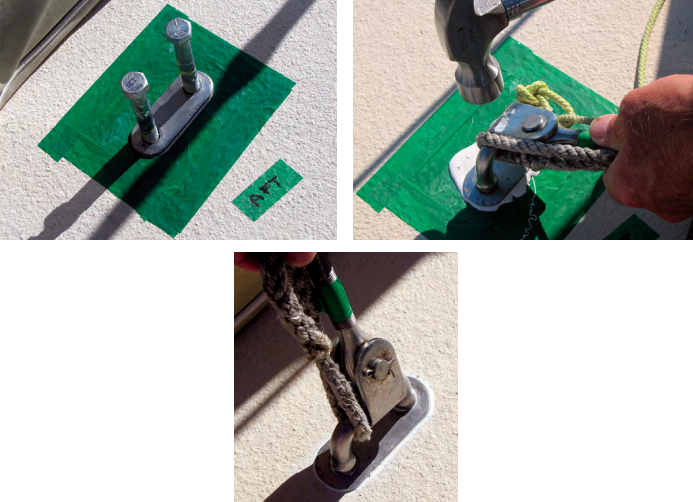
The next day, we ground off the excess epoxy, removed the painters tape, and touched up the holes with a drill. We decided to bevel the upper edges of the holes a tad to allow the sealant to form a good barrier around the U-bolts. Then we retaped the deck around the outline of the deck plate and applied the caulk. To our astonishment, the U-bolt went back into place perfectly. We gratefully put on the washers and nuts and tightened everything. Removing the tape removed most of the excess caulking and a little acetone cleaned up the rest. Then we finished the bottle of chardonnay.
Mission accomplished
In turn, we finished the other two starboard and all three port chainplates. Every chainplate had at least one deck hole that was significantly oval; one huge oval hole had been filled with an enormous amount of caulking. There was no evidence the oval holes themselves had been ever been addressed.
Around the starboard aft plate, the one over the underwear, we found some soft wood in the core. (What’s with that, Mr. Surveyor?) We cleaned out the soft wood with a variety of tools before letting that area dry overnight and doing the epoxy the next day. We planned to drill holes in the deck from underneath and let it dry completely over the winter. That plan collapsed when the job of repairing the headliner looked too formidable.
We invited the surveyor with the moisture meter to come back in the spring to see where we stood. The highest readings in the area around the chainplates were 18 to 19 percent and the surveyor said it sounded good when he tapped on it. We did find some slightly higher readings just aft of the chainlates where the pump-out and water fill penetrate the deck but, overall, we were pretty happy.
Our project was strung out over several days, all at anchor, and nary a single item was lost overboard. Taping the deck minimized any unsightly residue of either epoxy or sealant. The lip-balm-covered bolts inserted into the wet epoxy guaranteed accurate access for the U-bolts to the L-brackets inside. The total cost of the repair was $19 and a bottle of chardonnay.
And yes, the underwear stayed dry the rest of the summer.
Fred Bagley and his wife, Jennifer, live in Vermont but sail the upper Great Lakes out of Penetanguishene, Ontario, in southern Georgian Bay. They primarily cruise Georgian Bay, the North Channel, and Lake Superior on their Caliber 38, Catamount.
Thank you to Sailrite Enterprises, Inc., for providing free access to back issues of Good Old Boat through intellectual property rights. Sailrite.com