It’s easy to replace opening ports – but fixed ports are another matter
Issue 8 : Sept/Oct 1999
The Second Law of Thermodynamics states that when things are left alone, they go from the complex to the simple. In the case of a boat, it falls apart. Hence we must constantly maintain our boats or watch them deteriorate. One common project is replacing old, cracked, and leaking ports. Eventually, applying caulking around the outside of the ports no longer cures the problem, and the ports need to be removed and re-bedded. When you go to the trouble to remove an old port to re-bed and stop the leaks, it may be just as easy or easier to install a new one. Many older ports are weakened by exposure to the UV rays of the sun and become brittle and crack. By the time they have been removed, there may be no choice but to replace them.
First the good news: there are many choices on the market when it comes to the replacement of opening ports. They can be purchased in bronze, stainless steel, or a composite material. They come in most popular sizes and, when installed, they enhance the looks and the integrity of the boat.
The bad news is that when it comes to replacing the fixed ports in the cabinsides of your boat, your choices are more restricted. Many of these ports are in odd sizes. Trapezoidal is quite common. If your boat is still in production, it may be possible to order new ports from the factory. However, if your boat has been in production for a decade or more, port sizes may have changed since your boat was manufactured. Many sailboat owners have seen the manufacturer of their boat go out of business in the last 10 to 15 years. Unless you want to enlarge or change the shape of the opening in your cabinsides, a custom-made port may be your only option.
Some years ago I was faced with this problem. I had purchased a late ’70s Pacific Seacraft Flicka. It originally had been sold as a “sailaway kit,” a boat with rigging but with an unfinished interior. When I purchased the boat many years later, the four opening ports of an unknown white plastic/nylon composite were leaking. The two large fixed ports also leaked, the interior cabinsides were badly stained, and the wood had started to delaminate.
I removed all the ports and replaced the interior wood panels using the old pieces as a pattern. I purchased four new bronze opening ports, complete with screens, from a marine supply catalog. The new ports were the same size as the old ones, so installation was straight-forward.
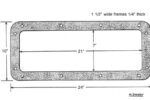
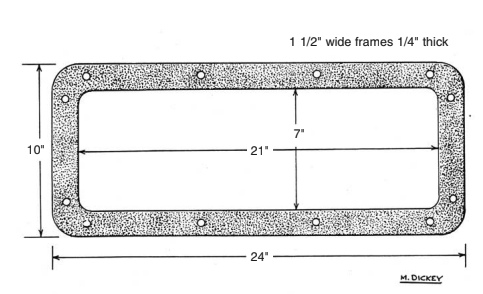
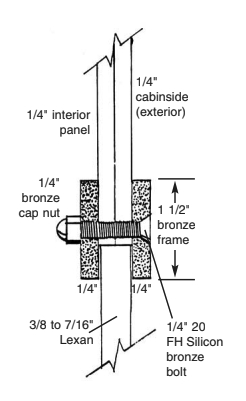
When it came to replacing the fixed ports, things were not so easy. The old ports were not set in a frame but attached directly to the outside of the cabinsides with their edges covered and trimmed in teak. Since the old installation had leaked, I wanted a different approach. The opening cutout in the cabinside was 8 x 22 inches. I cut a 10 x 24-inch pattern out of 1/4-inch plywood with a sabre saw. (See diagram.) This pattern had a hole 7 x 21 inches cut in it for the finished size inside of the fixed port frame. This resulted in a frame pattern 1 1/2 inches wide, which would result in a 1-inch overlap on all sides of the opening. I took this pattern and found a small foundry/blacksmith shop that would cast four bronze frames the size of the pattern. The price was very reasonable. In 1989 I was charged $35 apiece as they came out of the mold or $40 apiece if they were polished on one side with a buffing wheel. I paid the extra to have them polished.
A word of caution: be sure the foundry understands that you want bronze with as low a zinc content as possible and that you do not want brass. This is an important difference. Brass is an alloy of copper and zinc. In a marine environment, the zinc dissolves and leaves the copper soft and porous. Manganese bronze is also a brass with almost 40 percent zinc and should not be used. Bronze that is going to be immersed in water or in frequent contact with water should be an alloy of a high percentage (86-96 percent) of copper, with lesser amounts of tin, aluminum, silicon, or nickel such as silicon bronze. (See marine metals article in the June 1998 issue of Good Old Boat.)
I took two of the frames and clamped their rough sides together and drilled two holes on each of the short sides and four holes on the longer sides. The holes were drilled 3/4 inch from the outside edge of the frame. The frame that was going to be on the inside was drilled and tapped with 1/4 x 20 threads and the outside frame was drilled and countersunk for 1/4 x 20 flathead machine screws. I did this to the other two frames also. I cut two pieces of Lexan to fit the openings in the cabinsides. This Lexan was slightly thinner (3/8 to 7/16 inch) than the combined thickness (1/2 inch) of the cabinside and the interior wood. Plexiglas or tempered glass could have been used. It can be clear or tinted.
I centered the outside frame over the hole. This resulted in an overlap of 1/2 inch on all sides of the inside of the hole. When the frame was in place and clamped with several C-clamps, I marked the holes and drilled in the cabinsides. I assembled the frames and the Lexan and fastened them together with 1/4-20 flathead silicon bronze machine screws to assure that everything was going to fit.
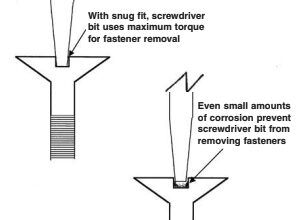
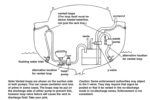
A word of caution: before disassembly, cover the exposed Lexan or Plexiglas with masking tape. I didn’t do this, and in removing the excess bedding compound later, I scratched the Lexan. I then disassembled everything, generously bedded them with a bedding compound, and reassembled them. I used a non-adhesive caulking for easier disassembling later, if needed. I covered the protruding ends of the machine screws inside with bronze cap nuts. An alternative would be to drill (rather than tap) holes in the inside frame and to use lock washers and nuts on the inside, perhaps covering the exposed threads with cap nuts. (See diagram.)
If you don’t want the frames to be bronze because your other ports are of some other material, an alternative could be aluminum. Aluminum 1/4-inch stock can be purchased in any width at stores that sell metal by the foot or in small lots. This will not be your local hardware store, but you can find a supplier in the Yellow Pages. One source is scrap metal dealers. If you have the necessary tools to cut aluminum to match the pattern, you can make the frames yourself. If not, a metal-working shop can cut it for you at a reasonable cost. The frames can be left their natural color or, with proper preparation, can be painted to match the other ports on your boat. When assembling the frames, be sure to use sealant on the stainless steel machine screws to prevent corrosion between the dissimilar metals.
Norman Ralph and his wife, Jeanette, were late bloomers when it came to sailing. After buying a Compac 16 in 1986, they sailed a series of Midwest lakes and reservoirs in a variety of boats. A 1988 trip to the Gulf Coast exposed them to the concept of year-round sailing and sowed seeds that initiated early retirement and a move to Lake Pontchartrain in Louisiana.
Thank you to Sailrite Enterprises, Inc., for providing free access to back issues of Good Old Boat through intellectual property rights. Sailrite.com