No more muddy souvenirs to foul the foredeck
Issue 74 : Sept/Oct 2010
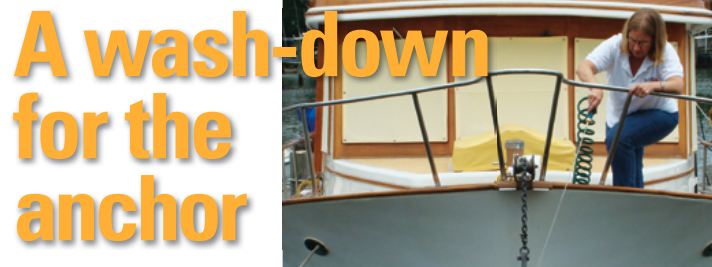
Nothing says you need a washdown system quite like hauling up an anchor and rode full of black goop that attaches itself to the anchor, rode, anchor platform, windlass, foredeck, anchor locker, and anything else within a couple of feet of it.
On our new boat, Beach House, we took a day trip with our visiting children and grandchildren. After a day of fishing and anchoring on the Beaufort River off Parris Island, and catching a few shark and redfish, this project came to the top of our to-do list.
We always try to plan our boat projects. We study each one carefully, determine what the main components will be, and buy them ahead of time. As the project progresses, we only have to purchase the small items that make up the details. Since the wash-down project had been on the list for some time, all of the parts were already sitting on a shelf in the boat, so starting it was easy.
A source of raw water
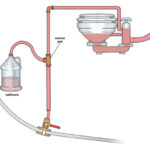
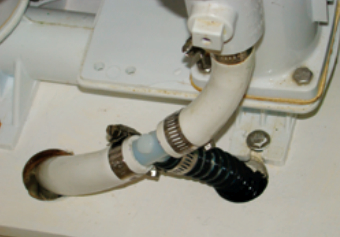
With a raw-water wash-down system, the first consideration is where the water will come from. Since we had converted our forward head to primary use as a shower, the head would seldom be used. That left the intake for the head as a good candidate to serve double duty as the wash-down intake. Teeing into the head intake would not adversely affect its use and would allow us to plumb the wash-down without installing another through-hull.
From the tee, the wash-down hose runs into a strainer to prevent debris from clogging the pump. The wash-down pump we purchased came with its own strainer, which we used, but there are also several small sea strainers available that could work quite well. The strainer should be sized to the pump you would use.
Where to put the pump?
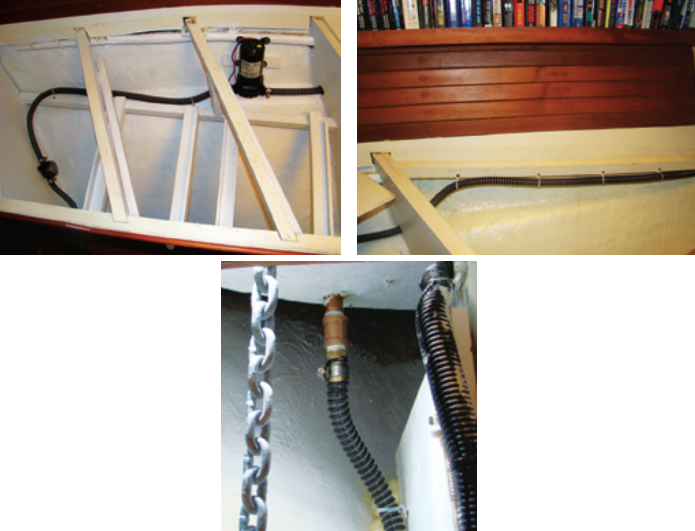
We next had to decide where to locate the pump. We prefer that a pump be in a place where it will stay dry and free of corrosion. We also prefer it to be easily accessible for service and in case of a leak. In the end, we chose to install it inside a locker in the forward cabin near the head, on the opposite side of the bulkhead. This allowed the straightest possible runs for the hoses.
We have found through experience that too many bends and elbows will considerably reduce the flow from the through-hull to the hose on the foredeck. The chosen location would also give the hose a good straight run into the anchor locker and to the deck fitting on the foredeck.
We chose the Shurflow wash-down pump since we have had good success with it in the past. Many pump options are available, from a simple 12-volt system, such as the one we chose, to dedicated 12-volt high-pressure wash-down systems from companies like Groco, and even to 120-volt high-pressure pumps for boats with the power capacity to handle them.
Cutting and fitting
With the head intake through-hull closed, we cut the head intake line at the appropriate spot, placed the tee in the line, and mounted the strainer and pump in place.
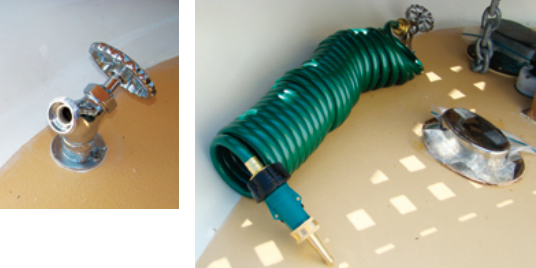
There are several options for deck fittings. We chose a stainless-steel standard hose bib with a flange so we could attach it directly to the deck.
Once again, we gave some thought to the location of the hose bib since we didn’t want the wash-down connection to become a toe-stubber, get entangled in the anchor rode, or snag any other foredeck lines. Our anchor platform has a teak grate, a good portion of which is over the foredeck, so a location under the grate as far forward as possible would get it out of the way and give us easy access. We had considered installing it in the bulwark, but doing so would require a 90-degree fitting on the inside attachment and we wanted to avoid that.
We drilled a hole in the deck just large enough to accept the pipe extension on the bib that would pass through the deck. This would extend into the anchor locker far enough that we could easily reach it to attach the hose.
Each time we cut a hole in the deck, we saturate the hole and the exposed deck-core material in epoxy. The goal is to seal the core and prevent moisture from entering the core material if a leak should develop. To do this, we seal off the bottom of the hole, fill it with epoxy, allow it to saturate the core material, then clean out the excess before the epoxy sets. We do this for any screw holes as well.
After the epoxy sealing the core material had cured, we installed the deck fitting with generous amounts of bedding compound.
Plumbing and wiring
Once all the main components were in place and we were satisfied with their locations, we could begin connecting the hose, starting at the intake tee and working our way to the deck fitting connection inside the anchor locker.
We chose a type of hose that would allow wide bends without kinking and would not collapse if some weight were applied to the hose itself. After we installed the hose, we secured and supported it with plastic straps about every 8 inches.
That left making the final connection: the electrical wiring. We wired the pump into a circuit breaker on our 12-volt panel so it could be easily turned on and off as needed. The wires run from the pump to the panel and back to the pump. This is quite a long distance and the wiring needed to be of the proper gauge to carry the maximum amperage the pump could draw at an acceptable voltage drop. It also had to be secured properly.
At the business end of the washdown system, we prefer the pre-coiled hose over garden-variety hose. You can find it in most hardware, marine, and RV supply stores. The pre-coiled hoses stow better. We keep ours in a canvas bag to prevent it from getting entangled in everything else on the foredeck. Our hose is long enough to cover most of the deck; we use it for general deck cleaning when we are not at a dock where fresh water is available.
One more job done
With the completion of our deck-wash system, we could check off one more pre-cruising project. We know we’ll feel less anxious the next time we have to anchor where the bottom comes up in large chunks with the anchor and rode. This system will also be wonderful the first time we catch and clean a fish under way.
Chuck Baier and his wife, Susan Landry, are working hard on their Marine Trader 34, Beach House, readying her for cruising. Chuck, a marine technician and licensed captain, is general manager for Waterway Guide and Susan is the editor.
Thank you to Sailrite Enterprises, Inc., for providing free access to back issues of Good Old Boat through intellectual property rights. Sailrite.com