Instant desk space: a liveaboard writer’s muse
Issue 110 : Sept/Oct 2016
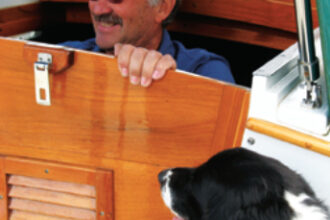
Living on a 34-foot cruising boat requires being flexible, comfortable with small spaces, and doing a lot with a little. Being a professional writer on a small boat adds to the pressure. Though all the tools of my trade fit in a briefcase, I tend to spread out when I work, as I haven’t yet mastered the “do a lot with a little” part. Papers, reference books, highlighters, and spreadsheets surround my laptop like battlements, covering every horizontal surface within arm’s reach: the dinette table, the cushion next to me, my lap, and sometimes spilling onto the cabin sole.
One day, watching me struggle to keep all my materials organized, my husband, Dave, said, “What if I made you a little extension for the dinette table, right next to your laptop? Would that help?” Neither of us had any idea how much I would appreciate and use the mini-table or how easy it would be to design and build.
Criteria
This mini-table, if it was to be worth the effort of making it, had to meet a few requirements. I wanted it to be easy to install and remove. If, every time I worked, I had to untangle and hook up lines or flip and spin supports while juggling the mini-table, I knew I’d never bother to set it up. Secondly, I had to be able to get in and out of my seat at the dinette table easily, to make another pot of coffee, go to the bathroom, or just take a stretch break. I didn’t want to feel penned in by the mini-table. Finally, it had to be sturdy enough to hold a heavy book or for me to rest my arm on it as I jotted down notes.
Design
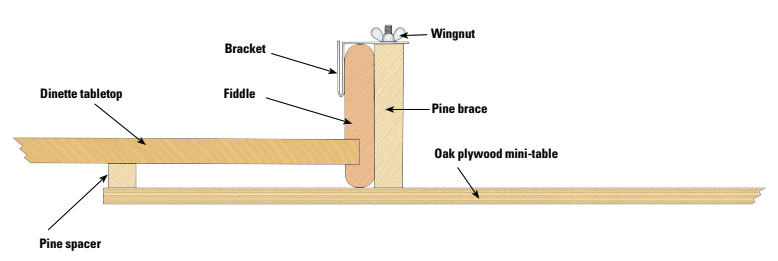
Easy to set up, not trapping me in my seat, and sturdy. Dave had his criteria. Now he had to figure out how to fulfill them. He decided that, without strings or other supports, the only way to make a small table that met my requirement for sturdiness was to cantilever an extension from under the tabletop. At first, the fiddles, which on our dinette table extend below the tabletop, presented a design challenge, but Dave found a way to use them to his advantage. His carpentry background comes in handy at times like this.
Dave’s design will work on any surface that has a sturdy fiddle around the edge and space beneath the table for the cantilever’s support. That the fiddles on Eurisko’s dinette table extend below the table added one step in making the mini-table.
Construction
For materials, we spent $11 at Home Depot on a 2- x 2-foot piece of 1⁄4-inch oak plywood and a length of 1- x 4-inch clear white pine lumber. We figured we could scrounge the hardware from what we had on board.
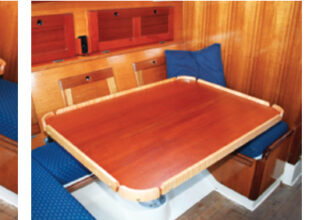
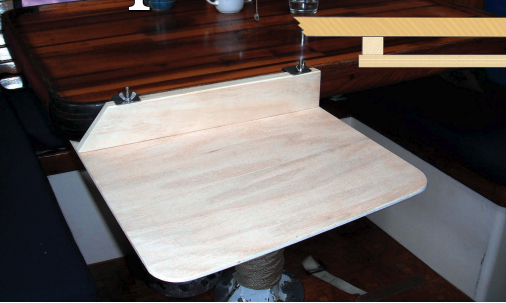
Our dinette table is a parallelogram in shape — the forward and aft ends are square to the boat’s centerline and the other two sides follow the hull. Dave designed the mini-table so the side that faces me extends in a straight line from the dinette table. The inboard side of the mini-table is parallel with the boat’s centerline and Dave made the inboard corners square. The result is a trapezoidal work surface 16 inches deep, 12 1⁄2 inches wide along the side that faces me, and 11 inches wide on the far side. To provide sufficient support for a cantilevered surface of that size, Dave extended the mini-table 6 inches under the dinette table.
Dave cut the trapezoid for the mini-table surface from the oak plywood and rounded the inboard corners. He then cut the pine 1 x 4 in two lengthwise, making the width of one piece equal to the full height of the fiddle. This piece would be fastened upright to the top of the mini-table’s surface and clamped to the fiddle. (In cases where a table’s fiddle does not extend below the bottom surface of the table, this width would be the height to the top of the fiddle from the underside of the table.)
To compensate for the extension of the fiddle below the table, Dave cut another piece from the 1 x 4 with its thickness equal to the depth the fiddle extends below the underside of the dinette table. He attached this strip to the top surface of the mini-table along the edge that would rest against the underside of the dinette table. Its function is to keep the top of the mini-table level and parallel to the surface of the dinette table. (This step is not necessary in cases where a table’s fiddle does not extend below the bottom surface of the table and the underside of the table is flat.)
Dave attached both pieces of pine with screws from underneath (through the bottom of the plywood). For the smaller piece he used flathead screws. He fastened the larger piece (the one that butts up against the fiddle on the dinette table) with panhead screws and large washers, as countersunk screws would have pulled through the 1⁄4-inch plywood once any weight was placed on the mini-table.
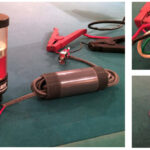
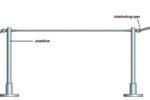
Dave designed the mini-table to hang from the fiddle. He accomplished this with a pair of right-angle brackets he made from stainless-steel stock he had left over from another project.
He screwed two hanger bolts into the top of the larger piece of pine. The bolts engage holes Dave drilled in the brackets, which sit flat across the top of the pine and extend over the top of the fiddle and down to the surface of the dinette table. Wingnuts on the bolts secure the brackets in place.
To protect the table from scratches, Dave rounded and smoothed the ends of the brackets, making an attractive curve that does not mar the table. When we realized the face of our fiddle is slightly rounded, we thought we would have a problem, but the straight pine sits firmly against it anyway.
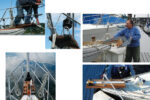
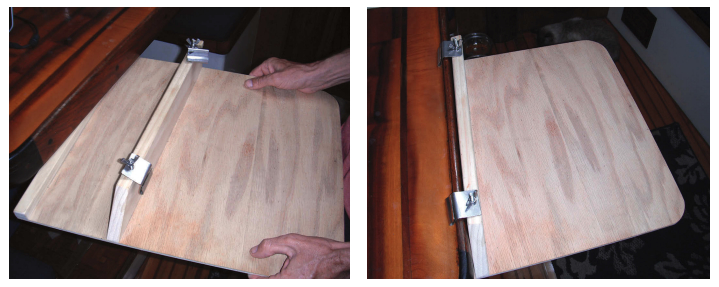
A cinch to install
The overall size of the mini-table, which must be stored somewhere aboard when I’m not using it, is about 16 x 20 inches. To use it, I hold it in place with one hand (with the vertical pine piece sitting flush against the
fiddle) while I rotate the brackets over the fiddle and spin the wingnuts tight. This 10-second procedure meets my easy-to-install requirement.
I find it no harder to slip around the mini-table than around the dinette table. Because I like to spread out, I asked Dave not to put fiddles on the mini-table, and there are times that this little added-on table is hard to identify under the layers of tools it accumulates. It is so strong that I sometimes I find I’m writing on papers stacked on top of books piled on it, usually next to a coffee cup that should not be knocked over in the process.
A piece of plywood, a short board, a couple of pieces of hardware, some stainless-steel stock, two wingnuts, a few hand tools . . . and in half a day, Dave built the perfect small addition to my “desk.” I suppose, at some point, my new work area should be graced with a few coats of varnish, except I’ve grown so accustomed to using it that I’m not willing to give it up for that long. I like not being buried in a sea of papers while I work more than I would like for this helpful new addition to be varnished. Life as a writer on our little boat is a little easier now, even if I do still have to find a way to meet deadlines between passages.
Thank you to Sailrite Enterprises, Inc., for providing free access to back issues of Good Old Boat through intellectual property rights. Sailrite.com