Hard labor and a little luck restore order
Issue 111: Nov/Dec 2016
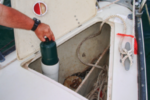
I was staring at the rivulet of diesel forming a pool near the fuel tank. “Well, we knew it was bound to happen sooner or later,” said my wife, Heidi, by way of consolation.
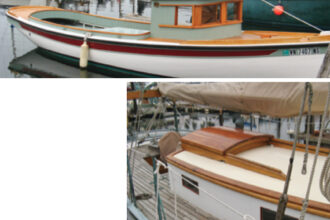
Cetus, our Fantasia 35, has been our cruising home for 21 years, and in the back of my mind I knew it was just a matter of time before the 120-gallon iron tank would need to be replaced. After all, Cetus was 31 years old and had four South Pacific crossings under her keel. I just wish it hadn’t happened right after we’d filled the tank.
We had left La Paz, in Mexico’s Sea of Cortez, the day before to begin our spring migration north in the Sea. Wanting to avoid a diesel calamity in the event the leak became uncontrollable, we headed back to our just-vacated slip at the marina, where we offloaded the diesel to fellow cruisers. When the tank was finally empty, we sat back to figure out our next move.
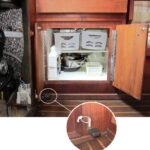
On Fantasias, and many other boats built in the 1970s and ’80s, the fuel tanks were installed with almost no thought given to how they were to be maintained or, eventually, replaced. The tanks were simply placed in position and the boats built around them. Cetus’ fuel tank was nearly as wide as the boat’s beam and about 4 feet long. The tank was fully baffled, but had only one inspection plate, which was in the center of the tank and accessible through a small hatch in the cabin sole. Settees, a chart table, and bulkheads were built above the rest of the tank, so no other access was possible.
We quickly realized that, because so much of the tank was inaccessible, patching the leak was not a consideration. The tank would have to come out. Because we planned to continue living aboard during this project, we wanted to remove the tank while doing the least amount of damage to our home. Accordingly, we decided to leave the furniture intact and cut a rectangular opening in the cabin sole above the 4-foot length of the tank. The width of the hole was determined by the width of the sole in that area. The narrowest spot was 18 inches.
A tidy incision
Using an oscillating multi-tool with the standard thin blade, I made a cut as neatly as I could in the middle of the sole, removing a 4-foot x 18-inch section. I used the thin holly strips of the teak-and-holly sole as a cutting guide, reasoning that the cut would be less noticeable and make it easier to put the sole back together when the time came. We hoped an opening this size would give us enough working space to cut the iron beast into manageable pieces.
After carefully removing the cabin sole, we cut through and removed the three 2 x 2-inch support beams that crossed over the tank, making sure to number the pieces. We also made a drawing so we would know how to put them back. I made three temporary braces out of 2 x 4s to replace the support lost when we removed the beams. We then covered all the adjacent teak surfaces with a collection of towels, T-shirts, and plastic bags to protect them from damage while we removed the dirty old tank.
Around the dock, the consensus was that I would need a robust reciprocating saw to remove the tank. At a local hardware store I purchased a Milwaukee Sawzall along with a dozen blades to start with (six short and six long). They were bi-metal blades with 14 teeth per inch (tpi). The tank was 14-gauge black iron; we knew there would be more blades in our future.
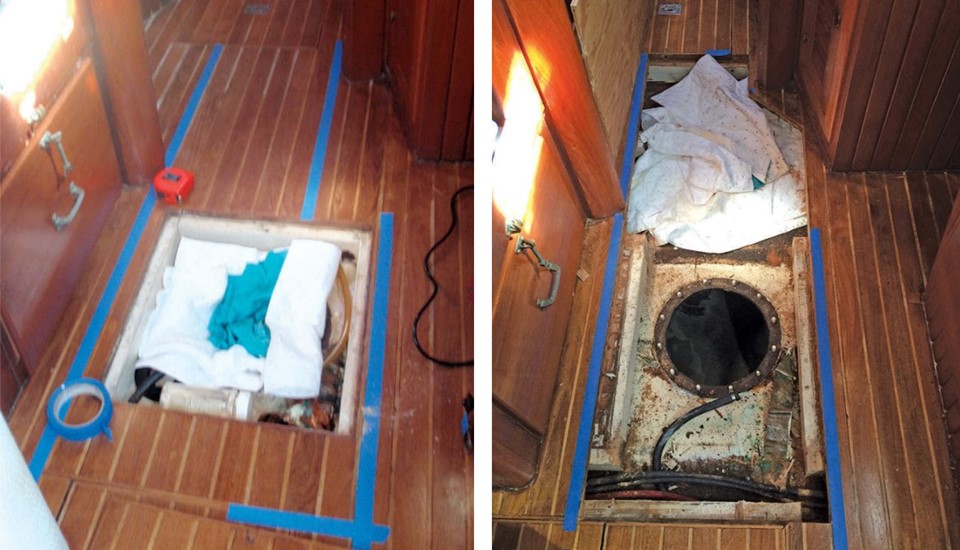
I started cutting at the inspection plate. A couple of hours and five blades later, we pried the first section off. It was only a 2-foot piece, but it gave us hope that we were on the right track — a good thing, as there was no going back. While the initial cut along the top and sides was encouraging, the bottom of the tank sat on the keel and allowed little room for the blade to cut. I needed the short blades here. Several times, I used my electric drill to make starter holes for the blade so I could begin a new cut.
The welded baffles proved to be blade-breakers, but luckily the town had a great supply of metal-cutting implements. The baffles also made it challenging to get a good cutting angle because the Sawzall was longer than most of the baffled compartments. We pressed on, cutting and removing strips, and then pulling the remaining tank toward the middle of our access hole. We continued this awkward process for seven days. When the last piece hit the dock, I am not sure who was the happiest: the Cetus crew or the neighbors who had to endure the dawn-to-dusk hammering, sawing, and longshoremen-type verbiage.
So what goes back in?
Naturally, we wanted the replacement tank to have as great a capacity as possible, but we knew we’d never be able to replace the 120-gallon capacity of the old tank — especially as the new tank had to fit through our 4-foot x 18-inch hole. We first explored using a bladder tank, which would fit through our limited access when empty and offer high-volume storage. While we found a bladder that had a volume close to that of the tank we had just removed, we identified two problems with off-the-shelf bladders. First, they are rectangular in shape. Only the middle portion would rest on a flat surface; the ends would follow the curvature of the hull, reducing the usable volume. Second, how could we securely anchor something that big?

Having ruled out off-the-shelf bladders, we got quotes for custom-made bladders (also called fuel cells) that could be designed to fit our space. We quickly abandoned this idea due to the high cost (around $2,000 to $5,000). When the manufacturer informed us that the useful life of its bladders was somewhere between 10 and 15 years, we said thanks, but no thanks.
We perused loads of premade plastic tanks on the internet. Many of them would fit through the opening in our cabin sole but, because they were rectangular and couldn’t make use of all the available space, their volumes were disappointing: ranging from 25 to 30 gallons. We were now coming to the conclusion that, to get decent capacity, we would need at least two tanks custom-built to conform to the shape of the hull.
Purgatory postponed
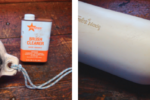
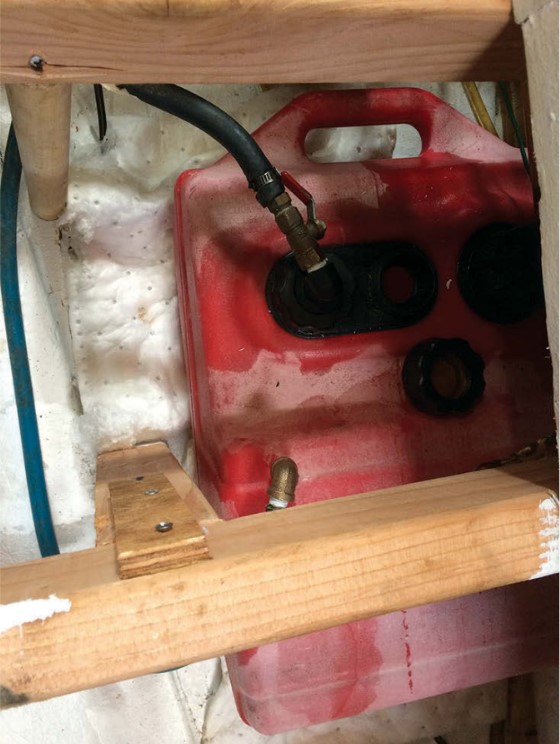
As we pondered this thought, Heidi came up with a truly brilliant idea. “Let’s hook up a small temporary tank and go out and enjoy the Sea,” she said. “We can use that time to evaluate our options.”
I procured a used 5-gallon outboard motor tank, did some creative plumbing, borrowed a couple of jerry cans for diesel, and off we went. With our fuel-stingy Yanmar (it only burns about a half-gallon of diesel per hour) and 10 extra gallons in jerry cans, we had enough fuel for cruising. The sun and the daily swims in the warm Mexican waters were great therapy after the hard work of removing the tank. Yet the tank replacement problem was never far from our minds.
Before leaving La Paz, I happened to run across a small advertisement posted in the cruisers’ lounge by an ex-pat, Albert Klettke of Scubahoy Enterprises, whose business was repairing plastic gas tanks, kayaks, and the like. One day, while thinking about our temporary plastic tank, it occurred to me that maybe Albert could modify a couple of tanks to fit our needs. We contacted him and learned he had the machinery and tooling to make plastic tanks from scratch. Now we were in business!
Albert described how he would make the tanks using HDPE — high density polyethylene — the material used to make gas tanks, kayaks, and water bottles. (For more on this subject see “Holding Tank Harmony,” September 2015.) He uses a Canadian-made injection welding system that works in a similar manner to wire-feed metal welding, but with plastic welding rod. His standard practice is to fully baffle the tanks, reinforce the area where the plumbing attaches, and provide extra material at points that might wear against the hull. He cautioned us that the biggest mistake made when building a tank out of any material is not measuring correctly. He suggested we construct plywood mock-ups to make sure the finished tanks would fit.
Plywood and planning
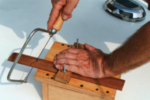
We decided that custom-built plastic tanks were our best option, so when we arrived at Puerto Escondido, 115 miles north of La Paz, we bought several sheets of 1⁄4-inch plywood (the same thickness as the HDPE Albert would use). We also purchased a variety of brackets and screws to aid in making the tank mock-ups. We first thought we could join the pieces with duct tape, but that didn’t prove rigid enough so we went with the brackets and screws.
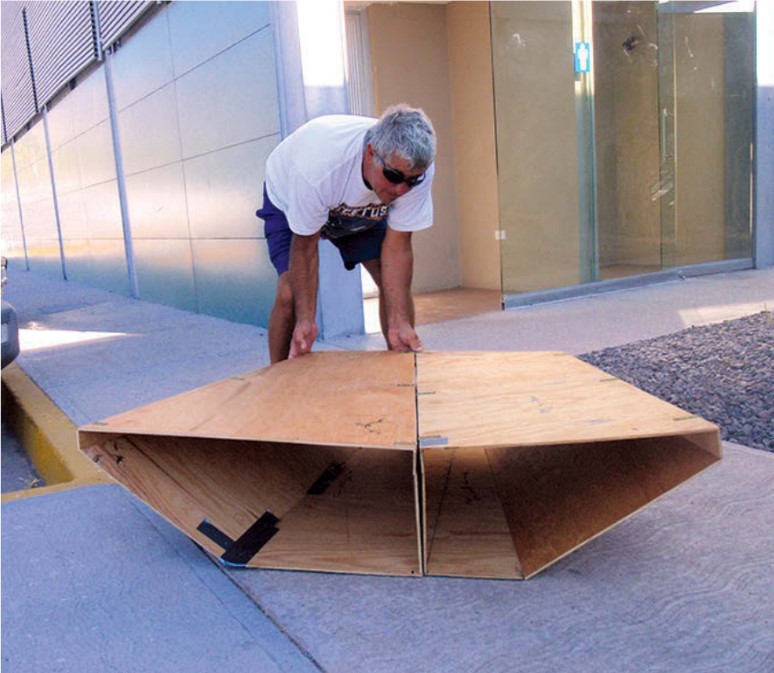
We thought the best way to go about it would be to design one large tank to fit the space and then divide it down the middle to create two tanks that could fit into and out of the hole in the sole. We cut the bottom of the tank first, using the flat area of the bilge as our guide to the shape. Next, we placed the sides, laying long pieces of plywood against the hull and butting them to the edges of the bottom piece. Then we measured and marked the plywood sides at the height we determined the tank could be: 3 inches below the sole beams.
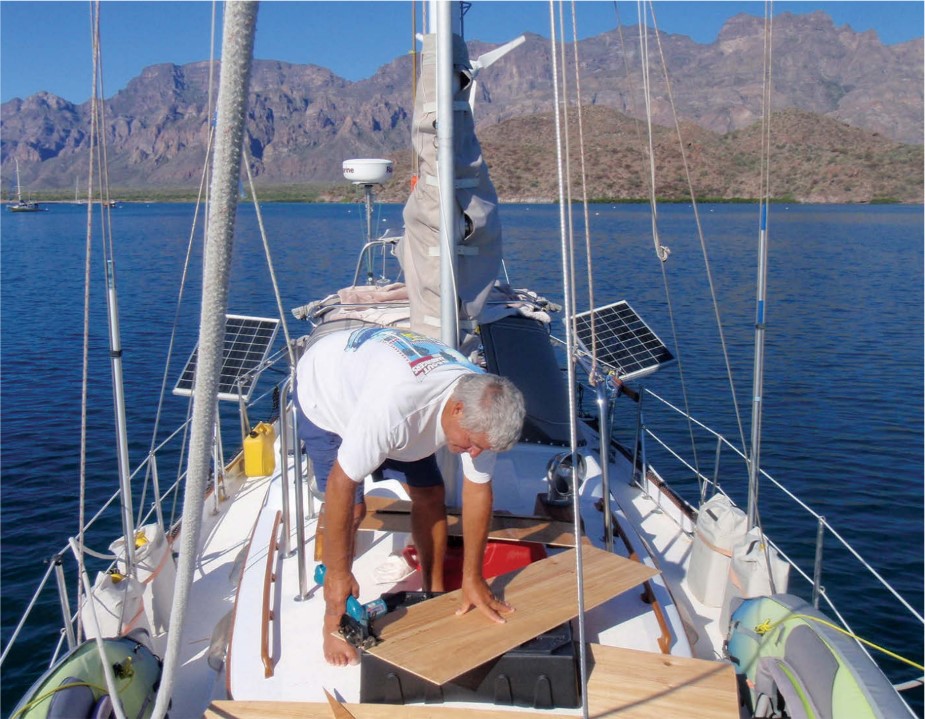
Using my battery-powered circular saw, we started small, initially making sure the tanks would fit through the opening. When we saw we could go a little larger, we added higher sides or a bit more length until we had two tanks that would just make it through the opening with almost no room to spare. Recording all the measurements and angles as we went along, we removed the plywood pieces and made new cuts or added pieces as needed, then reassembled them on deck.
Constructing the mock-ups informed us that the true limiting factor was not the opening in the sole but the width of the companionway hatch. If we could get a tank through the companionway, we could get it under the sole.
Satisfied that these tanks would fit and provide us with the maximum fuel capacity, we placed the order with Albert and sent the mock-ups to his shop in La Paz. We then sat back for a couple months of sun, swimming, and the occasional anxiety attack when we worried that we’d overlooked some detail. When we returned to La Paz, the tanks were done, and we were very impressed with how they looked.
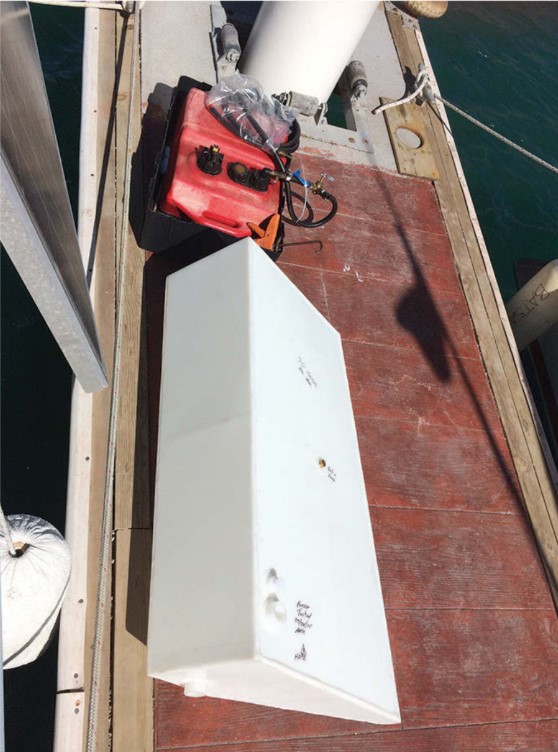
A fine fit
The tanks fit through the companionway more easily than the plywood models had, in part because we were not as concerned with the plastic scratching the teak around the hatch as we had been with the rough plywood and metal brackets of the mockups.
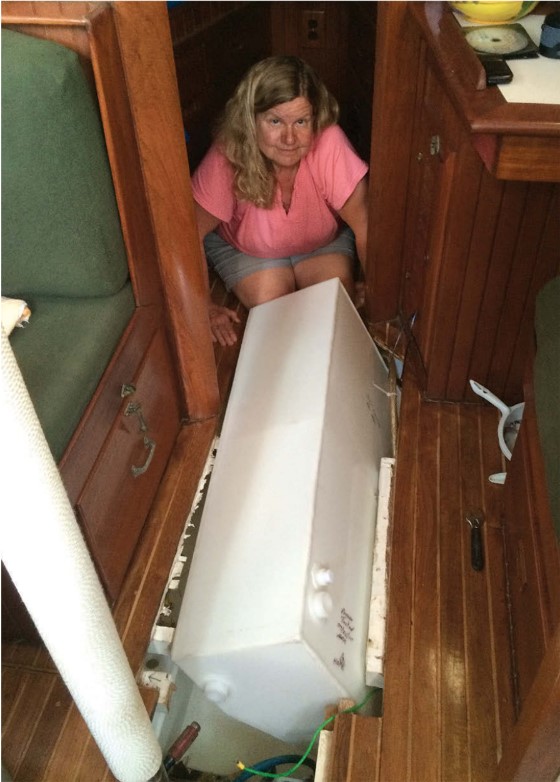
Once we had cleaned and painted the bilge where the old tank had been, we lined the entire area with closed-cell foam for additional abrasion protection. Then, with the slightest bit of nudging, the two tanks fell right into place.
I plumbed the various hoses using brass fittings: two fuel pickups, two vents, two fuel returns, and the long fill hoses. We have three two-position valves: one for fuel pickup between the two tanks, one for returning fuel, and the third for recirculation when we want to polish the fuel.
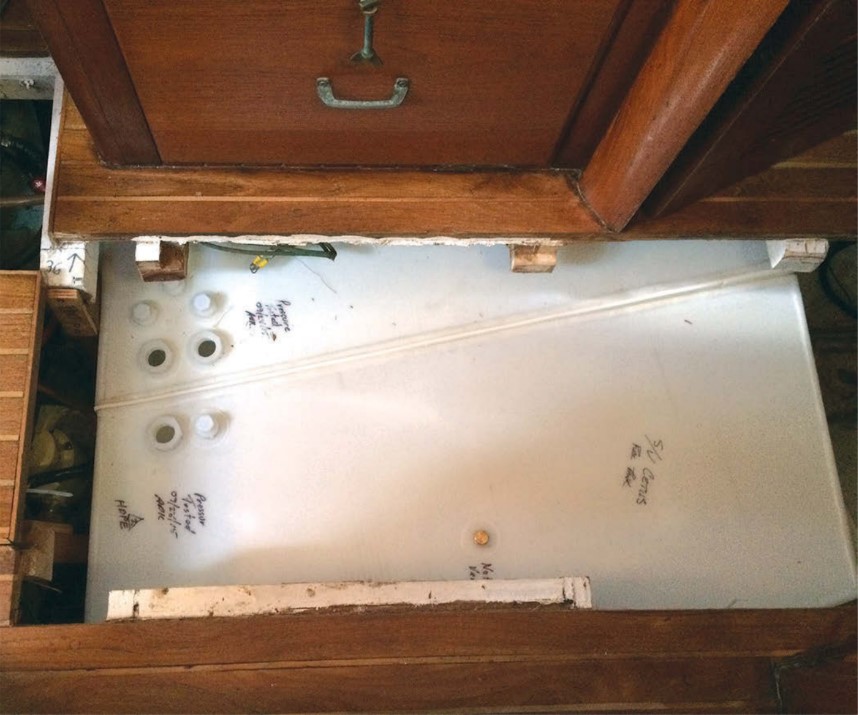
We thought it prudent to test the system before we replaced the supports for the cabin sole, in case of unforeseen problems or leaks we’d need to attend to. We filled the tanks with diesel 5 gallons at a time so we could mark a dipstick for future use. Here we discovered another benefit of the plastic tanks: by shining a flashlight on top of the tank, we could see the level of the fuel and were able to mark the 5-gallon increments right on the tanks’ sides.
After the full tanks sat overnight with no signs of leakage, and we had successfully fired up the engine and let it run, we were confident that we were ready to secure the tanks and restore the sole.
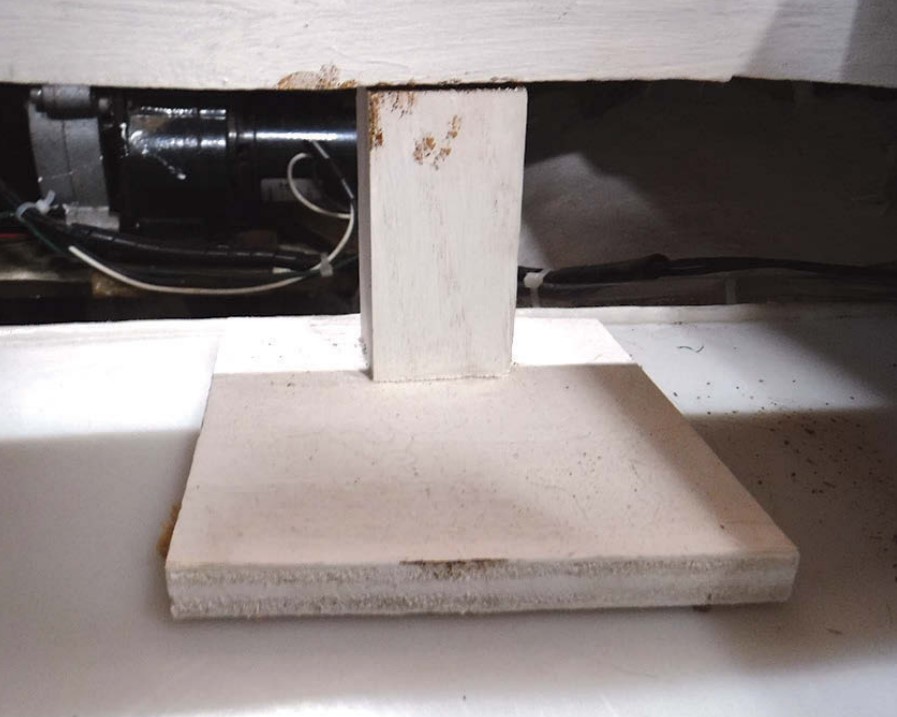
We used galvanized corner brackets to reattach the sole beams and thickened epoxy to fill the gaps created where we’d cut them. With the sole beams in place, we were able to begin securing the tanks.
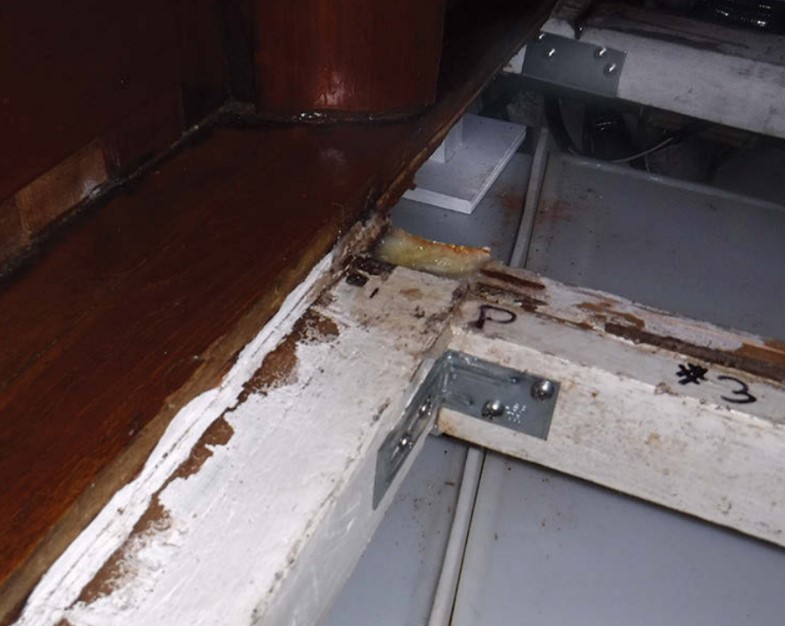
The original tank had been held down with wooden wedges under the sole beams. Our new tanks were several inches shorter in height, so we needed braces. We screwed and epoxied 3-inch-high 2 x 2 hardwood blocks to 6-inch-square pieces of 1⁄2-inch marine plywood and wedged these braces between the tank and sole beams every 6 inches, with the plywood sitting on the tank to spread the load. To secure the tanks against moving fore and aft, we again used 2 x 2 hardwood blocks, these being 6 inches long, two forward and two aft. For good adhesion, I ground the fiberglass on the hull next to the tank, then used thickened epoxy to hold the blocks in place.
The total capacity of the two new tanks is 60 gallons, about half that of the original tank. That’s the downside. On the upside, we no longer have tanks with 30 years of accumulated crud that was impossible to clean out (and only made its presence known when rough seas stirred it up and it clogged the filters). We also ended up with some new storage space forward of the new shorter tanks.
All in all, even with the reduced diesel capacity, we could not be happier with the new tanks. It’s a relief to have this project behind us and not have the constant worry about that old iron tank. Albert did an excellent job constructing the tanks and meeting our design parameters, as well as offering good advice along the way.
Terry Kotas and his wife, Heidi, have lived and traveled aboard sailboats for most of the past 30 years. They are currently enjoying Mexico’s Sea of Cortez while planning and readying their Fantasia 35, Cetus, for their next South Pacific adventure.
Thank you to Sailrite Enterprises, Inc., for providing free access to back issues of Good Old Boat through intellectual property rights. Sailrite.com