Removing drawers leads to safer plumbing
Issue 111: Nov/Dec 2016
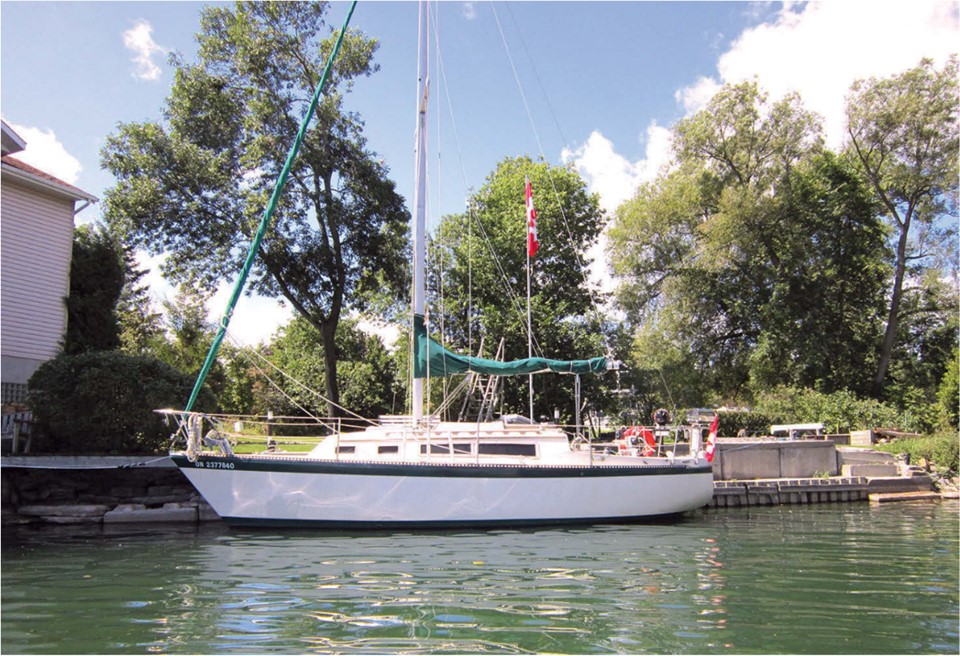
We bought our Mariner 28, Day by Day, in 2014, downsizing from our Corbin 39 as a concession to our advancing years and the desire for more manageable upkeep. The Mariner is a well-built good old boat with good interior volume and meets our three principal requirements: an inboard diesel, a separate head compartment, and a sleeping cabin. However, having grown used to the storage capacity on the Corbin, we found the Mariner’s capacity a bit skimpy.
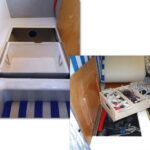
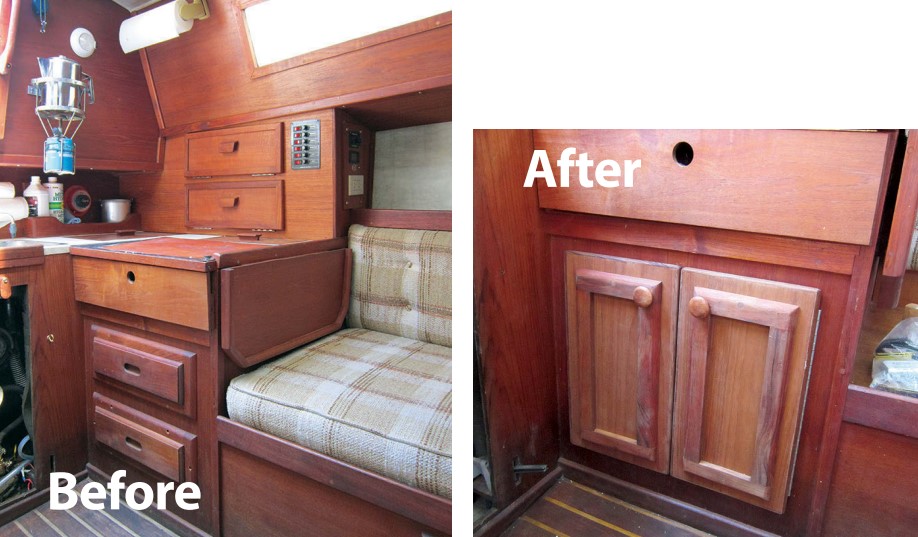
One day, my wife, Eileen, always on the look-out for opportunities for additional stowage, noticed wasted space around the two drawers under the galley counter and suggested we make better use of this area. We decided to convert it to a locker and reconfigure the surroundings. Removing the drawers and supports was fairly easy; everything was screwed in place and there was little gluing to detach. This opened up a large space . . . and set the stage for another project (see “Sidetracked to a seacock”, below).
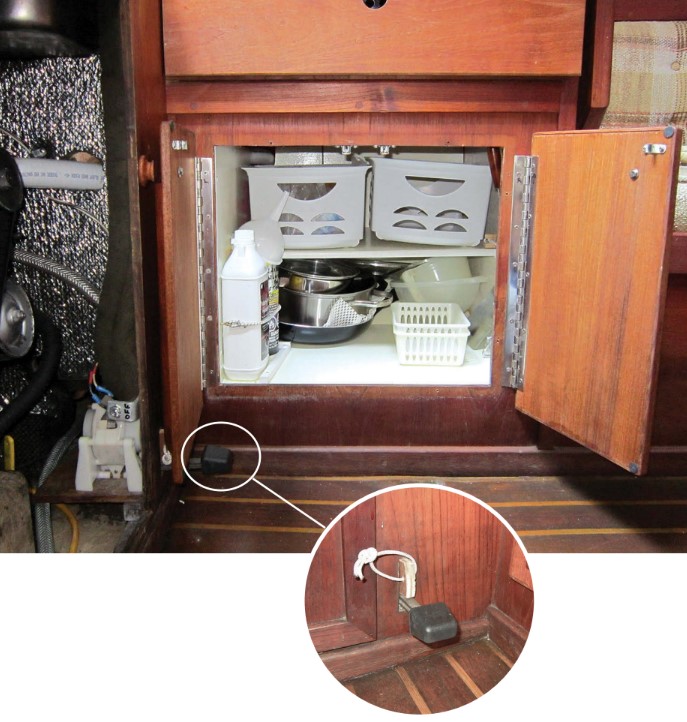
Where the drawers had been, I built an enclosed locker to use the most I could of the available space. I used 1⁄2-inch plywood, painted on all surfaces. A horizontal cleat below the door opening provided a means to support the front edge of the locker’s floor. To support the inboard edge of the locker’s aft partition, I glued and screwed a cleat vertically to the inside, just to the left of where the left-hand door would be attached. The existing bulkhead forms the right (forward) partition. I secured the locker floor and aft partition to the cleats with screws, which will enable me to remove it should the need arise. At the back of the locker, I installed a removable panel to allow access to the new seacock. A shelf I added in the middle increases the useable space.
To finish the project, I made a pair of doors out of new 1⁄2-inch teak plywood and applied some of the original drawer trim to maintain the original design aesthetic. I hung the doors on stainless-steel piano hinges and installed unobtrusive knobs. Sealed with teak oil, the doors blend in well with the rest of the furniture. Initially, the foot pump for the galley faucet prevented the aft door from opening fully, but I overcame that problem by using a wedge to hold the foot pedal down whenever greater access is needed.
Sidetracked to a seacock
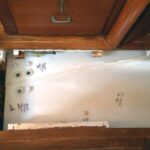
Removing the galley drawers gave me unimpeded access to the through-hull for the galley sink drain. Even though the outlet is above the waterline (at least when the boat is floating level), I had been unhappy that there was no seacock here, and I now had the access I needed to rectify that.
The drain hose sagged in the middle, trapping sink water that turned smelly, and I didn’t like the convoluted thin plastic hose in a place where a break could be disastrous. What began as a project to increase stowage was now also a project to fortify this through-hull.
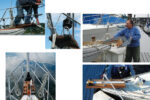
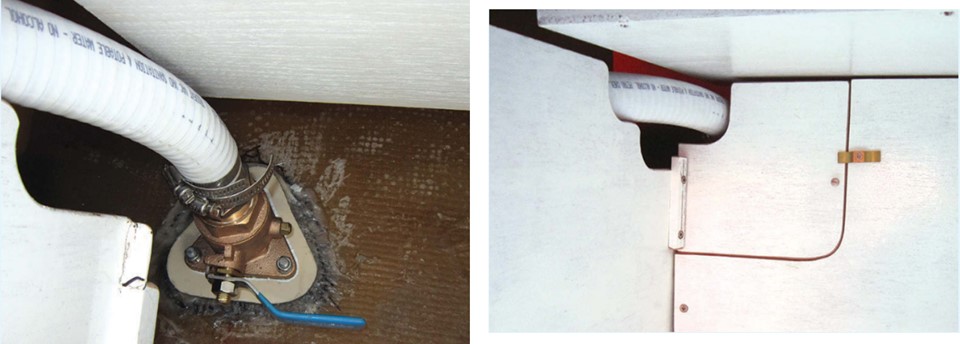
Installing a 1 1⁄2-inch bronze seacock was the first job. It is good practice to reinforce the hull where there is a penetration, and for this I used a piece of surplus 3⁄8-inch-thick fiberglass reinforced plastic (FRP). Before bonding the FRP to the inside of the hull, I drilled holes in the FRP for the through-hull and the three bolts that secure the seacock. Then I epoxied the bolts to the FRP, heads to the hull side. This allowed me, once the epoxy cured, to slide the seacock over the captive bolts pointing inward and attach it with nuts. Doing it this way, there would be no need to drill additional holes in the hull.
When working with epoxy, I often apply grease to surfaces I don’t want the epoxy adhering to. In this case, I applied a layer of grease to the bolt threads before epoxying the heads to the backing plate. I also painted the exposed 1 1⁄2-inch hole in the FRP with epoxy.
To ensure the seacock would be perpendicular to the hull, I greased the through-hull’s threads and used it to hold the seacock in place (attached to the backing plate) while I set the backing plate on a bed of thickened epoxy. (I used West System epoxy thickened to a buttery consistency with approximately 2 parts milled fiberglass and 1 part Cab-O-Sil, a fumed silica).
After the epoxy cured, I removed the through-hull (with some difficulty and a lot of leverage), cleaned the grease off the mating threads of the seacock and through-hull, and re-installed the through-hull with polysulphide caulk on the threads and hull flange. To finish the job, I connected the new seacock to the sink drain with good-quality hose, routing it and supporting it to keep it from sagging.
David Salter and his wife, Eileen, have fitted out a series of cruising boats, beginning with a steel-hulled HO28 (a Dutch design), graduating to a Corbin 39 and, most recently Day by Day, a Mariner 28. They sail on Lake Ontario from their dock outside the back door as soon as the ice has gone out. Woodworking has always been David’s hobby and he has been fortunate to find local craftsmen to fabricate the stainless-steel fittings he designs.
Thank you to Sailrite Enterprises, Inc., for providing free access to back issues of Good Old Boat through intellectual property rights. Sailrite.com