A plan and hard labor win the day
Issue 97 : Jul/Aug 2014
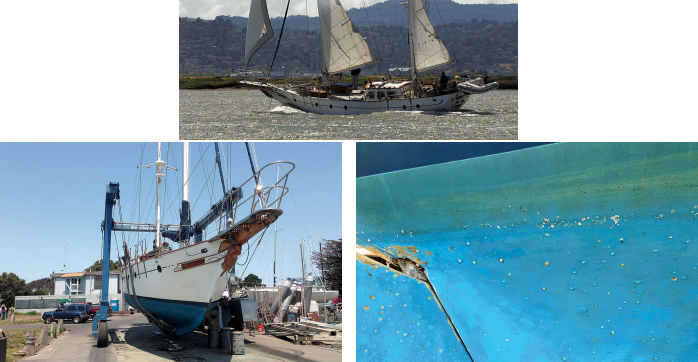
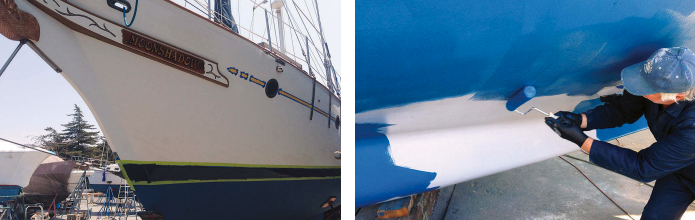
I had known for a couple of years that Moonshadow, our 1983 Hudson Force 50, needed to have the gelcoat blisters on the bottom repaired. Blisters affect some fiberglass hulls more than others and can be caused when water enters voids in the hull and builds up osmotic pressure within the laminate. The typical cure is to grind out the blister, dry it thoroughly, and fill it with a high-quality epoxy filler. When we bought Moonshadow, the surveyor had described the blistering as cosmetic and suggested we look into it the next time the bottom needed to be painted. That time had arrived.
Moonshadow had had blister problems in the past. The previous owner paid a boatyard in southern California to correct the problem a dozen years before. They sandblasted the bottom, repaired the blisters, and applied eight coats of epoxy barrier coat. It took several months and cost tens of thousands of dollars, but the blisters returned after a few years. The previous owner’s advice to me was to forget about heroic measures and just fix the blisters that I found every two to three years when I hauled the boat to apply bottom paint.
I thought about this, did some research on the Internet, and reviewed the solutions offered by some of the large epoxy and paint vendors. I decided to find a boatyard in the area that could educate me on the latest techniques for blister repair and would permit me to do a lot of the work myself to keep the costs reasonable. We needed to work quickly. I had a 30-day window, not the typical two to four months a blister job and barrier coat can take. I selected a DIY boatyard and scheduled a time for the haulout. On July 2, they hauled Moonshadow and power washed the bottom so we could have a good look at the situation.
A plan of attack
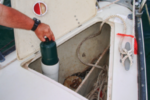
After inspecting the boat with the pros at the boatyard, we decided on a game plan. The hull would need to be sanded down to the barrier coat and all of the blisters ground out until we had solid fiberglass to work with. The bilges would need to be drained to the last drop and we’d use a de-humidifier to dry the interior. After grinding and drying the blisters, we would fill them with two-part epoxy followed by a new barrier coat and bottom paint.
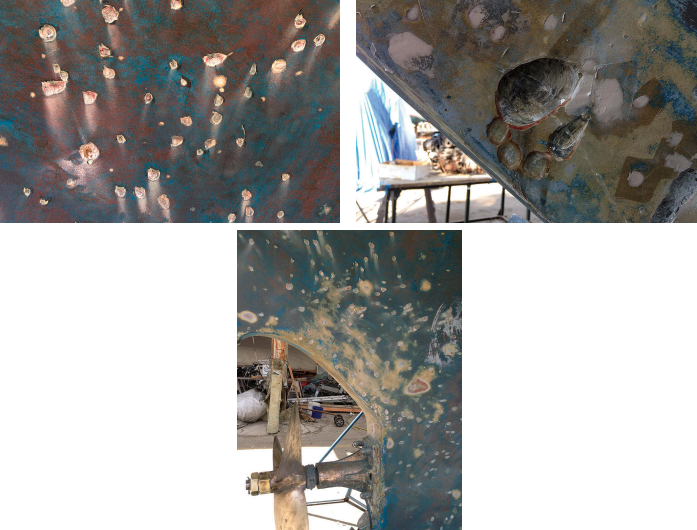
We started by sanding the hull to see how extensive the blistering was. Initially, it appeared there were 300 to 400 blisters. This turned out to be a very optimistic estimate . . . we would repair more than 2,000 blisters before we were finished. Eventually, they were washed out with solvent, dried, and filled with a two-part epoxy.
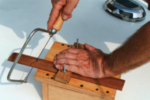
To remove the blisters, we used a Dremel tool with a small grinding wheel. The work went quickly. I would grind out a shallow depression over the blister, rotate the tool 90 degrees, and grind it deeper from a different direction. This resulted in a shallow divot deep enough to pop the blister. When it popped, liquid would flow, sometimes quite forcefully. It was important to wear safety glasses and rubber gloves, as this liquid contains styrene and really burns the skin. When I was sure I had opened up the blister completely, I left it for a day to drain. The following day, I ground it deeper and wider until there was good quality fiberglass lining the depression. Most of the blisters were drained after two or three grinding sessions and we cleaned them with acetone and allowed them to dry for a few more days before filling them.
A daunting prospect
We had set aside two weeks to remove the bottom paint and dig out the blisters. Things went well for the first few days, but then we started to run into problems.
The surface area of a 50-foot full- keel boat is immense. After a few days of sanding, I realized I needed help. I could manage the sander for just an hour at a time before needing a break. Wendy and I had recruited family and friends to help with the work on weekends, but we also hired a couple of friends to help us with the heavy sanding during the week.
As we began to get the bottom sanded down and the first few hundred blisters opened up, we realized there were many more blisters than we had thought. Many of them were previously repaired blisters in need of further work and others were small blisters in the process of forming. We decided to grind everything, hoping to get ahead of the curve. After a week, we had nearly 2,000 divots in the hull with about 100 more blisters still draining and in need of further attention. At this point, I began to have second thoughts about tackling a project of this scope.
Experts at the boatyard assured me we were doing fine and said to stay focused on the work at hand without getting too far ahead of ourselves. The blisters that were ground out and dry could be filled. That would leave only 100 or so blisters remaining. We could focus on the remaining blisters one day at a time until they, too, were ready to be filled. This divide and conquer strategy proved to be good advice and, as the blisters were filled and faired, we began to get a real sense of accomplishment.
I tried several epoxy fillers. I needed something easy to mix, apply, and sand. I settled on a new filler by System Three Resins called SilverTip QuikFair that was very easy to work with, easy to sand, and yet had tremendous strength. It had become a favorite in the yard with many of their technicians. It’s available from Jamestown Distributors. Toward the end of the third week we had 90 percent of the blisters drilled and filled.
Barrier coat
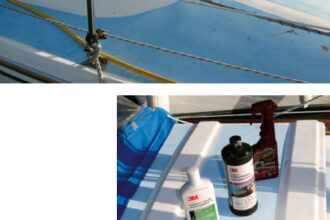
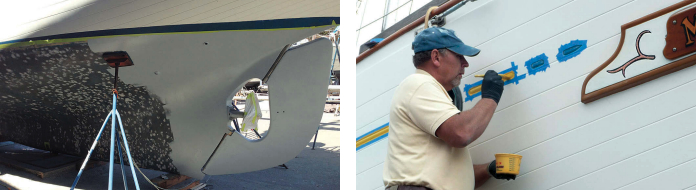
Once we had successfully ground out and filled all the blisters, it was time for the barrier coat. Because we wanted to make the hull as smooth as possible before applying the first layer of barrier coat, we filled and sanded the entire hull three times . . . until we could no longer find any obvious flaws. After consulting with the boatyard pros, we selected Sherwin Williams Pro-Line Low Temperature Curing Epoxy Primer. This two-part epoxy primer is designed to be applied on less-than-perfect bottoms and claims to have the latest technology for preventing water intrusion. Each gallon of primer is mixed with a quart of epoxy hardener just before application.
The good news about this barrier coat is that, when you discover a flaw in the hull, you can apply additional epoxy filler right over the barrier coat and sand it down before you apply the next coat. We went over the boat two to three more times filling and sanding. When it was as smooth as we could make it, we applied the final layer of the barrier coat.
Bottom paint
The first coat of bottom paint should be applied while the last barrier coat is still green so they will bond chemically. As soon as the barrier coat is dry to the touch, it’s time to begin. The bottom paint needs to be applied quickly without excessive rolling that might disturb the underlying coat.
Once we got the first coat of bottom paint applied, we quit for the day. My friend Ray and I were completely worn out after applying two coats (barrier and bottom) to the hull o a 50-foot boat in one day. We retired to a nearby pub to celebrate our progress and recharge for the next day.
Boot stripe
I thought this would be a good time to give the boot stripe a new coat of paint. I sanded the old boot stripe carefully with 150-grit wet/dry sandpaper and applied a coat of Epifanes one-part topsides enamel. After this had dried for a couple of days, we sanded it again and applied a second coat with a roll-and-tip method. It was windy when we applied the second coat and it was drying very quickly. I worried that the finish would have an orange-peel look, but the paint is amazing and continued to level out overnight. It looked great when we removed the masking tape in the morning. The secret is to keep adding solvent to the paint to ensure that it flows well during the painting and drying process.
Cove stripe
I had noticed that a lot of the wooden boats at the Master Mariners Regatta held each year on San Francisco Bay sported a yellow or gold stripe on their topsides. The letters on Moonshadow’s nameboards were a gold/yellow color. I matched this color as well as I could by mixing two Epifanes enamel paints together. I sanded and taped, then applied the new color to the cove stripes. It seemed like the right accent for a classic sailboat design and I was very pleased with the result.
Propeller treatment
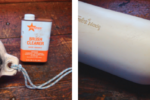
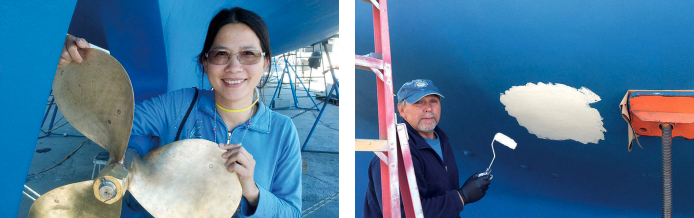
Wendy and her sister had sanded the propeller and polished it to a high luster. I wanted to keep it in that condition. The boatyard recommended a marine-grade grease called LanoCote that works as an underwater metal coating to slow marine growth.
Before applying the grease to the prop, the propeller must be warmed to 100 to 120°F. I used a propane torch to heat it up (being careful not to let the shaft bearing get hot) and, once it had cooled, applied a generous coat to the propeller, shaft, and locking nuts.
Launch at last
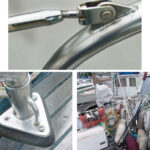
Before we could launch Moonshadow, we needed to reach the parts of the hull under the jack stands and we wanted to block the boat a little higher off the ground to give us better access to the bottom of the keel. We had to repeat the process in each of these areas: grind out the blisters, fill and fair, and apply two layers of barrier coating and two coats of bottom paint.
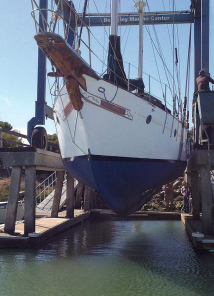
On launch day, Moonshadow was the last boat to go in the water just before closing time on a Friday afternoon. The yard was careful to block the boat and apply wax paper to the lifting slings to prevent any damage to the new paint.
Summary
This was a big job that took us the whole month to complete. Now that we have a dependable barrier coat in place, I hope we’ll have very few blisters to repair on our next regular haulout. We had a diver look at the bottom about a year later and he found no trace of blisters. He said there was some slime on the propeller but no barnacles and it cleaned up easily, so I would say the LanoCote is having a positive impact.
Dale and Wendy Bagnell live aboard Moonshadow, their 1983 Hudson Force 50, on San Francisco Bay. They are currently refitting her in anticipation of an extended bluewater cruise in a few years’ time.
Thank you to Sailrite Enterprises, Inc., for providing free access to back issues of Good Old Boat through intellectual property rights. Sailrite.com