A top-down core replacement
Issue 99 : Nov/Dec 2014
In this, the first of two parts, Matt Bowser describes three ways to repair a delaminated deck. He then relates how he settled upon the one he would use and how he proceeded to attack his boat with destructive tools (carefully) and remove the fiberglass skin and the soggy core beneath.
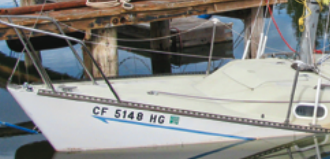
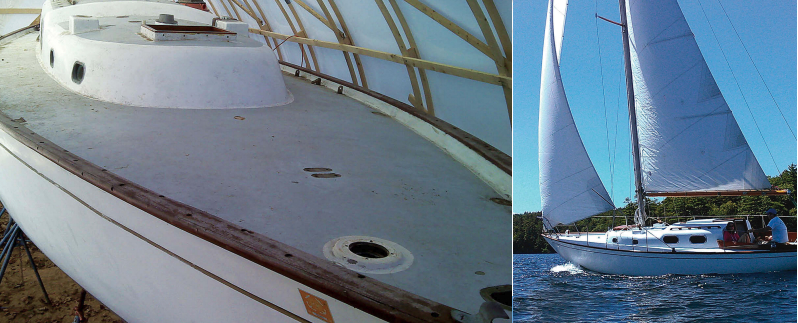
When I first saw Magic, a 1962 Alberg 35 (hull #16), it was love at first sight. I was hopelessly smitten with her classic lines and thought she was the perfect boat for me in almost every way. She was just the right size for coastal cruising with a growing family — we had one child in tow and another on the way. The owner had replaced the Atomic 4 with a new diesel and had done many upgrades over the years to keep her looking good. I bought her in 2001.
Sure, a bunch of soft-deck issues turned up when I had her surveyed, but I didn’t let that cloud my judgment. How bad could they be? I studiously stepped over the soft spots the surveyor had pointed out, but I kept the varnish looking good. Each year I owned her it got a little bit harder to step over the soft spots, but I was in love. The boat was beautiful and I have a long stride. My wife had begun calling her “The Mistress.”
Years of ignoring the warning signs came to a head over the winter of 2007-08 when I was unable to cover the boat because of work and family commitments. Water in the already soft core froze, causing most of the top skin of the foredeck to completely delaminate. Even with my broad stride, I couldn’t ignore the problem any longer. I didn’t launch her during the summer of 2008 and moved her to a yard with cheap monthly storage while I figured out what to do.
A friend in the boat restoration business said re-coring the decks would cost more than the boat was worth. Depending on what he found, it could cost in the tens of thousands of dollars. I didn’t have to consult my checkbook to rule out that option, so Magic languished that summer. The yard where I stored her was a depressing place where many old boats sat neglected and some were destined for the scrapheap. I couldn’t allow my boat to meet that fate, but I couldn’t afford a professional job. I would have to re-core the decks myself.
Choosing a path
I spent countless hours researching different re-core methods and found three main approaches. Before deciding which method is appropriate in any individual case, it’s necessary to determine the extent of the delaminated area. This is done by sounding the deck with a mallet. In theory, the sound made when the mallet strikes solid deck differs from that made over voids. I suspect this takes a practiced ear. I didn’t need a mallet to tell me that most of the core in my deck was in a bad state and needed to be fixed. The good news was that everything I read indicated that no specialized tools were needed beyond what can be found in an average handy homeowner’s toolbox, and no specialized skills, either. It just takes patience, a willingness to ruin good clothes, hundreds of disposable gloves, and caveman determination.
Drill and fill
The first and easiest method (relatively speaking) involves drilling a patchwork of holes into the core and injecting acetone into the holes to help dry the core. Whether this actually dries the core completely is the subject of some debate, but it certainly can’t hurt. Once all the acetone has evaporated and the core is dry, inject penetrating epoxy into the holes until it has filled up all the voids and has started to run out of the other holes). Let it cure, fill the drill holes with fairing compound, and repaint. This method may be viable for small areas where the core still retains its compressive strength, but the delaminated areas on my deck were too big and squishy for this to be effective.
Remove and replace the bottom skin
Another method I found, but quickly dismissed, was to remove the bottom skin of the deck from underneath (see Good Old Boat, March 2004.) This could be an attractive option if the top skin of the deck is in good shape as it’s not necessary to refinish the non-skid, but there are many challenges to this approach. First, any headliner that may be in place must be removed. My headliner is a molded affair that would have to be cut out and replaced. Strike one. It’s also necessary to wiggle into some pretty tight areas and bulkheads may have to be removed to provide proper access. At 6 feet 5 inches and a bit claustrophobic, I don’t wiggle into anything tight very well. Strike two. Finally, I am a firm believer in gravity and almost always want it working for me. The thought of trying to hold a 4-foot piece of glass in place with epoxy dripping all over me while it cures just doesn’t appeal to me. Strike three.
Remove and replace the top skin
The method I chose was to cut off the top skin, replace the bad core, and laminate a new skin on top. This is probably the most widely used of all the techniques, although many people have had success re-bonding the old top skin in place once the core has been replaced. Using the old top skin is cheaper because less epoxy and glass fabric is used, but the old skins need a significant amount of prep work and I’ve read accounts of void problems arising when the skins are bonded in place.
A shed and a mindset
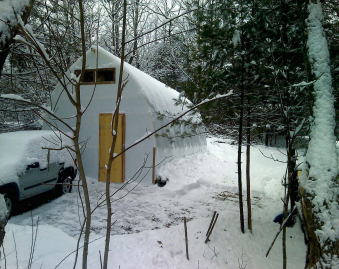
To get started, I had the boat moved to my property and built a Stimson bow-roof shed during the fall of 2009 (see “Do-It-Yourself Boat Barn,” September 2012). Almost two years had passed since I had come to terms with the fact that I needed to re-core the decks, but I never gave up. I found that if I started thinking too much about all the tasks to be completed before the boat was re-launched, I would get overwhelmed. But once I got it into my head that there was no rush and focused on just the task at hand, I was able to proceed. With that in mind, I got to work . . . slowly. I mentally divided up the project into three simple phases: destruction, construction, and finishing.
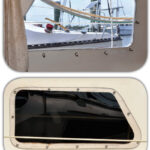
The destruction began over the winter of 2009 with the removal of all the deck hardware. There’s nothing fun about this task. Some days I managed to free up only five or six bolts before muscle spasms or frostbite set in (sometimes both). Central New Hampshire winters are better suited for skiing than removing cold steel hardware from boats.
Over the course of a month, I slowly removed all the stanchions, cleats, and other fittings. Some came off easily; others required a nut splitter and half a can of Liquid Wrench. Most of the nuts and bolts were stainless steel or silicon bronze, but some washers or backing plates were steel and had turned into masses of rust that had to be chipped or cut away. Needless to say, I was pretty happy when I pulled off the last fitting.
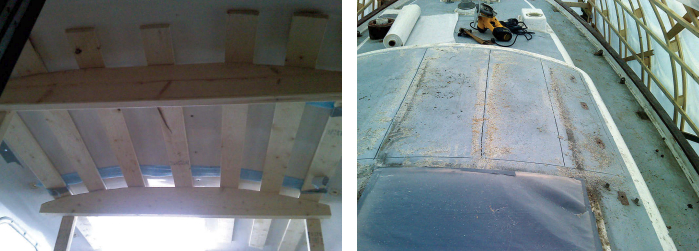
With that finished, I needed to install bracing on the undersides of the unsupported areas of the deck and cabintop in preparation for the re-core. This was important because the bottom skin can be quite thin (mine was about 1⁄8 inch) and won’t support much weight once the top skin and old core are cut out. The core has to be weighted down to bond effectively, and if the underside is not supported while the core is installed and bonded, depressions can form in the deck that will have to be corrected later on.
The supports don’t need to be fancy. I used 2 x 3 and 1 x 3 strapping cobbled together with sheetrock screws and jammed into place in the cabin. How much or how little support is required is really a matter of common sense.
The first cut
Once I had the bracing in place and everything ready to go, I faced a big psychological challenge. Nothing, up until that point, had involved cutting up pieces of boat or real destruction. Now, I feared I would screw up so badly I would have to throw the boat away. When I finally came to terms with what I had to do, I jumped in head first.
The first cut was the hardest. I had selected my trusty 6 1⁄2-inch cordless circular saw as the weapon of choice and set to work on the aft section of the cabintop. My hands were shaking as I pulled the trigger. Setting a circular saw loose on a boat is not for the faint of heart. Fortunately, it gets easier, and I eventually found that, even though the 6 1⁄2-inch saw was adequate, my 15-amp Bosch 7 1⁄4-inch saw was perfect for long open-area runs like the sidedecks and foredeck. I set the depth of cut to about 1⁄4 inch so the saw penetrated the top skin and into the core, but no deeper. The bottom skin needed to remain intact.
I started on the aft part of the cabintop and made a series of parallel cuts a little over a foot apart running fore and aft. I started these cuts about 2 inches inboard of the edge of the cabintop to leave a flange so I could grind tapers later on. This is an important detail. Because the top skin needs to be tied back into the existing deck, the contact area at this interface should be made the maximum possible.
Cutting the fiberglass into reasonably small (1 by 4 foot) pieces made it more manageable, both when pulling the skin off and ultimately for disposing of it. For the corners and tight areas where the circular saws wouldn’t fit, I used a Dremel Multimax oscillating cutter. The Dremel was slow and I went through quite a few blades (I should have used carbide-tipped blades), but was essential for getting at the areas the circular saws couldn’t reach.
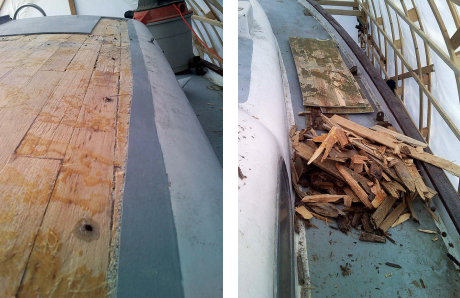
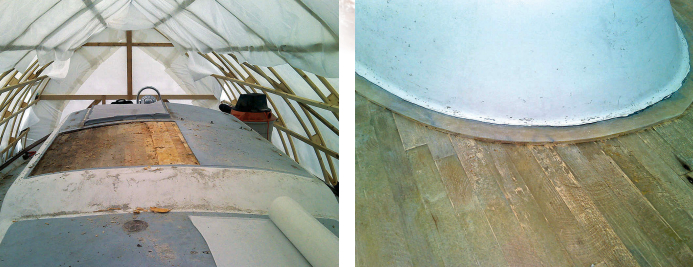
Once the initial cuts were done and I had further reduced the value of my boat, I took a hammer and an assortment of pry bars and set to work pulling off the cut skin. In most cases, the deck was so badly delaminated I was able to pull off the pieces of top skin with little effort, but a few spots required a pry bar and some well-placed words. Overall, I removed about half of the core in the cabintop but left some remaining good core on the port side. I used the oscillating cutter to remove core material anywhere that handrails and other through-deck fittings would be located.
Core decisions
Most of the core was, as I expected, a mushy brown stew, but the type of core was a surprise. I expected to see end-grain balsa blocks under the skin, but instead found balsa planks about 2 by 24 inches. I had heard about balsa-plank cores in early production Albergs, but understood that most manufacturers had discovered the virtues of end grain balsa — among them, better compressive strength — and had switched early. My boat was probably one of the last to see this type of core. I do know of an Alberg 35 manufactured the same year that has end-grain balsa core.
Whatever the orientation of the core material, most of it was in really bad shape and had to go. The vast majority came out easily. Only a few chunks clung to the bottom skin with any degree of tenacity. I was thankful the core was planked; more often than not I was able to pry up entire planks at a time without breaking them up. This saved a lot of time. I did leave the existing core on the port side of the cabintop because it was in excellent shape and a previous owner had taken care to over-drill many of the fastener holes for the through-deck fittings and fill them with epoxy to isolate the core from water damage.
After removing the core, I let the area dry before I broke out my 6-inch random orbit sander and 60-grit paper. I then sanded the inner skin to remove any leftover core and smooth out the surface in preparation for the new core. This was reasonably satisfying in that all the little humps and bumps from excess fiberglass resin and core quickly disappeared, leaving a nice flat substrate. I also spent time digging out old core from underneath the perimeter of the cabintop where I had left the 2-inch flange.
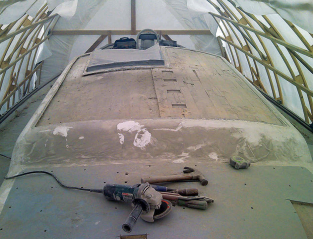
With the old core removed and the inner skin cleaned up, my only remaining task was to put a bevel on the existing deck. This would allow me to blend in the new deck with the old and maximize the surface contact area between the old and new glass. For a mechanical bond such as this, the larger the bevel ratio the better (12:1 is the standard). Given that Magic’s fiberglass top skin was roughly 3⁄16 inches, I needed the bevel to be a bit over 2 inches. This was the most miserable part of the whole project.
Grinding reality
I learned a quick lesson about the hardness of fiberglass, even if it is almost 50 years old. I started sanding the bevel with my random orbit sander and 40-grit paper, but it was slow going. Using my excellent math skills, I calculated that using a sander to cut the bevel around all the decks that needed them would take just under 47 years. My powers of deduction then led me to conclude that this method would not work for me and something more drastic was needed.
I called my friend in the boat restoration business. He laughed when I explained the problem and told me to buy a rubber backing plate that would allow me to fit 24- or 36-grit sanding discs on my angle grinder.
He was right. This absolutely tore through the old glass and, with a little practice, I became somewhat of a caveman artist. With the angle grinder, I am now able to shape bevels with perfect 12:1 ratios into even the most delicate curves.
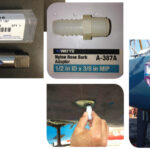
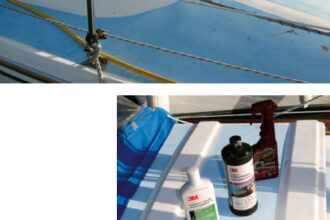
This method has a downside. When you put a 24-grit disc on a machine that spins at 10,000 rpm and grind a surface with it, you create lots of noise and even more dust. It is nearly overwhelming, and I don’t believe you can do this task safely without a very good respirator and ear protection. I bought a 3M 6880 full-face respirator with particulate cartridges. That may have been the best $100 I spent on the project. It is well worth the cost over a half-mask respirator because the grinder dust is very fine and literally gets into everything, including your eyes. A regular dust mask just won’t cut it for this job. There is nothing fun about it and, even with a full-face respirator and a Tyvek suit with ankles and wrists taped tight, weeks later I was able to find fiberglass dust in crevices I didn’t know I had. It’s that bad.
It took about an hour to grind all the bevels on the cabintop and about two hours to vacuum the entire boat shed because a thick film of whitish grey dust had covered every surface in sight . . . including the roof.
That done, I wiped down the cabintop and adjacent surfaces with acetone. I was finally ready to start the rebuilding phase.
Matt Bowser got the sailing disease at a very young age and has been afflicted ever since. After a four-year restoration project, he and his family are finally enjoying sailing Magic again on Lake Winnipesaukee in central New Hampshire. Follow his project blog at www.alberg35.com.
In part two of this article, in the January 2015 issue, Matt will describe the process of replacing the core, rebuilding the fiberglass skin, and patching up the damage.
Thank you to Sailrite Enterprises, Inc., for providing free access to back issues of Good Old Boat through intellectual property rights. Sailrite.com