Essentials first, then the fun parts
Issue 97 : Jul/Aug 2014
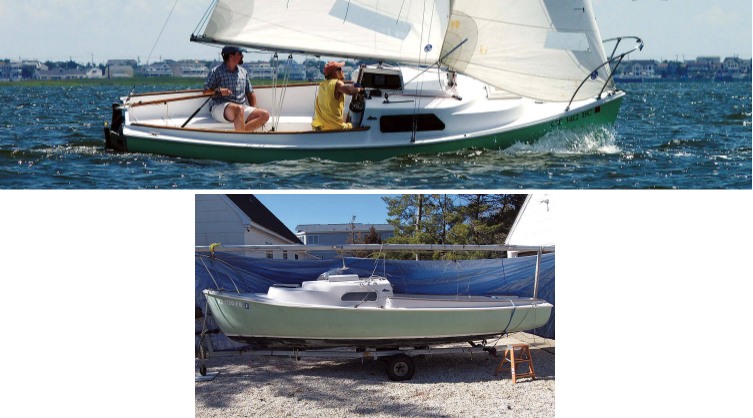
I first laid eyes on an O’Day Mariner as a teenager while working at my family’s marina in Niantic, Connecticut. It was a derelict, but there was something about the lines that attracted me. As much as I wanted to restore it and claim it as my own, schoolwork and other commitments prevented me from doing so. Fast forward 10 years and, after taking my wife sailing in my Dyer Dhow and hearing her later utter the magic words, “I think you need a bigger boat,” my thoughts returned to the Philip Rhodes-designed Mariner.
Based on the Rhodes 19, the 19-foot Mariner was first built in 1963, sported a large cockpit and a small cabin, and was meant to appeal to families wanting to daysail or cruise overnight. O’Day made about 4,000 hulls, and the design is still produced at Stuart Marine in Rockland, Maine. The Mariner Class Association is extremely active and celebrated the 50th anniversary of the birth of the Mariner in 2013.
Although far from being a derelict, the boat I bought did need quite a bit of help. The deck and hull had separated at the transom, the rubrail was chewed up and smashed at the bow, the centerboard was a rusted hunk of iron, the mast step was sinking into the deck, the chainplates leaked, the portlights were crazed, the gelcoat was faded and mottled . . . the list goes on.
There was a lot to do, but I decided to take some very important advice my father gave me: only do the work necessary to make the boat seaworthy and get out on the water as soon as possible. This gave me the opportunity to sail the boat, figure out how I wanted to restore her, and prioritize restoration tasks. Fixing the sinking mast step and removing and refurbishing the iron centerboard were at the top of the list, but I also wanted to do a fun project and design a new cabin sole.
Replacing the deck core
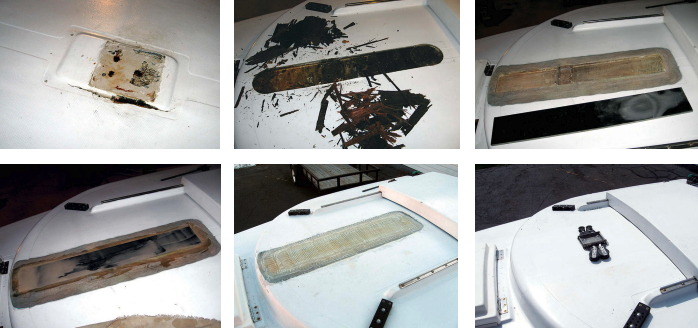
O’Day Mariners from the early 1970s have a single strip of plywood fiberglassed fore and aft under the the cabin roof as a stiffener for the mast step. Beneath that is a thicker arch made of oak and fiberglassed in place from port to starboard. This provides sufficient support for the mast that a compression post is not needed. While the cabin arch seemed to be in good condition, I suspected the plywood core under the mast step was rotten. A few test holes confirmed that.
Since the arch impeded my access to the core from inside the cabin, I decided to remove the fiberglass skin from the top. From inside the cabin, I drilled a small hole in each corner of the core, going all the way up through the top skin so I could see exactly where it was from above. I connected the dots with a marker and carefully cut off the top skin using a small cordless hand-held Makita circular saw. The skin came off quite easily — there was no bond left between it and the core. The entire length of the plywood piece was soaking wet and it crumbled and split apart when I probed with a screwdriver. I chiseled and scraped out the rest, dried the area with a heat gun and, using West System’s Fiberglass Boat Repair & Maintenance manual as a guide, sanded the surrounding edges with an electric disc sander to create a 12:1 bevel.
I obtained a new carbon-fiber G10 deck core from Connecticut-based Forte Carbon to dimensions just slightly
smaller than the rectangular recess in the deck. (Forte does not currently list this product –Eds.) Following the directions in the West System repair manual, I prepared the new core and recess by sanding them and wetting them out with epoxy. I then mixed a substantial batch of West System 105/205, adding 404 filler to make a mayonnaise-like consistency. I used a notched spreader to coat the bottom and all the sides, making sure to get it in every crevice. After that, I simply placed the core in the slot and pressed it down firmly until a little epoxy mix squeezed out the sides.
The thickness of the fiberglass cabintop varied somewhat, although it was generally about 1⁄4 inch thick. To build up close to this thickness, I used three layers of 24-ounce woven roving and two layers of 12-ounce cloth, alternating them. Each layer was slightly larger than the previous one to match the sanded bevel and spread the load. After applying the fiberglass with epoxy, carefully sanding it after it cured, and fairing the surface with epoxy and fairing compound, it looked pretty good. After painting, it looked fantastic and, when I drilled and tapped the holes into the G10 for the mast step, I took comfort knowing it would never rot again.
Centerboard cleanup
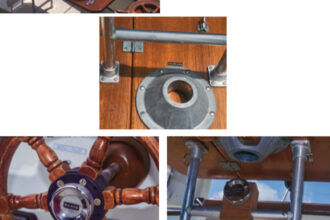
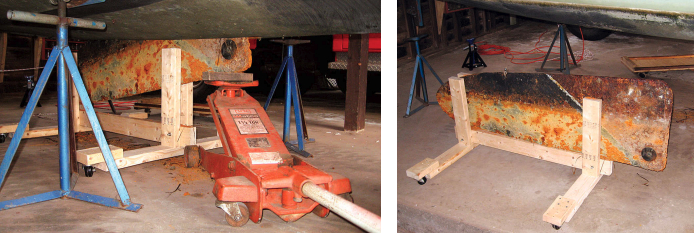
To restore the 165-pound centerboard, I needed to remove it from the boat. With the boat on jack stands, my plan was to lower the board out of the trunk and into some kind of cradle while keeping it level.
I built a wooden cradle out of 2 x 4s. It consisted of a longitudinal piece, a crosspiece on the bottom at each end, and two pairs of vertical supports to guide the centerboard onto the longitudinal piece and hold it upright. I fitted large rubber casters on the ends of the crosspieces so I could move it around. The vertical supports were short enough that the whole cradle could fit beneath the boat.
I used a floor jack to take the weight of the forward end of the centerboard while the pendant supported the aft end. With a piece of wood on the jack, small enough to fit just inside the centerboard case opening, I put slight upward pressure on the front of the centerboard. This allowed me to easily knock out the pivot bolt from inside the cabin. I positioned the cradle under the boat to catch the centerboard as it came down, then alternately lowered the floor jack and eased the centerboard pendant from inside the cockpit. Eventually, the board came all the way out. I cut the pendant and removed the board.
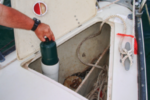
The centerboard was completely rusted and the leading edge was scarred from collisions with underwater objects. I took the board to a metalworking shop that sandblasted the whole thing for only a few dollars. A fellow Mariner owner had previously recommended a rust-preventive paint called POR-15. I ordered a quart of it and applied three coats right after the board was sandblasted. Four years later, I can happily say that POR-15 has helped keep my centerboard rust-free.
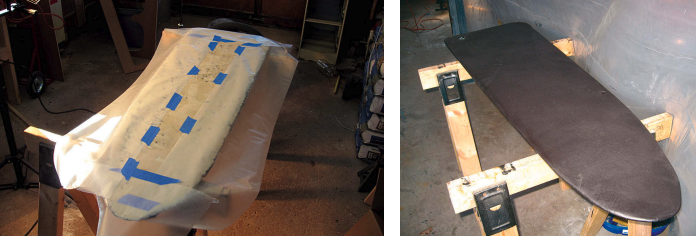
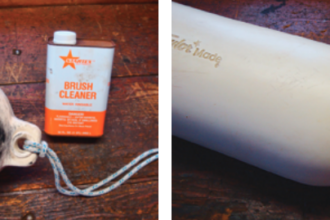
After applying several barrier coats of epoxy, I faired the surface with the same compound I used for the deck core project. When I had finished, it began to look like a centerboard again, but something needed to be done about the edges. I used a technique described on the Mariner Class Association online forums. I taped wax paper around the edges, then flipped the board over and put fairing compound on the edges. Wrapping the wax paper around the edge and pulling it snug, I taped the free edge to the other side of the board. I let it dry, removed the wax paper and, voilà! A new edge — that desperately needed sanding.
I sanded it smooth, applied more epoxy barrier coats, and added two coats of bottom paint. It looked brand-new. Eventually, I put the board back in the boat using the removal process in reverse. It was a little trickier getting it back in, but by using a large screwdriver inside the cabin to align the boltholes, I was able to insert the pivot bolt without difficulty.
Cabin sole
Most boats have a common problem: they leak, whether a lot or just a few drops. Mariners are notorious for leaking at the centerboard bolt. Try as I might, I hadn’t been able to seal it correctly and I suspected there were a few other small leaks as well. I got tired of having gear slide off the berths while sailing and landing in the small puddle that accumulated in the bilge. I decided to make a cabin sole that could be removed in a hurry, but would be stable and look nice. I originally thought I’d make it out of mahogany boards, but after a conversation with my wallet I decided to go with mahogany plywood. This was still expensive, but I could use the leftover pieces to make new hatchboards.
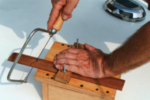
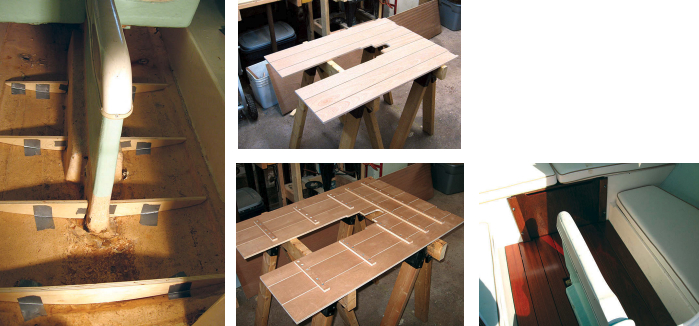
The first part of the project was to make supports for the sole. I used the technique of “story-boarding,” (also called a “story stick,” or “joggle stick”). This is a 19th-century technique that works very well and allowed me to duplicate all the curves of the boat extremely accurately. An Internet search will provide the finer details. In my case, I created a joggle stick, clamped a board to the side of the centerboard case, and traced away, transferring the markings to plywood I later sealed and epoxied to the cabin floor.
After I made the supports, I used the story stick technique to get an outline for the new sole. I could have taped pieces of cardboard together, but the story stick method was extremely accurate and fun. I transferred my tracings to a piece of scrap plywood. It fit extremely well, and I needed only a few small adjustments to make it fit perfectly.
I procrastinated before taking a saw to the nice mahogany plywood. I finally said, “I’ll never finish it if I don’t actually start it,” so I made the last measurements and just plowed ahead. I cut 4-inch-wide strips and clamped them together with bits of 3⁄16-inch-thick wood in between to create spaces for water to drain through. I then put the scrap-plywood template on top, traced all around, and carefully cut the boards with a jigsaw. I joined them with crosspieces on the underside.
I took the sole to the boat, fully expecting to make marks for adjustments, but everything fit so well I didn’t need to do a thing. While several coats of varnish made the sole a bit slick, it still looks fantastic, is extremely functional, and requires only a couple of coats in the spring. No more wet feet or gear!
Over the next few years, I completed a number of other projects that have turned the boat into a small cruiser. There’s more on my website. If you ever have the opportunity to buy an O’Day Mariner, do it! You won’t regret it. It’s a fast, easy, comfortable boat to sail and maintain, and the Mariner Class Association is a top-notch organization that offers a tremendous amount of support for its members.
Nathan Bayreuther has owned his 1970 O’Day Mariner, Orion, since 2007 and is the current president of the Mariner Class Association. A professional full-time organist, he grew up next door to his family’s marina, Bayreuther Boat Yard, in Niantic, Connecticut. Nathan lives with his wife and son in Wallingford and sails the waters of Long Island Sound in his spare time.
Thank you to Sailrite Enterprises, Inc., for providing free access to back issues of Good Old Boat through intellectual property rights. Sailrite.com