A liveaboard steps up to a major project
Issue 80 : Sept/Oct 2011
My ears burned and my pride smarted when I heard the old sailor’s words: “Some people are too worn out from all the prep work,” he said. “They don’t take the time they should when they get to application of the finish.”
Although his barb was not aimed directly at me — it was just a general comment made while we were sitting around a friend’s cockpit — I knew he was right. The varnish I had recently applied to my caprail was ragged in places, with runs and voids. I could have done a much better job, but I was so tired from all the sanding and taping that I hurried the application process and did not do my best.
More than 20 years have passed. The old sailor has long since left the marina and I have perfected my varnishing technique, but his words came back to me as I built up the courage to refurbish our cabin sole. This was a huge project that had to be completed quickly. Was I setting myself up for failure?
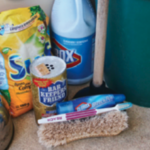
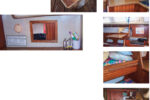
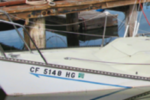
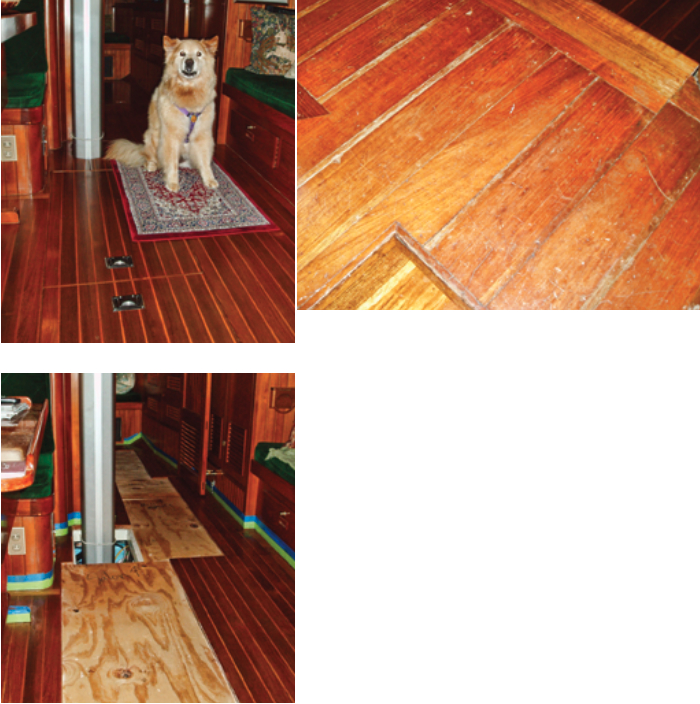
My husband, Drew, and I live aboard our 1983 Tayana 42, La Vita, in Kemah, Texas, with a fuzzy, long-haired dog named Maya who sheds constantly. Keeping the daily accumulation of dog hair at an acceptable level — much less keeping it out of newly applied varnish — is a challenge. But for several years I had wanted to refinish the cabin sole and an unexpected break in employment gave me the opportunity to do so.
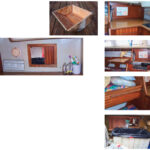
First, though, I had to properly set my expectations. La Vita’s cabin sole is 27 years old. It was dull, lifeless, and scarred. Even with my best efforts, it was not going to look brand-new, but I could make it look much better.
Logistics when living aboard
One of the many challenges of living aboard a boat is the lack of space for large projects. Although it added several hundred dollars to the project cost, I rented a storage shed with electrical power where I could refinish the removable pieces of the sole. This reduced the clutter in and around La Vita during the project but accounted for almost a quarter of the overall cost. Anyone who doesn’t live aboard or has access to a garage could avoid this expense.
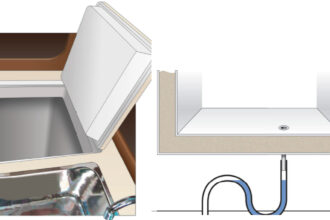
After removing the floorboards, we covered the openings with plywood (cut into manageable sizes) to reduce the amount of sawdust getting into the bilge and ensure that no one accidentally stepped into an opening. I did not put handles on these temporary boards, but if I use them again I certainly will. A loop of rope tied through two simple holes would make removing and transporting the boards much easier.
No one likes to live in chaos, and I was concerned about the effect living in a construction zone for several weeks would have on our morale. To improve this situation, I developed a protocol that allowed us to keep our evenings and weekends as close to normal as possible.
First thing in the morning, I would sand, clean, and varnish the sole inside the boat while Maya stayed on deck. Maya and I then left for the workshop, where I repeated those tasks on the removable floorboards I had taken there. When we returned to the boat in the afternoon, I stored my work materials in the aft stateroom, leaving the rest of the boat free of clutter.
The varnish I had applied to the sole first thing in the morning was dry to the touch by mid-afternoon, and I could cover it with throws in the evening to protect it from dog claws and dropped items. Also, I only varnished Monday through Thursday. This let us enjoy our weekends while allowing the varnish to dry intermittently between coats, dramatically reducing the final curing time.
Tape and strip
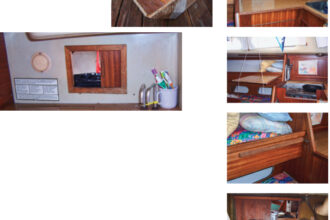
The last thing I wanted to do was damage the nearby furniture while redoing the sole, so before doing anything else, I had to protect the surrounding surfaces (bulkheads, table legs, and so on).
The yard in Taiwan where La Vita was built had used a spray-on lacquer finish. I was concerned that tape might lift the lacquer from adjacent surfaces, so I taped first with ScotchBlue Painter’s Tape for Delicate Surfaces, then covered this blue tape with 3M Scotch green masking tape 233+, which is more resistant to sandpaper. As an added benefit, anytime I was overenthusiastic in my sanding, I would see blue peeking through the green tape, and knew to reapply green tape over the spot before varnishing.
I don’t know if the double-tape procedure was worth the extra expense and prep time, but when the tape was removed there was absolutely no damage.
Once the area was taped and I had my plan, the next step was to remove the old finish. There are three general ways to do this: heavy sanding, heat, and chemicals. To choose the best method for your sole, you need to know how it’s constructed. Most soles in older boats are made of plywood with a layer of teak-and-holly veneer. The thickness of this veneer varies from extremely thin to, in La Vita’s case, 1⁄4 inch. With a thick veneer, I had more options, but even so I was not comfortable using heavy sanding. It generates a good deal of heat and I was afraid the old finish might burn and darken the sole. I also worried about containing the large amount of sanding dust that would be produced.
I have had good luck removing exterior varnish with a heat gun, but the old finish on La Vita’s sole was hardened, discolored 27-year-old lacquer. After testing a small area using a heat gun and a 1-inch steel furniture scraper with unsatisfactory results, I chose the chemical removal method, followed by a light finish sanding.
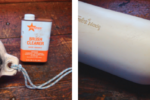
I couldn’t always guarantee I’d be able to keep the hatches open for ventilation, so I needed a chemical removal agent that was safe to use indoors. I chose Citristrip Safer Paint & Varnish Stripping Gel. However, Citristrip is not as potent as traditional varnish strippers and required at least two applications to remove the
old lacquer, with each application remaining on the wood for 12 to 24 hours for maximum effect.
Inside the boat, I worked in sections of the sole no larger than 3 square feet; that way, the entire sole was not covered in stripper at the same time.
I preferred to apply the stripper to an area first thing in the morning and scrape it off after dinner. This was not exactly the setting for romantic evenings but it gave the stripper about 12 hours to work. Also, because the stripper dries to the touch in about 6 hours, I had the option of covering the area with a drop cloth overnight and scraping off the old finish the next morning.
Stripping the floorboards in the workshop was much simpler; I applied the stripper one day and removed it the next.
The entire stripping process took approximately 30 hours of grueling work on my hands and knees, and I strongly recommend a quality pair of knee pads.
A sharp scraper is invaluable. After some experimentation, I settled on the ProPrep 1-inch flat-blade scraper made by Spectrum Razor Tools. The Spectrum blades seem to hold their edge well, can be sharpened, and were the right size for my purposes. Using the scraper effectively takes close concentration; always pull the scraper toward you and with the grain while being careful to keep the blade level with the sole. If you accidentally dip a corner of the blade, it will make a nasty gouge in the wood.

Repair dings and scratches
After I had removed the old lacquer, I inspected the sole for damaged areas. I was able to sand out most of the blemishes. I filled the deeper dings and scratches that remained with Minwax sandable wood filler. I learned to get the type that hardens after I once used the other kind and had to dig it out and start again.
Some floorboards showed their age with chips and small voids on their undersides, so I repaired these spots first. I taped around the voids and filled them with epoxy resin, let it dry overnight, and sanded it smooth. Luckily, the bottoms of most of the floorboards needed only a couple of coats of paint. I roughed up the old paint with 150-grit sandpaper, cleaned the surface, wiped it with a cheap general-purpose thinner, and applied two coats of white Interlux Brightside polyurethane. The edges of the floorboards were still in good shape and didn’t need painting. I also inspected the edges of the sole in the cabin for damage. Since plywood absorbs moisture much faster through the edges than through a top or bottom surface, damaged edges must be repaired. If moisture gets under newly-applied varnish, it will create bubbles and yellowing on the surface. It can also cause the wood to swell, making it difficult to remove the floorboards.
Sand and clean
Once I had stripped and scraped the majority of the old lacquer from the sole, it was time for sanding. A high-quality variable-speed random-orbit sander with a vacuum attachment is imperative for this work, but it’s important to know the thickness of the teak-and-holly veneer before getting to work. The thinner the veneer, the finer grit sandpaper you need to use. With the thick veneer on my Tayana, I was able to use 120-grit sandpaper for the first pass to quickly remove any remaining lacquer and smooth out most dents and scratches. On thinner veneer, I would have started with 150- or even 180-grit paper to avoid sanding through it to the underlying plywood.
I started with the orbital sander on a very low speed setting until I became comfortable with the sander and the veneer. For tight areas the orbital sander could not reach, I sanded by hand, always with the grain. I finished up with 220-grit paper to prepare a smooth surface for the new varnish.
Initially, I planned to remove all the cushions every day and tape plastic sheets over the lockers and exposed surfaces to keep the dust out, but my ingenious husband connected the orbital sander to a small shop vacuum for me, using a short piece of bilge hose. The reduction of dust in the boat was amazing.
Sanding in the workshop was much simpler. With the help of a long extension cord, I was able to work outside, keeping the varnish area fairly dust-free. On rainy days when I couldn’t sand outside, I carted the vacuum setup to the workshop.
After sanding, I thoroughly cleaned everything by vacuuming and dusting the sole and surrounding areas. I then wiped the sole with general-purpose thinner, and got in the habit of wiping in the direction of the grain to ensure that I was actually removing the sanding dust, not just stirring it around on the surface.
This was a good time to look for residual varnish or lacquer I might have missed, as it shows up well. I reapplied tape to the surrounding surfaces where necessary and let the wood dry at least overnight before proceeding with the refinishing. If a cabin sole has any water damage, this would be the time to consult the varnish supplier about achieving a moisture content suitable for applying varnish.
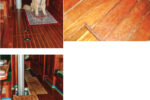
After the sole was sanded to naked wood, I discovered the builder had applied stain to disguise all the color differences, knots, and patterns in the teak. Suddenly I was looking at La Vita’s sole for the first time in its true form. I did not hesitate — there was no way I would cover all that character with stain.
Apply the varnish
Finally, it was time to start coating the sole. I chose Defthane polyurethane varnish because the local varnish professionals recommended it highly. They found it easy to use and forgiving in its application, but advised me to be sure to thoroughly stir (not shake) the varnish in the container before using it.
“Ease of use” sealed the deal; I bought stirring sticks and was off to the races. Strictly out of personal preference, I chose the semi-gloss finish (Defthane is also available in satin and high-gloss). I wanted some shine but was concerned that a high-gloss finish would amplify any imperfections. We all know that compromises sometimes disappoint, but I was very pleased with the results.
Before the first coat of varnish is applied, the sole must be sealed to ensure good adhesion for the build-up and finishing coats. The choice is between thinned-out varnish and a product specifically designed as a sanding sealer. The references I consulted were split on the issue. I chose to go with thinned-out varnish.
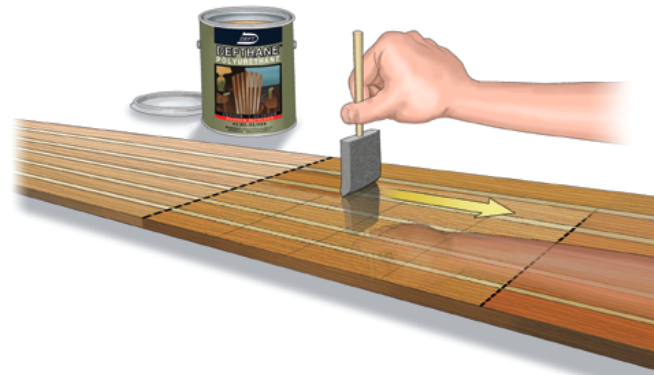
Thinned 50/50 with Interlux 333 Brushing Liquid, the Defthane semi-gloss varnish easily soaked into the veneer. Using a 2-inch foam brush, I applied the liquid across the grain in an area of about 2 square feet. Then, without adding more varnish to the brush, I smoothed out the brush marks with long non-overlapping strokes parallel with the grain, just touching the varnish with the tip of the brush (this is called the “tipping stroke”).
I repeated this for the rest of the sole by moving another couple of feet down, applying the varnish against the grain and smoothing out the brush marks with tipping strokes that ran with the grain. I worked toward the wet edge with my tipping strokes by laying the brush into an uncoated area and brushing back to the coated area, just touching the brush to the wet edge. I learned to avoid overbrushing when tipping, as this will increase the likelihood of brush strokes showing in the dry varnish. This technique requires some practice and I began on the loose floorboards before tackling the strange angles inside the boat.
I applied one coat of thinned-out varnish and let it dry overnight. The next morning, without sanding between coats, I used a tack rag to make sure there was no dirt or hair on the surface and applied a second coat of equally thin varnish. I allowed this second coat to dry thoroughly overnight, after which I lightly sanded it with 400-grit sandpaper, using a sanding block to ensure I applied even pressure.
There are many opinions on the appropriate number of varnish coats for a cabin sole. First, the choice of finish influences this, since getting to a high-gloss finish requires more coats than a satin or semi-gloss finish. Another factor is the type of varnish you choose, as polyurethane-based products provide the same protection with fewer coats than traditional varnish. And the amount of thinner you use affects the rate of build-up: thinner coats require more applications to achieve sufficient thickness.
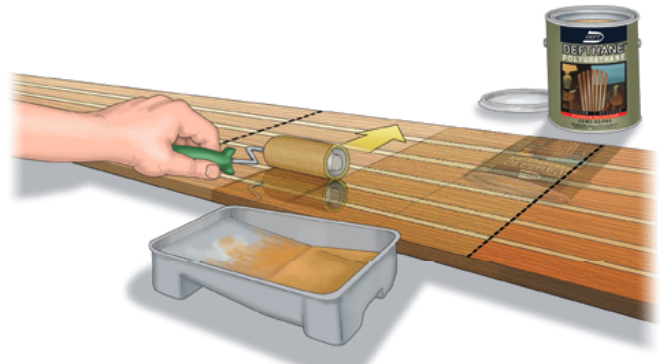
I settled on 12 coats: two of thinned-out varnish to act as a sanding sealer, five build-up coats, and five finish coats. For the build-up and finish coats, I used the roll-and-tip method to apply the varnish wherever possible as it saved time. This method is similar to the brush-on method. The tipping strokes are made with a brush but the product is applied with a roller.
The amount of thinner to use depends on the varnish you use and the weather. The rule of thumb is to use only as much thinner as necessary to allow the varnish to be applied smoothly. Too much thinner requires extra coats; thinned too little, the varnish shows brush marks and can sag.
I prepared my varnish by thinning it up to 10 percent with Interlux 333 Brushing Liquid in a small plastic tub. Immediately before varnishing, I wiped any errant dust or hair from the sole with a tack rag and poured the varnish into a roller tray with a disposable lining.
I used 3-inch and 7-inch Glasskoter R-101F rollers made by Corona Brushes to roll the varnish onto the sole, but any good-quality roller with a tight nap (1⁄8‐inch is good) should be fine. Lots of bubbles appear after the varnish is applied across the grain with the roller, but these disappear with the tipping strokes. I tipped the varnish using a 2-inch foam brush, brushing with the grain, working from a dry area to the wet edge as before.
It was especially easy to use this method on the floorboards, rolling varnish over the entire floorboard (across the grain) and then tipping the full length with the grain. Inside the boat, I could not use the roller in some areas and had to use a brush for both application and tipping, but the roll-and-tip method sped up my application time.
Large sections of sole inside the boat presented some challenges. Sometimes the varnish, even when thinned, dried too quickly, leaving brush marks. For the last two finish coats, I divided the large areas of sole into smaller, more easily worked sections using tape.
I used the delicate-surfaces tape for this; I had no desire to pull up my newly applied varnish. I ran the tape down the middle of a holly strip and coated the adjoining sections at separate times. After coating a taped-off area and letting it dry thoroughly, I removed the tape and reapplied it over the coated area, carefully lining up its edge along the varnish line in the middle of the holly strip. The slight raised line this left where the two applications met disappeared after a few days. This step may not be necessary in a drier cooler environment or on smaller cabin soles.
Some products don’t require sanding between each coat, but I chose to take this extra step. I always waited at least 24 hours before sanding. For the five build-up coats, I sanded between each coat with 220-grit paper, using the orbital sander attached to the vacuum. Between the fifth and sixth coats, I sanded moderately heavily with 150-grit paper to remove any grain in the finish, yielding a very smooth surface for the finish coats. I was careful at corners and edges at this point so as not to remove the base layer.
For the finish coats, I switched to a sanding block and wet sanding with wet/dry 400-grit sandpaper between each coat. Wet sanding yields a very smooth surface but adds some time to the project. It’s a good idea to wet sand only between the last couple of coats. I wiped the surface with thinner between each of the final coats and was diligent in my cleaning and use of a tack rag prior to recoating. Tack rags are inexpensive; change them often. After every two or three coats, I also removed and replaced the protective tape on the surrounding surfaces. If varnish is allowed to build up on the tape, it will tear or lift when the tape is removed. This step seems like overkill, but there were a couple of areas (such as under the saloon table) where I did not follow this protocol and had a very difficult time removing the tape cleanly from the varnish when the project was over.
Once the final coat has been completed, the varnish will take a period of time to dry before you should walk on it even barefoot. We left the plywood fillers in place and walked on those as much as possible for two weeks after the last coat. Sailors in northern climates or who use a traditional varnish may want to wait up to a month before walking on the sole. This might not be possible for liveaboards. They may have to take an extended vacation away from the boat or make other compromises.
With the total hours expended in refinishing the sole of a Tayana 42 approaching 300, and a cost of almost $1,500, this is not a project to be taken lightly. But now, two months later, as I pour myself a glass of wine and sit down for dinner, I openly admire La Vita’s beautifully refinished cabin sole. I catch myself smiling and thinking back to how much I have learned during this project, and I tip my glass in a silent toast to the old sailor from so many years ago. This time, he would have loved the final product.
Stephanie Concelman met her husband, Drew, in 1987, when she owned and lived aboard a Tayana 52 and he owned an Alberg 37. They have lived aboard and sailed together ever since. Both licensed captains, Stephanie and Drew currently sail the Texas coast on their Tayana 42 cutter, La Vita, with their dog, Maya, and look forward to cruising to further destinations after retirement.
Thank you to Sailrite Enterprises, Inc., for providing free access to back issues of Good Old Boat through intellectual property rights. Sailrite.com