This grating bends to the contour of any floor
Issue 54 : May/Jun 2007
Marine gratings have one thing in common: they are rigid and fit only in perfectly flat areas. A curve in the sole means getting out the wood rasp and fairing. Without a doubt, getting that thing to fit is going to be a big job.
In the process of installing a new cabin sole in our Watkins 27, I found myself with a bit of spare time while I was waiting for the weather to get around to being spring. “What else needs doing?” said I, as I looked around Sundew’s interior. The first thing I noted was the cruddy snap-together rubber tiles in the head. They are cheap, uncomfortable to stand on, and look about as nautical as a clearance sale at Wal-Mart. “There’s room for improvement here,” I thought, “but how to put a grating in a space that has a concave floor?” Enter the flexible grating.
If you think about it, a grating that can form itself to a floor space that is not flat has oodles of possibilities. Other than the floors in most heads, there is the space between V-berths, the bottoms of storage lockers, and spaces under dinettes to name a few possibilities. But how does one go about creating a flexible grating?
You’ll need some basic woodworking machines: a table saw, drill press, chop saw, thickness planer (nice but not absolutely required), belt sander and/or an orbital sander. Next, select the type of material you want to use for your project. Teak, mahogany, and oak are the most common options, but you can use just about any material that toots your whistle.
Individual slats
Once you have decided which material to use, you will have to create the individual slats that make up the grating. The grating I made covered a little over 2 square feet and required 90 slats to complete, so figure about 45 to 50 slats per square foot of grating. Each slat measures 4 inches long, 3⁄4 inch wide, and 3⁄8 inch thick.
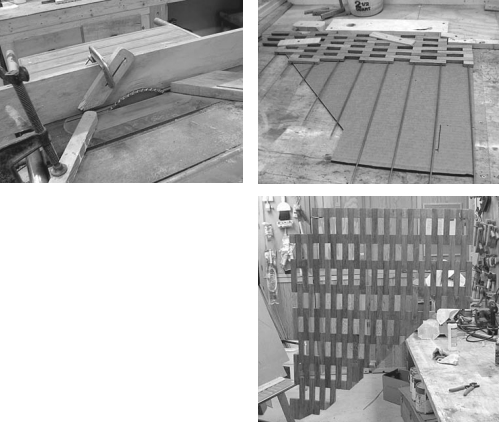
The first step is to mill this material to the desired thickness. A thickness planer is the proper tool to complete this task. If you don’t have a planer, a local woodworking shop should be able to do the job at a reasonable cost. Once the material is planed to its proper thickness (3⁄8 inch), set up your table saw to cut the material into 3⁄4-inch-wide strips. At this point it would be a good idea to set up a cutting jig to make all cuts exactly the same. Finger boards are a great way to keep the stock in a consistent position while it is going through the saw. You can make your own out of any clear hardwood that is at least 3⁄4 inch thick, or they are available at your local Home Depot for about $7.
When you have enough strips cut (4 inches times the number needed equals the total length of the 3⁄8-inch strips required), set up your chop saw to cut the strips to length. A simple stop clamped to the saw will eliminate the need to measure each slat before cutting. Just set the stop, shove the strip up to the stop, and cut. Repeating this approximately 100 times will give you the number of slats you will need to construct your grating. Make more if your grating is larger than 2 square feet or fewer if it will be smaller.
Set up a jig
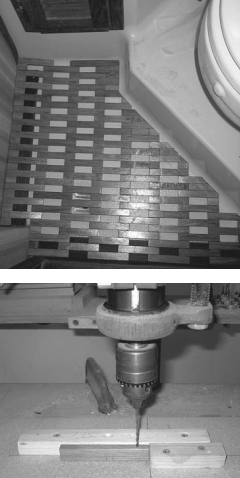
The next step will be to drill 9⁄64-inch holes, one in each end of all your slats. It is most expedient to set up a drilling jig to ensure accuracy and precision. The holes are drilled 1⁄2 inch in from each end and exactly in the middle of the side of each slat. The jig, when properly set up, will ensure that each hole is precisely where it should be. Take sufficient time to set up your jig correctly or each hole may be precisely where it should not be.
Using the jig, drill holes in the sides of each slat. Continue this until you have gone completely crazy or the job
is done. If crazy comes before you’re completely done, finish the job tomorrow.
Next, you’ll have to spend a little time sanding all the slats. The sanding operation will consist of smoothing each surface, slightly rounding each edge and end corner so the finished slat is smooth and uniform.
You will now need to create an exact pattern of the space you wish to cover with your new grate. A piece of light-weight cardboard is best for this job. To get an exact fit, start with a piece that is approximately 85 percent of the floor space and then — using smaller pieces and masking tape — form the pattern to the exact shape required.
Now you have the pattern, a huge stack of slats, and — I hope — some good vibes about getting this whole thing together. The secret of the “flexible” in this grating is the fact that the slats are fastened together by passing a 1⁄8-inch brass rod through the holes that you so carefully drilled.
Brazing rod
Your local welding shop is an economical source for 1⁄8-inch brass rod. They stock brass brazing rod that’s exactly what is needed for this project.
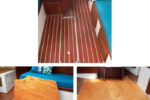
I like to think of this operation as knitting with wood. To begin, place the pattern on a suitable flat workspace. Align several brass rods so that slats are arranged in alternate positions with a space between each slat. If you study the photos on Page 25, you will recognize the alternate slat placement used in the grating.
Continue “knitting” the slat placement until your floor pattern is covered by interconnected slats. Finishing may involve one of several operations, depending on the final shape of your grating. The one I created was basically a triangle with an identity problem (it was not sure if it wanted to be a triangle, as it had too many sides).
In any case, finishing a flexible grating will require cementing the perimeter slats to the brass rod. I injected polyurethane glue into the holes in the slats and reinserted them on the brass rods. It’s critical that you secure the grating in position during this operation. This is done by using 1⁄4-inch plywood pieces of 2 inches by 5 inches and screwing them through the open spaces in the grating to the work surface.
If your grating shape is irregular like mine, you will have to work your way around the entire perimeter, gluing slats in small sections until the entire grating is completely fastened to the ends of the brass rods that connect the slats. It may also be necessary to glue adjacent slats together to help form a continuous perimeter that will ensure that the grating will maintain the desired shape.
Ready to finish
Once you have completed the grating and the shape matches the pattern, you are ready to finish the piece. To do this, place the grating on a flat work surface and, using an orbital sander, smooth the top surface until all slats are smooth and uniform.
Next, I selected spray polyurethane semi-gloss varnish. The spray makes the finishing much easier than trying to brush on finish, and the polyurethane allows for several fast recoats, so the finishing process goes rather quickly. (This is a welcome change from the repetitive nature of the project.) I sprayed six coats of finish on both sides, and the result was very pleasing. The finishing job goes more quickly if you can hang the grating and spray both sides at once.
If your pattern was exact and if you were diligent in replicating the desired shape, you’re ready to install your handwork. The brass wire connectors will allow the grating to assume a concave shape that will snugly fit in almost any configuration your boat’s sole may have. In order to hold the concave shape, it will be necessary to fasten the center of the grating to the cabin sole with just one #6 x 3⁄4-inch stainless-steel screw. You can determine the exact screw location by pressing the grating into position with your hand and testing several locations until the best fastening spot is determined.
Now that the job is done, you can step back and admire your craftsmanship. It looks great. Don’t throw away any of the instructions and jigs that you used. Your marina mates will want you to make one for them too.
Thank you to Sailrite Enterprises, Inc., for providing free access to back issues of Good Old Boat through intellectual property rights. Sailrite.com