A venerable Triton gets a valuable upgrade
Issue 70 : Jan/Feb 2010
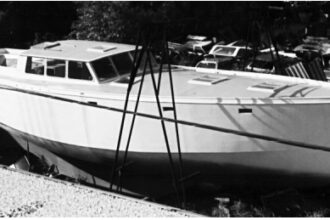
One of the enjoyable aspects of owning a good old boat is exercising your creativity to make it it your own. My boat, a 1960 Pearson Triton, had been all but abandoned for five years when I found her. While the old Pearson fiberglass was generally in good shape, she needed nearly everything else. This presented a big challenge. Even my wife, who is used to my shenanigans, just shook her head, convinced that my affinity for the diamond in the rough had finally met its match.
To help get the project rolling, I started looking at boats — from daysailers to ocean cruisers — from a different perspective. I came to the conclusion that most boatowners have their own ideas regarding what’s right and proper and what’s attractive. My task was to decide which of these views would help me define my direction.
The venerable Pearson Triton is a classically styled boat. I wanted mine to have a “cruisy” feel and, as a part of that, I felt the boat needed a dodger. After looking at a lot of dodgers, I recognized that styling was as important to functionality as to appearance. The Triton is not a large boat and a dodger’s size and shape should not distract the eye from the balance of the original design. At the same time, it should successfully deflect spray and keep the cockpit dry.
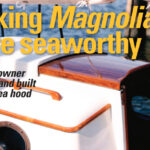
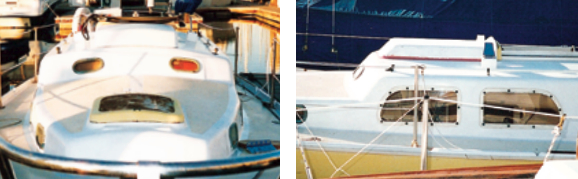
The Triton’s companionway slide was designed to open along the cabintop. I decided that a sea hood over the slide would provide a structure on which to mount the forward edge of the dodger. Properly designed, it would add to the finished look and it would also assist in providing a reasonable seal from the weather. Since no such unit was available commercially, I set out to make one.
Harmonizing the design
As with the dodger, I felt the design of the sea hood should add balance to the overall appearance of the boat and harmonize with the curves and angles already there. I wanted the finished project to look as if it had been molded in place as part of the original design for the Triton that had come from Carl Alberg’s pen.
Constructing the sea hood in fiberglass seemed to allow the most flexibility in its design without adding unneeded bulk. To achieve the result I had in mind, it was going to have to be molded.
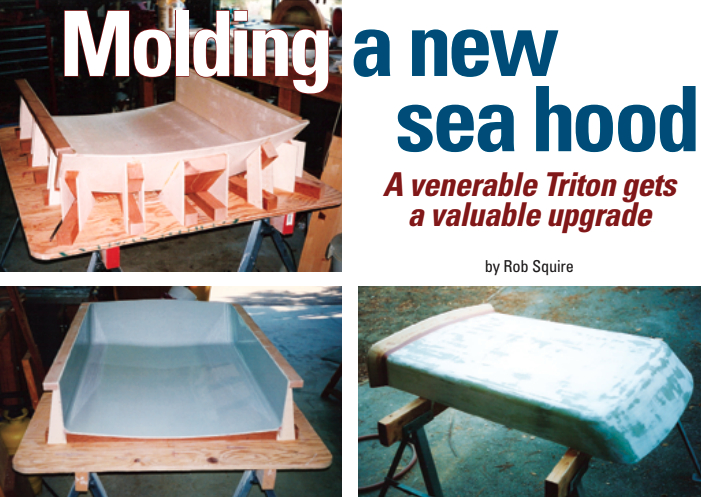
I hadn’t planned to build a mold and didn’t know how or where to start. I sketched what I thought the final sea hood should look like and, with a scrap of 3⁄4-inch plywood as a base, some 1⁄4-inch birch ply, and a few blocks of scrap, I began building a mold: the sea hood in reverse.
I filleted the inside corners using epoxy mixed with sandable filler, shaping the fillets with a piece of an old windsurfer mast to create a uniform inside radius throughout the mold. I sealed the pores in the wood with more epoxy-and-filler mix and sanded this to a smooth finish. Finally, I painted the inside of the mold with Brightside one-part polyurethane to give it a clean, shiny, waxable surface.
Before attempting to make the sea hood itself, I molded a proof-of-concept prototype that I could try on the boat, trim to fit, and use to further define the finished product. I laid a couple of layers of lightweight cloth in the mold and set them with epoxy. Then, it was out to the boat to see if all my planning and work were right. A little trimming established the final height, after which I carried the prototype back to the garage where I marked the mold for the final size.
I recalled from the story of the Pearsons’ development of the Triton that laying fiberglass in alternate layers of mat and roving was stronger. Since I wasn’t savvy enough to know the minimum number of layers, I figured “several” ought to be enough. At around nine layers, the sea hood was near 1⁄8 inch in thickness and I figured that to be about right to support my weight with minimal deflection.
After removing the sea hood from the mold, I layered in strips in the back of the mold to mimic the aft edge of the hood. I used the strips to create a jig on which to form an aft rail to stiffen the opening of the sea hood and to provide a point of attachment for the dodger. I formed the aft rail by cold molding it with very thin strips of wood that I coated with epoxy and clamped over the jig. After sculpting, filling, and sanding it, I attached the rail to the hood, then used more epoxy and sandable filler to refine its appearance.
Mounting the hood to the cabintop so it looked as if it had been there all along meant making it permanent. This was a notion I initially had some difficulty with, but I couldn’t otherwise accomplish the look I’d envisioned at the outset.
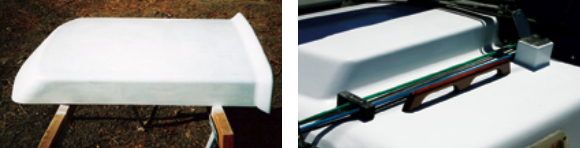
I mounted a couple of parallel strips to the cabintop, just outside the companionway slide, slid the hood down over the strips, and glued and screwed it in place. I then filleted the joint, using the windsurfer mast again to make all the rounded edges consistent. All that was left to do was to give the sea hood a final sanding and paint it.
In the end, this sea hood does what I set out to do on the broader scale. The dodger attaches to the rail and water stays out. Whether it’s artful, who knows? But I remember Don Casey talking about boats and saying something like, “When you leave the dock at the end of the day and you steal a glance back at your boat, it should make your heart skip a beat.”
So far, I’m still getting that feeling.
Rob Squire loves classic boats and old cars. He has been sailing for 25 years on San Francisco Bay and the California Delta and, while he enjoys some racing, he is a cruiser at heart with a special affection for pocket cruisers. When not tinkering on his Triton, he makes a living flying for American Airlines on its worldwide network.
Thank you to Sailrite Enterprises, Inc., for providing free access to back issues of Good Old Boat through intellectual property rights. Sailrite.com