Creative solutions for hard-to-use spaces
Issue 90: May/June 2013
In a smallish galley it’s hard to justify the space taken up by an oven. I removed the oven in my 31-foot ketch, Talisman, replaced it with a two-burner stovetop with a broiler, and used the area beneath it for storage.
I made the shelves with 5⁄16-inch marine plywood and used some 3⁄16-inch I had on hand for the front and doors. Had I been buying the plywood, 1/4-inch would have sufficed for both.
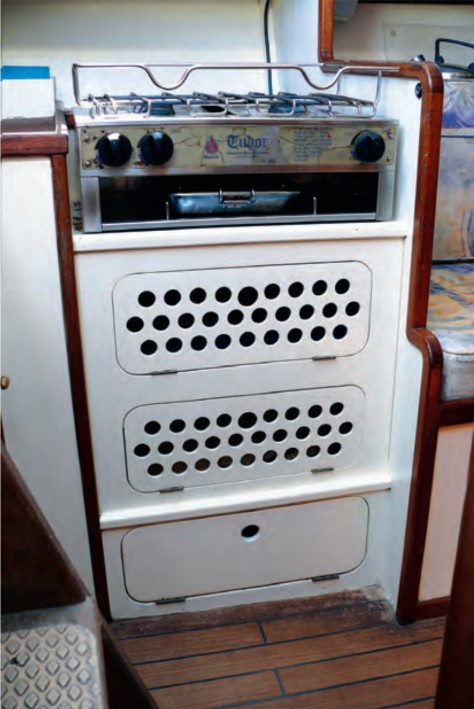
My initial idea was to keep vegetables in there, so I cut ventilation holes in the doors, but I found a better place for those. Instead, I now store packaged food in this readily accessible area.
My stovetop isn’t gimbaled — that’s another space saver. Since I have used my boat mainly for gunkholing, cooking at sea is a low priority. The extra stowage space was more than worth the inconvenience of occasionally heaving-to to cook under way.
Easy cleaning is important to me, so the stovetop is fastened in place with two 1/4-inch bolts with wingnuts. I can lift the stovetop unit out in seconds to wipe down the recess.
Reclaim dead space
I turned the wasted space under the galley sink into convenient storage for fruit and vegetables by fitting wooden rails for baskets to slide on. The rails are simply screwed to 3/4-inch square-section softwood that is in turn screwed to the plywood locker sides.
The baskets were easy to find — they came from the storage section in one of our discount hardware stores. When I slide the baskets completely out, I still have access to the cavernous area under the cockpit floor.
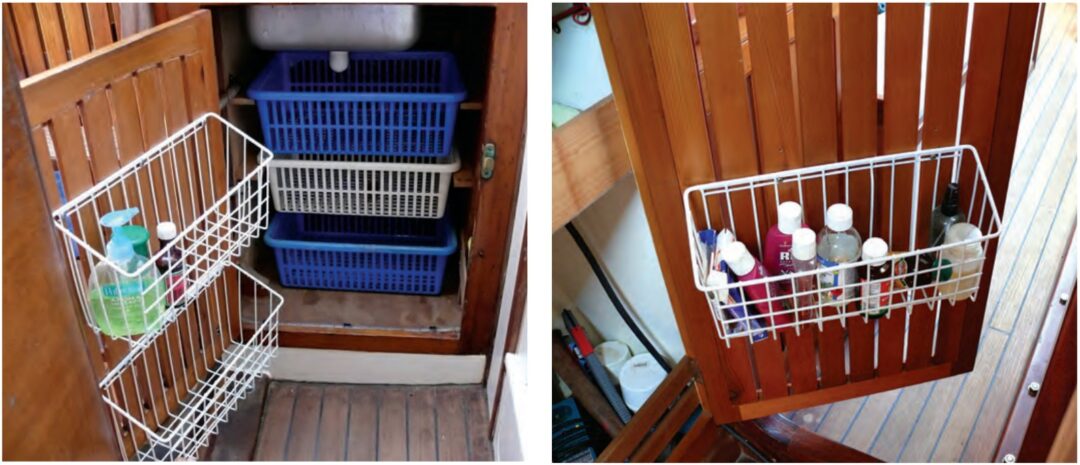
I hung wire baskets — another hardware-store find — on the inside of the door, and use them for ready-use items like spices, hand soap, and so on. These plastic-coated mild-steel baskets last about six to eight years and can be easily replaced.
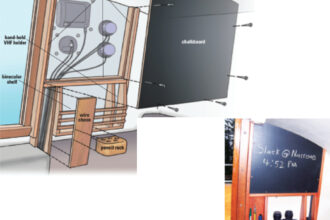
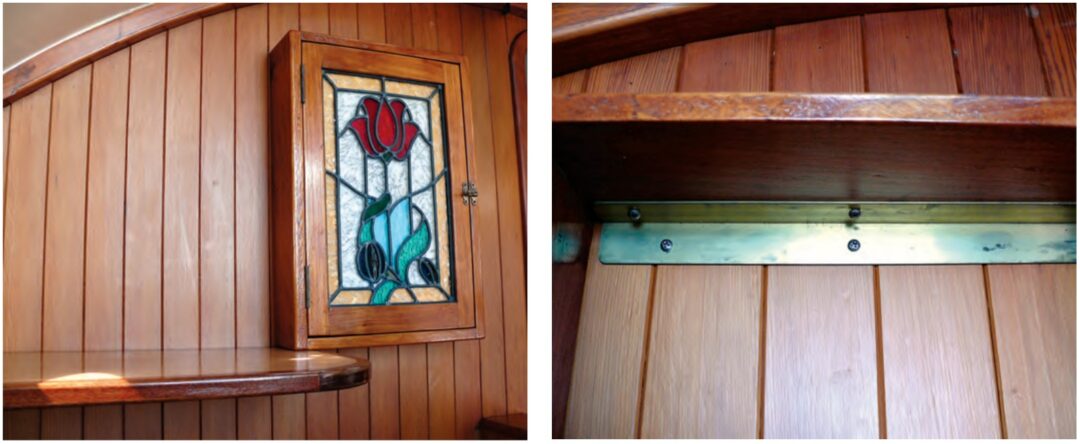
Another way to add storage capacity is to buy a ready-made cupboard to mount on a bulkhead. The cabinet can be whatever suits your boat. The fastenings for Talisman’s cedar cabinet were cut from a piece of brass angle from the hardware store.
Extend the capacity of shelves
Builders of production yachts tread a fine line between making them look spacious and providing enough stowage. That’s why you find dinky, shallow shelves above V-berths. These can be enlarged quickly and cheaply by fitting clear acrylic sheets inside the original shelf fronts. Measure the overall length and desired height and attach the new pieces inside the existing front using mirror tape, a strong type of double-sided tape available in hardware stores. Be sure to leave room above the extensions to allow easy access to items stowed there.
Working with acrylic sheet
Acrylic sheet can be purchased from plastics suppliers in clear and tinted shades. Buy it already cut to size or shape it yourself. To avoid scratching it, leave its protective paper covering in place while working with it.
Acrylic can be cut by hand or with a saber saw, but is easiest to cut with a table saw using a blade with a high number of teeth per inch. To reduce splintering, place a scrap of plywood under the acrylic and cut through both. The cut edges of this plastic sheet can be very sharp. Smooth them with fine sandpaper (300 grit or higher), taking care not to scratch the shiny surface. When drilling holes in it, use a blunt drill bit to avoid cracking the acrylic.
To make useful containers for small items, acrylic can be cut then joined with acrylic adhesive. A small tube of glue will last indefinitely if capped and kept refrigerated. After cutting the pieces, wipe away any dust and lay a thin bead of glue along the center of each joint. Hold or clamp the pieces together. The glue bonds in minutes but takes about 12 hours to achieve full strength.
Petrea McCarthy is an Australian freelance writer, long-term live-aboard cruising sailor, and former yacht rigger. She has been sailing for 45 years, circumnavigated the Australian continent, crossed the Tasman and Coral Seas, built two yachts from bare hulls and decks, and fitted out several others. Her idea of a mid-life change is racing a Laser on a freshwater lake near her home in north Queensland where she is also a sailing instructor.
Thank you to Sailrite Enterprises, Inc., for providing free access to back issues of Good Old Boat through intellectual property rights. Sailrite.com