Simple original construction means a simple repair
Issue 90: May/June 2013
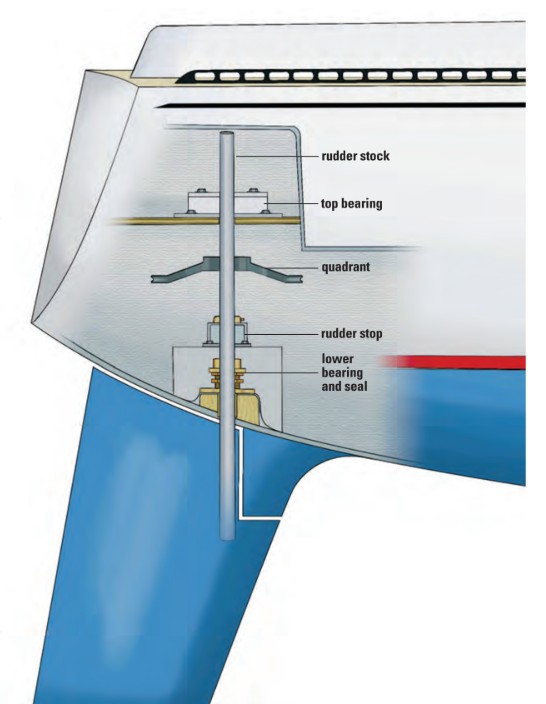
I should have paid more attention to my loose rudder bearing when I put the boat in the water, but it didn’t seem any worse than in previous years. Weeks later, during a day of sailing in strong winds, my friend yelled up at me from the cabin, “Hey, you’ve got water down here!”
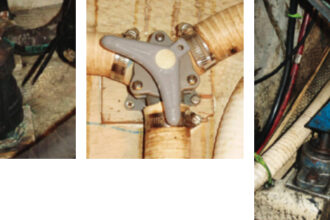
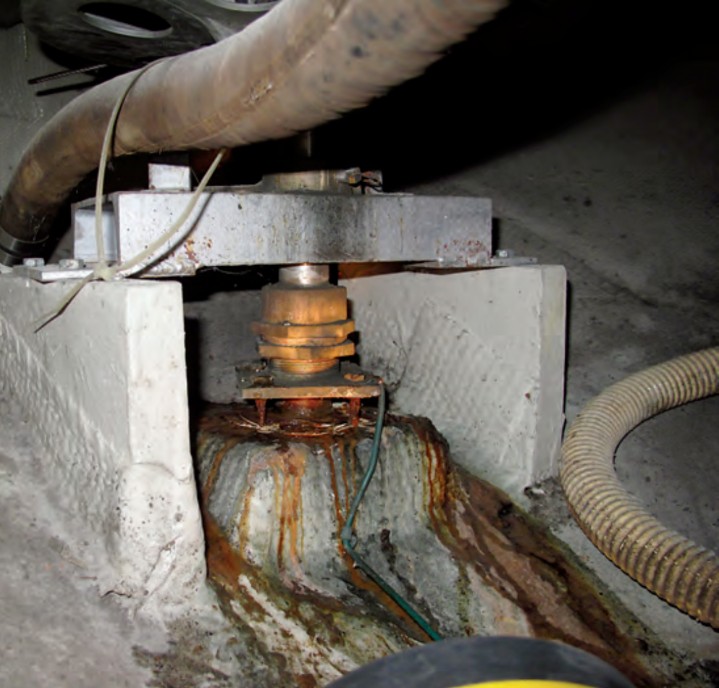
After pulling into the slip and pumping the bilge, I followed a small trickle of water back to my lower rudder bearing. The four lag screws fastening it to a block glassed into the hull had rusted away to tiny brown spikes. This, combined with the wooden block absorbing water and rotting, had caused it to work its way up the rudder post until it no longer provided a seal against the cold Lake Superior water.
I needed to do a quick fix for the leak until the boat could be pulled, so I smeared beeswax from a toilet ring — it sticks to anything — between the bearing flange and the rotted block and pushed the bearing against the block with small jacks made from bolts and coupling nuts. The leak slowed to a drip. That was good enough until the boat could be pulled later in the week. When he pulled the boat, the owner and operator of our marina thoughtfully placed it at the edge of his pullout dock so I could drop the rudder without first digging a hole.
Disassembly
Before unbolting the quadrant and stop collar from the rudder stock, I fastened a rope sling under the rudder. Together with the solid stainless-steel stock, the rudder assembly probably weighed 150 pounds. I could imagine it dropping into the mud below as I loosened the last bolt, but the sling held it in place. After all the hardware was removed, I lowered the rudder assembly with the sling and laid it on the dock.
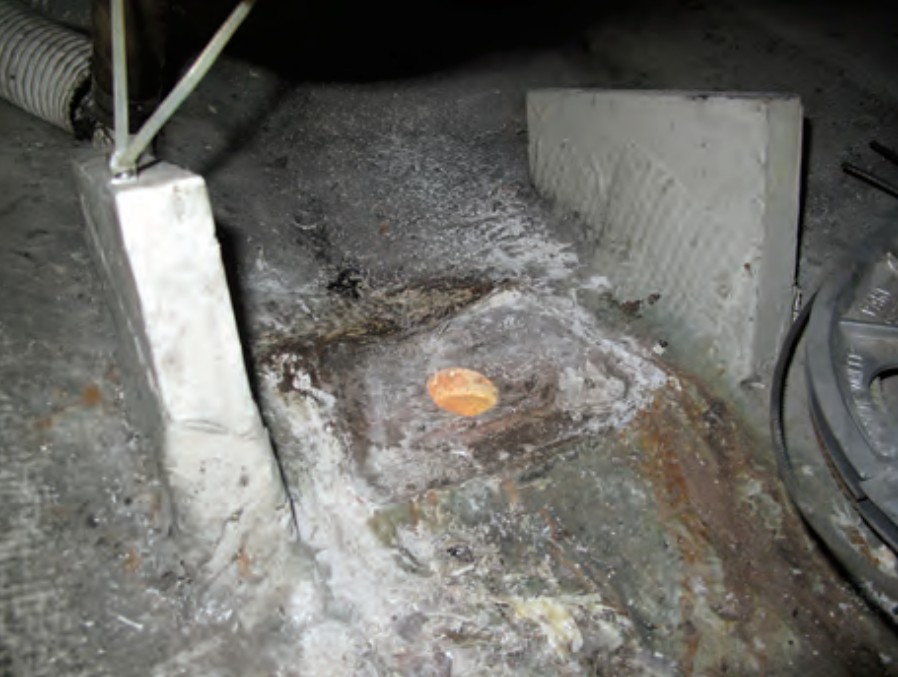
Using an angle grinder and an old chisel, I cut through the fiberglass covering the rotted bearing block and removed it. I was careful to keep it intact as it would be my template for the new one. I cleaned up the remaining fiberglass and the hull around it to provide a clean surface for mounting the new block.
Fabricating new parts
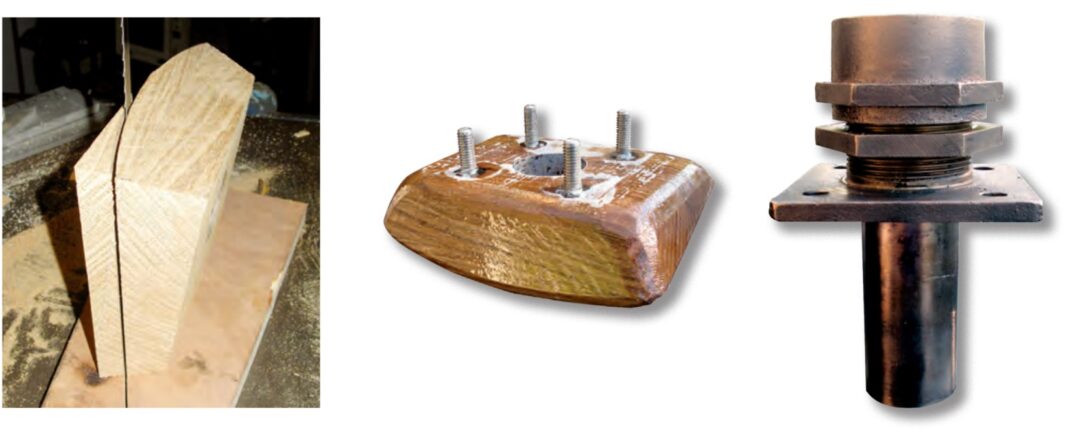
I selected white oak for my new bearing block, not only because it resists rot but also because I happened to have a piece thick enough to do the job. I cut the rough shape on my band saw, sanded it to its finished shape, and machined a hole in the block to accept the bronze bearing.
Instead of using lag screws to secure the bronze bearing, as in the original installation, I chose to epoxy stainless-steel bolts into the block. I then coated the entire block with several layers of epoxy. To help the epoxy penetrate the oak, I heated the block before I applied the first coat. As it cooled, it drew the epoxy into pores and crevices.
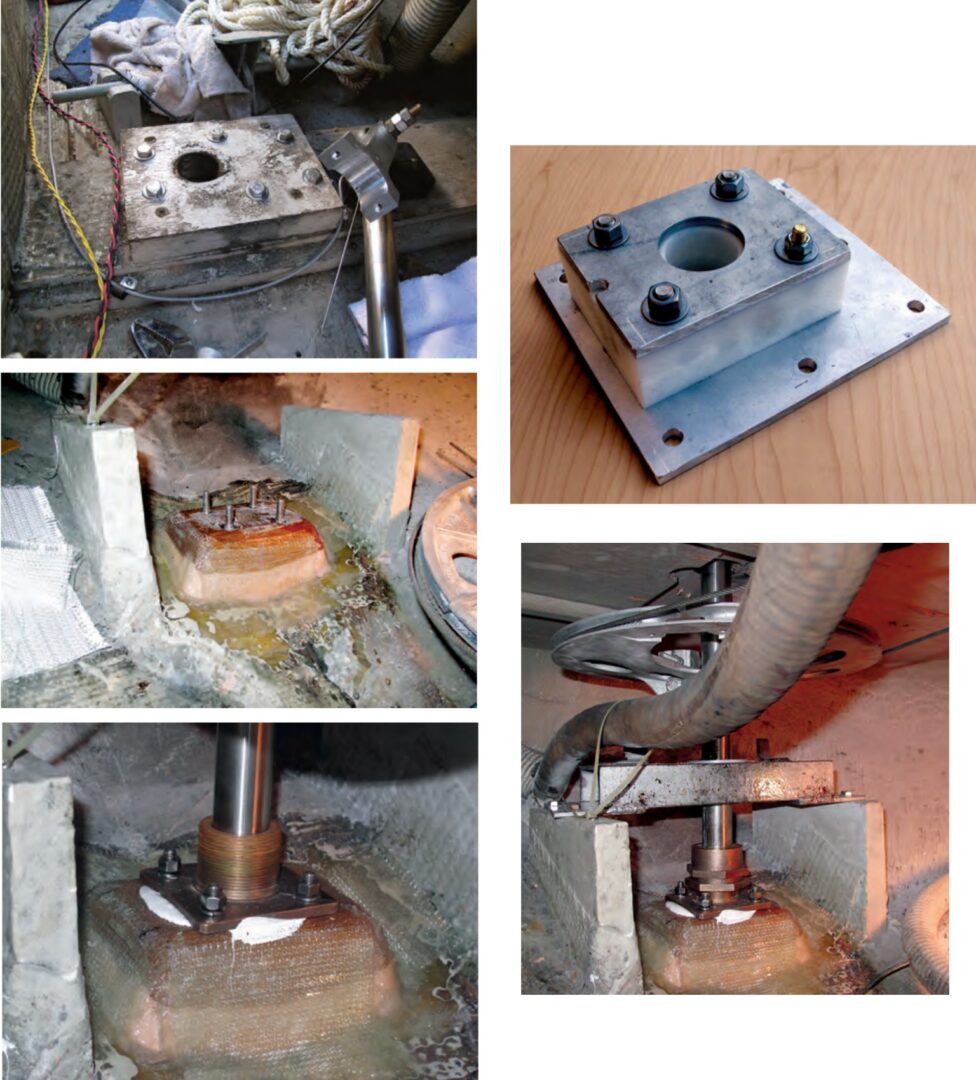
The upper bearing appeared to be getting sloppy as well, so I decided to replace it too. The old upper bearing was nothing more than a block of wood with a plastic bushing. I fabricated a new one from aluminum with an acetal (Delrin) insert.
Reassembly
To help align everything during reassembly, I used a length of pipe the same diameter as my rudder stock. I bolted the upper bearing in place and fitted the bronze bearing into the oak block. After applying Johnson Paste Wax to the temporary stock to prevent it from becoming permanently glued in place, I passed it through the upper bearing, lower bearing, and hull, and glued the oak block to the hull with a thin paste of epoxy mixed with milled glass. I checked the position of the block by making sure the pipe ran parallel with the skeg below the hull.
After setting the epoxy with the help of a hair dryer, I laid up several layers of 10-ounce fiberglass roving, adding extra layers in the corners to create fillets.
When the fiberglass had set up hard, I applied a liberal coating of 3M 5200 and bolted the bronze bearing in place. Once again, I used the temporary stock to assure that everything lined up.
To finish the job, I had to lift the rudder and fit the stock into the hull, through the bearings, quadrant, and rudder stop. The top of the stock had a slot for an emergency tiller. I drilled a hole though the stock at a right angle to the slot and pressed a short piece of rod into the hole. This created a means of attaching a rope to the stock. I then dropped a length of rope through the upper bearing, quadrant, stop collar, and the hull. After tying the rope to the stock, I stood the rudder up and used the mainsheet tackle to pull it into the hull.
Hindsight
I should have examined the problem as soon as I noticed the looseness in my rudder during my preparation for spring launch, but it’s so hard to be patient after waiting all winter. I would have saved myself from a wet boat and mid-season haulout fees and my downtime would have been during the marginal weather of early spring instead of the warm weather of summer.
From now on, you can expect me to make a thorough inspection of everything on the boat that will become inaccessible once it’s in the water . . . and then I’ll rush to put it in!
Jim Craighead and his wife, Annie, sailed their first boat, a 26-foot Chrysler, on Minnesota’s Lake Pepin for three seasons, learning how to sail and how to sink money and time into a good old boat. After towing the Chrysler up to Bayfield, Wisconsin, they learned that bigger waters called for bigger boats. They now use their S2 9.2A for weekend island-hopping in the Apostle Islands.
Thank you to Sailrite Enterprises, Inc., for providing free access to back issues of Good Old Boat through intellectual property rights. Sailrite.com