A little lumber and a little labor is all it took
Issue 86: Sept/Oct 2012
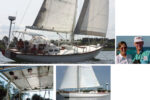
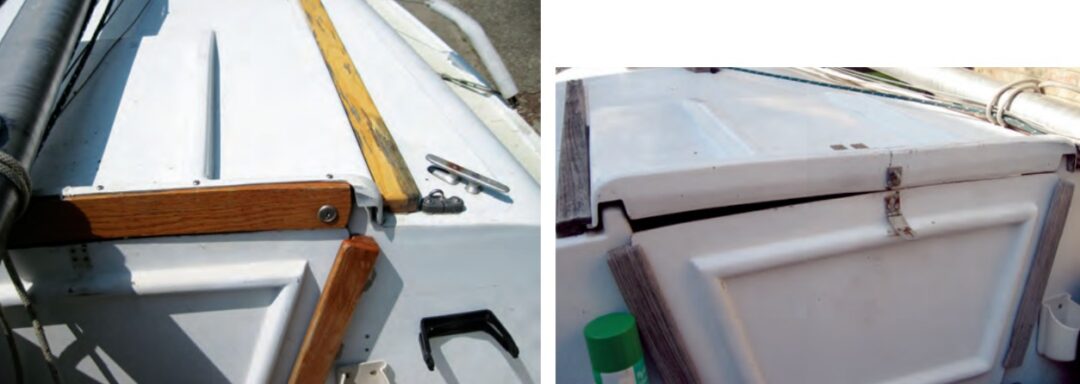
The hatch on my new good old boat, a 1972 Balboa 20, was not in the best of shape. The wooden pieces that enclosed the edges of the sliding hatch were pretty bad. Made of teak and probably original parts, they had not been maintained and were completely dried out. The port-side piece was split forward. The fiberglass sliding hatch itself was broken on the centerline. One of the easy repairs I planned for over the winter was to fix this mess.
I started by looking for some teak. For the guides, I knew I’d need two pieces 4-feet long, about 2-inches wide, and about 1-inch thick. These would need a groove cut into them to overlap the hatch. No problem.
One of the great resources for woodworkers in my area is Owl Hardwood Lumber. Their selection of furniture-quality wood includes the exotic, unusual, and bizarre — pau rosa, purpleheart, bubinga, and zebra wood, along with more mundane hickory, maple, and teak. Prowling the teak aisle at Owl, I looked over the variously sized pieces of rich, oily wood. I found a piece that met my requirements, turned it to read the price crayoned onto the back, and recoiled: “You want how much for this?” I knew teak would be expensive . . . but that much?
Chastened, I went around the corner and picked out a length of 6-inch-wide 5⁄4 white oak for $11. It might not last quite as long, but I figured I could replace it seven times over for the same cost as the teak.
Next, I needed to cut it to the correct size. I owned a hand-held circular saw that would do the job after a fashion, but to do it neatly and accurately I really needed a table saw. Luckily, a friend had one. With four quick passes, he cut my oak to the shape required. I applied three coats of spar varnish, sanding between coats, and I had my hatch guides.
I wanted the hatch to slide smoothly, so I bought a sheet of 1⁄16-inch-thick Delrin plastic. I cut this (and it was miserable to cut — I ended up using tin snips) into 2 1/4-inch-wide strips. I placed these on the cabintop, under the hatch and hatch guides, and used silicone caulk/adhesive to stick them down.
I was loath to drill more holes in the cabintop than were already there, so I transferred one of the screw-hole locations from each of the old slides to the new ones. (This was a mistake — I would have had a better fit if I’d simply positioned the guides close to the hatch, clamped them down, and drilled through from inside the cabin.) With the slides positioned by one screw each, I carefully aligned them parallel, then drilled and installed one additional screw each. With everything aligned, I removed the screws, coated the bottoms of the slides with sealant, filled the screw holes with sealant, and reinserted the screws to clamp everything down. After the sealant had set, I drilled and installed the remaining screws, with a daub of sealant on the shank of each.
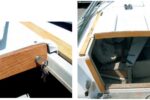
Hatchboard guides
For the vertical hatchboard holders, I went back to Owl for more white oak, this time 1⁄2-inch thick. I cut this into two pieces with my hand-held circular saw, getting one piece 2 inches wide and another 1 1⁄2 inches wide. I placed one atop the other and glued them together, ending up with a piece similar in cross section to the hatch guides but created without the table saw. After the glue had dried, I cut this piece into two pieces 14 inches long and varnished them.

Hatch-end mend
Repairing the broken aft end of the hatch had me baffled for a while. My original ideas were to form a wooden piece to fit inside the channel at the aft end of the hatch or to fill the channel with epoxy. Neither idea really appealed, and I eventually decided I could replace the entire back edge of the hatch with wood. So it was back to Owl for another length of 5⁄4 white oak, this time 3 inches wide.
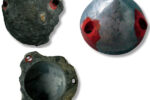
I forced a piece of sandpaper into the channel and rubbed a piece of blue foam insulation against it until I had the profile of the inside. With an abrasive blade in my circular saw, I cut off the back edge of the hatch. Using a little ingenuity and higher mathematics, I calculated what the original curve of the hatch had been and sawed the new white oak piece to match the curve.
To shape the oak to match the hatch, I first made some shallow saw cuts in the part that was to be removed. Using a wood chisel, I removed the excess wood between the saw cuts in large pieces. (This is a tricky procedure. I tend to make the notches too deep so that marks remain in the finished work, but it’s so much faster than planing and sanding.) I made a female template from the male piece of insulating foam and used it to check my progress.
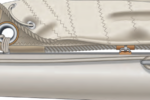
Finally, I had the piece finished. It was slightly curved to match the original hatch curvature, flat on the aftermost face, and rounded on the upper forward face to fit into the remaining portion of the hatch. After varnishing it, I applied a coat of glue and screwed it into place with #6 panhead screws.
Shortly after I completed this part of the project, the mast dropped onto the hatch. The new piece easily withstood the blow.
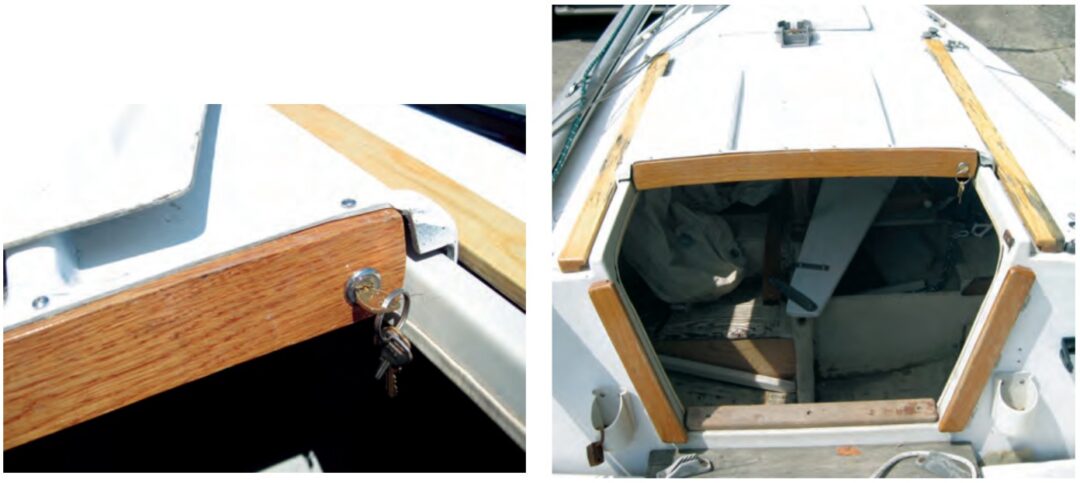
A new lock
The hatch originally had a traditional hasp secured by the obligatory rusty padlock. I wanted something spiffier, so I got a barrel-style lock assembly (made for locking a desk) from my local lock shop. I knew the lock had to be located with as much solid wood around it as possible, for strength, yet also had to be near enough to the edge that the tongue would engage the hatch coaming. After careful measurement, I drilled an undersized 7⁄16-inch hole in the new wooden hatch piece, then filed it into an oblong hole that was as close a fit to the lock as I could make it. After installing the lock, I marked where the latch plate struck the hatch coaming, then drilled and gouged a slot in it to clear the latch. When the lock was turned, the latch engaged the slot and secured the hatch from sliding. I added a 1⁄8-inch x 5⁄8-inch plate to the coaming edge to strengthen it.
The new varnished woodwork certainly looks much better than the old gray weathered teak did. At $15 or so for the wood, $8 for the lock, and a few dollars for stainless-steel screws and glue, the cost was quite low. All in all, it was a worthwhile project.
Charles “Chas” Hague is an engineer, bridge inspector, proud member of the U.S. Coast Guard Auxiliary, and serious user of tools. He sails his 12-foot O’Day on that little lake you see from the plane when landing at O’Hare. Future plans involve taking the 20 footer to bigger water.
Thank you to Sailrite Enterprises, Inc., for providing free access to back issues of Good Old Boat through intellectual property rights. Sailrite.com