Fixing the mast step without pulling the mast
Issue 65 : Mar/Apr 2009
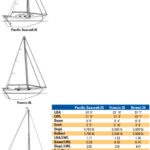
No matter how you looked at it, we had a serious problem. Our boat’s mast step was compromised and would have to be repaired. In December 2006, following an A-plus survey, I bought a 1977 Pacific Seacraft Mariah with a deck-stepped mast. I had it trucked from Florida to Lake Guntersville in Alabama and, to get the most use of the expensive crane, I stepped the mast the day the boat arrived, unaware that water had entered the step and delaminated the fiberglass skin.
In preparation for launching in May 2007, I tuned the rig. Ultimately, the boat’s movement in the slip added just enough stress for the step to develop horizontal cracks on its fore and aft edges and one running lengthwise under the mast shoe. The cracks looked like a capital H turned on its side. When I calmed down and called the surveyor, he said he had only looked for moisture in the hull. (Contact me if you want his number.)
The idea of dismantling the ProFurl over the water, renting a crane, and pulling the mast, only to have to do the whole procedure again in reverse after making the repair, dismayed me utterly, until I asked myself, “What would Captain Jack Aubrey have done?” One of my favorite sequences of the Master and Commander movie was his refit at sea. And hadn’t I read in Jack London’s The Cruise of the Snark how one man stepped a mast with nothing but a hull for help? There had to be a way to fix this thing without all the work, expense, and drama of taking that darned mast off the boat.
Too scary to contemplate
My first thought was to jack the mast up about 3 feet, secure it with some sort of four-legged table, repair the step under the table, and then lower the mast back down. Too scary. The next thought proved to be the winner. Why not use the big winch on the mast for the lifting, open the turnbuckles as far as possible, raise the mast only 4 or 5 inches, and move the base of the mast off the step while it straddled the main bulkhead on a temporary step and shoe? Why not, indeed?
The most serious problems I faced were figuring out how to use the mast’s own winch to raise it and how to prevent the disconnected base of the mast from sliding and bringing down the whole rig. Did I mention the pack of head-shaking naysayers taking bets from a safe distance on the multi-boat mast-crashing disaster that was sure to follow?
A frame to lift it with
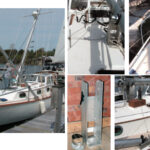
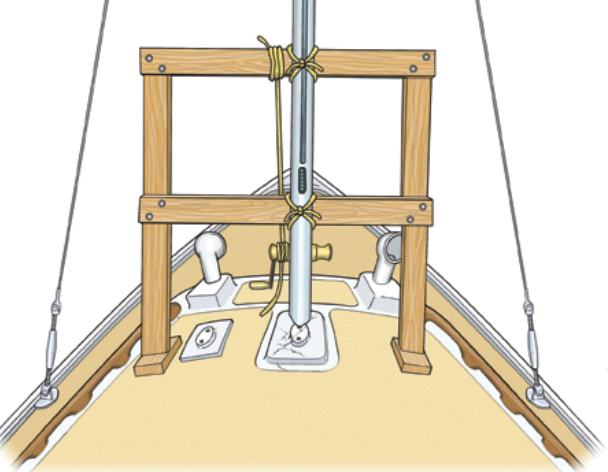
My son, Kyle, and I built a lifting frame out of three 2 x 6s. We cut off two 6-foot vertical legs at angles to match the crown of the deck. We attached feet to the legs with 4-inch deck screws. Then we bolted two 4-foot crosspieces horizontally to the legs: one at the top and the other in the middle where it wouldn’t interfere with the winch. Four-inch bolts with washers and nuts made everything tight. The lifting frame looked like a squared-off A.
We lashed both crosspieces to the mast securely enough to keep the frame upright and loosely enough for the mast to slide upward and through the lashings. We positioned the feet where the force of the operation would be supported by the main bulkhead.
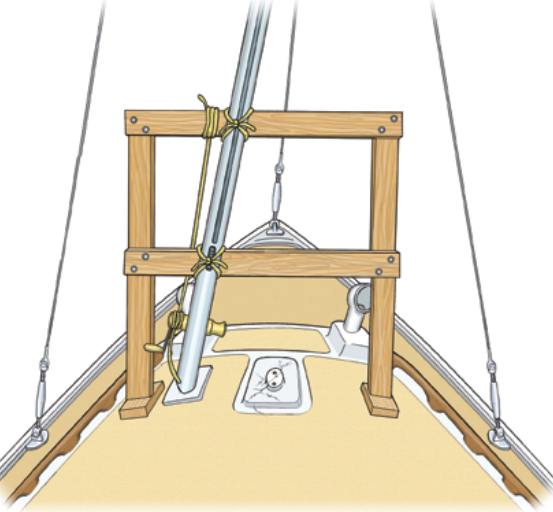
We made and placed a temporary plywood step and shoe to port of the step and between it and the foot of the lifting frame. We lined the bottom of the step with sponges to protect the deck and keep it from sliding. We centered this over the bulkhead for support.
Next we tied a 10-foot length of 1-inch double-braided line to the center of the upper crosspiece and led it down to the main winch. The cleat below the winch held what we got from the lifting.
A maze of braces
We braced the base of the mast port and starboard and fore and aft with eight ratchet-straps (two in each direction), all of them secured to heavy hardware.
This controlled lifting of the mast turned out to be harder than we expected. The idea was to loosen the turnbuckles and ratchet straps just a little, crank on the winch, raise the mast through the lashings as far as possible, secure the tail of the lifting line on the cleat, and repeat. Make that: repeat about 100 times. What made it a pain was the fact that we were only two, my son and I, to man the nine turnbuckles and eight ratchet straps. We would go to bow and stern, port and starboard, round and round, making slight adjustments and lifts. This was no pleasant stroll around the deck; the spider web of straps made each circuit more like a low hurdles course. To be more efficient at this, you really need one grinder for lifting and four helpers for loosening and tightening.
We ran into one issue with the turnbuckles fully extended: the new standing rigging — being at the beginning of its life of stretching — would not quite give us enough room for the base of the mast to clear the top of the shoe.
Our remedy was to secure a halyard from the masthead to the stern through a bridle we ran through the two hawse holes. We secured another halyard to the port aft-lower shroud turnbuckle base. With these extra precautions, we were able to detach the port half of the split backstay and the port aft-lower shroud. This move allowed the mast to go up and tilt to starboard, giving us the room needed to clear the shoe and disconnect the in-mast wires. Most boats probably have enough rigging play to make this step unnecessary.
Pretty as you please
To shift the mast base to port, we loosened the starboard ratchet straps and tightened those to port. When the mast was over the temporary shoe and step, we uncleated the lifting line and eased her down as pretty as you please. We went wild with excitement. The worried look on my neighbor two boats down encouraged us to carefully tighten all the stays, shrouds, and ratchets.
Having to look at my boat with her mast askew and the lifting frame resembling a gallows was the worst part of this project. The unnerving sight prompted me to finish the repair ASAP.
With the mast out of the way, repairing the step was straightforward. Using a grinder, I cut off the gelcoated top layer of glass, being careful to leave the sides of the step intact. What I found underneath made me glad I’d gone to all this trouble. The double layer of 1-inch marine ply was soaked through. An hour with hammer, chisel, sander, and grinder produced an empty box ready for epoxy, heavy fiberglass mat, 3/4-inch marine ply, and a plate of 1/2-inch stainless steel.
Since we knew the drill, putting the mast back in place was much easier. When it came down on the rebuilt mast step, we shouted with joy. As soon as the stays and shrouds were tight, we dismantled and removed the frame. What a relief it was to have the mast sitting straight up on a strong and dry step, even though the accredited surveyor tried to assure me that water-soaked lumber retains most of its strength. Still want his number?
Jeff Carlton is in advertising full-time, pastors a small church part-time, and with his wife, Cheri, sails their 1977 Pacific Seacraft Mariah, Sea Fever, whenever he can.
Thank you to Sailrite Enterprises, Inc., for providing free access to back issues of Good Old Boat through intellectual property rights. Sailrite.com