High-level protection at a low price
Issue 104 : Sept/Oct 2015
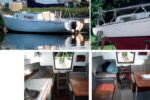
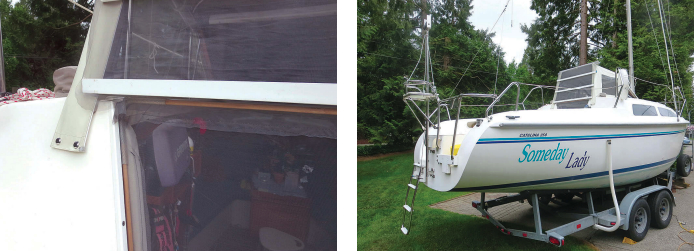
Sometime before we left — towing our 25-foot Catalina C250 WB (water ballast) — for a yearlong “road and float” 17,000-mile cruise around our continent, someone showed us how to make inexpensive, yet practical and functional, bug screens. This proved to be one of the best additions for comfort aboard.
We were planning to take the boat to remote places that could involve encounters with bugs, mosquitoes, and other nuisances in the cabin. Since we would be living aboard our 25-footer for an entire year, space was at a premium. Adding more “stuff,” even if it would be useful at times, was not desirable. If we were going to add screens, they would have to be compact and easy to store, simple to install and remove, flexible but tough enough to withstand some accidental abuse, and low-maintenance or, better yet, maintenance-free.
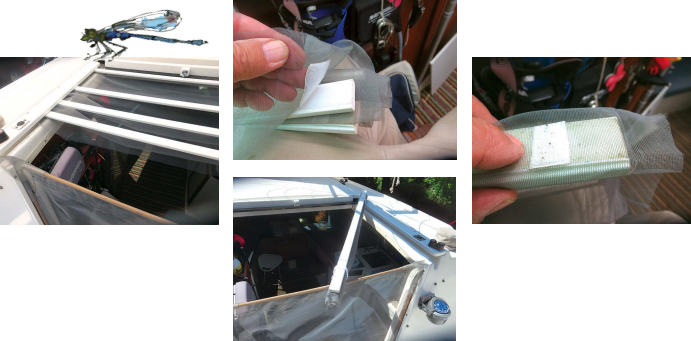
The trick to these screens is that they have frames made with wooden dowels joined at the corners with short lengths of flexible hose. They are adjustable, lightweight, and take up little space when stowed.
We bought 3⁄8-inch wood dowels, a length of 3⁄8-inch-ID reinforced water hose, and some good-quality screening material. We chose a polytype “no-see-um” screen, but later discovered that, although this dense mesh won’t let in any bugs, no matter how small, it also restricts airflow somewhat.
Simple construction
We first traced the shape of the hatchboard onto the screening material, allowing an extra 3 inches on both sides and the top and a generous 6-inch flap on the bottom. Using extra material is better as it can be cut to size later. After some experimenting with the flexibility of the hose, we decided to cut the dowels 2 inches shorter than the actual hatch opening at each connection, both in the vertical and in the horizontal directions. Longer dowels make tighter corners, but under some temperature conditions they may flatten the hose by forcing it to bend too sharply.
A sufficient hose-into-dowel “friction fit” is needed for the frame to keep its shape and conform to the shape of the hatch opening. In our case, a hose length of about 4 to 5 inches at each side of the joint served the purpose. The diameters of hoses and dowels may even vary slightly by manufacturer, affecting the effectiveness of the joints. Before cutting the hose to length, check the hose-dowel resistance and use a longer length of hose if you need more sliding resistance. Once you have adjusted the frame to the shape of the hatch, you may wish to consider gluing the joints permanently.
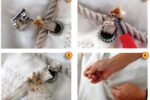
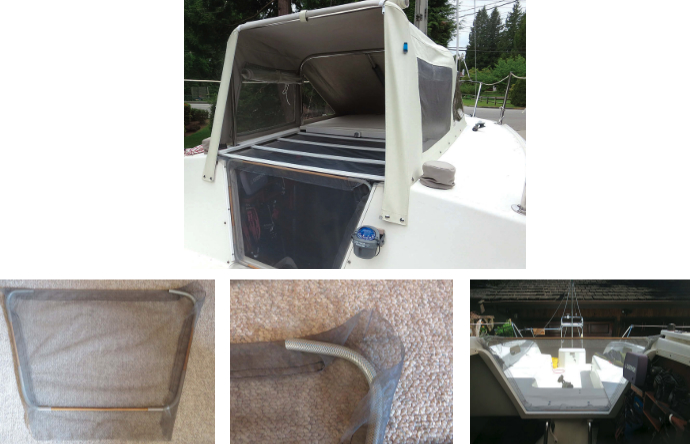
We folded the edges of the screening material over, leaving ample room to insert the dowels, and ran two lines of stitching along both sides and the top. We left the corners open so we could insert the dowel frames and left the material untrimmed at the corners to help fill any gaps.
The frame is friction-fit by sliding the dowels in or out of the reinforced tubing to exactly fit the hatch contours. To allow the flexibility to make upward and downward adjustments, we did not sew the 6-inch flap at the bottom.
More of a good thing
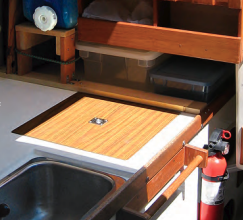
Once we had a screen for the vertical part of the hatch opening, we continued the job by adding a horizontal screen so we could also open the overhead sliding hatch. It uses the same screening material and four 1⁄2- by 2-inch slats (sold as doorstops at the local hardware store). We cut the screen to the exact width of the hatch opening and attached the screen along the full length of each slat with Velcro.
All four slats and the attached screen fit tightly from side to side in the track for the hatch slide. When it’s pulled forward into the hatch opening, the screen seals on the bottom rail. The forward slat meets the open hatch slide while the aft end overlaps the vertical hatch screen, sealing the entire area. To make the slats slide easily, we added little Velcro strips cut from the loop side to the bottom of each one.
We can also use this screen when the pop-top is in place. We seal the pop-top entrance by suspending the screen, using Velcro to hold it in place on top of the pop-top.
When not in use, both screens can be stored easily — one rolled up in a small bundle and the other laid flat.
Henk Grasmeyer, a native of Holland, learned to sail at the age of 6 in a rowboat with an oar and a bedsheet. Later, when living in British Columbia, he owned a Hobie Cat for years. Now retired, he and his wife, Johanna, sail and trail their Catalina 25 all over North America.
Thank you to Sailrite Enterprises, Inc., for providing free access to back issues of Good Old Boat through intellectual property rights. Sailrite.com