A holding tank vent revamp clears the air
Issue 104 : Sept/Oct 2015
I found an easy, inexpensive way to improve my boat’s holding-tank system. It cost $10, the stink is gone, and the catastrophe the original design almost caused won’t occur. I rebuilt the tank’s vent system, adding a valve and port that make it easy to clean the hose and through-hull fitting, and made a much better through-hull fitting. If a vent hose or fitting gets clogged (as my original fitting did) the system will smell bad and could become a brown disaster.
This project started when I replaced the house battery beneath the port-side cabin settee. The battery sits next to my holding tank and the smell under there was not good. Since the stink had been confined, I hadn’t noticed it until then.
The first suspects were the 1 1⁄2-inch hoses that connect the holding tank to the head and the macerator pump. My boat is 12 years old. In time, even the best sanitation hoses become porous to odors. At the intensity I experienced, the odor would soon have been obvious in the cabin. To test the hoses, I wet a rag in warm water, wiped the sanitation hoses with the damp rag — one at a time — and then smelled the rag. If a hose is leaking odor, the rag will pick up the smell. This easy test told me my sanitation hoses were not the problem.
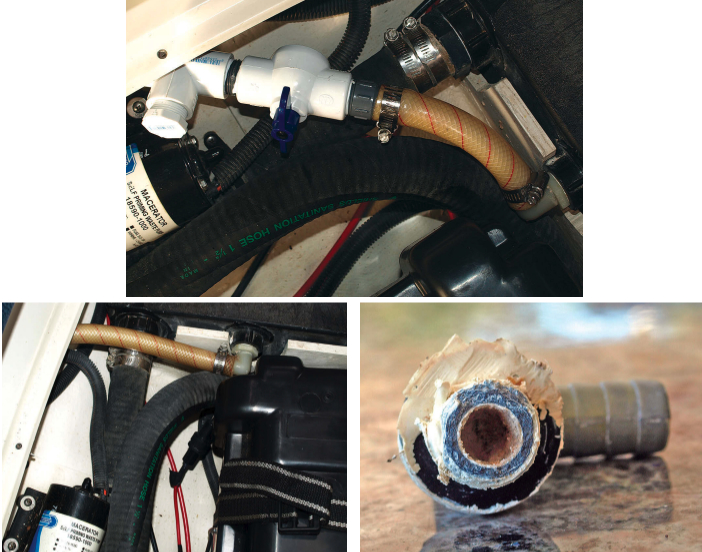
Next, I looked for a leak, and found none, so I did a lot of research and learned perhaps more than most people want to know about holding tanks and how they work. As it turned out, the culprit was the 3⁄4-inch vent hose. On my boat, that hose is reinforced plastic tubing. It was never designed to shield sewage odor. If sanitation hose had been used for the vent, as it is on some boats, the vent hose would not have become an odor problem, but my plastic tubing was emitting the smell trapped in the holding tank. A more serious problem was that the through-hull fitting for the vent hose was completely blocked.
Venting is necessary
Ventilation is a critical part of the holding tank system. Sewage not only smells bad, it produces nasty gases like methane, which is combustible. When you flush the head, the fluid that enters the tank pushes out an equal volume of air through the vent hose. This mixture of air and odorous gas then sits in the vent hose waiting for the next flush to deliver a new batch of nasty smells. In time, the plastic hose walls can become so saturated they begin to disperse the smell into the cabin.
The “good” bacteria that dissolve sludge in the tank need oxygen to do their work. When there is not enough air circulation in the tank, they use up all the oxygen and the “bad” bacteria begin to do their thing and create unpleasant odors.
In an ideal design, a holding tank would have two vent hoses and some way to promote cross-ventilation to supply oxygen for the “good” bacteria. In most boats, however, the only air movement occurs when normal daytime heating expands and expels air from the tank and contraction in the cooler night draws a little fresh air into the tank.
One of the clues that my vent hose had problems was the slow rising of the toilet flush handle when I didn’t lock it after use. This is a new toilet. Had the old one done that? I couldn’t remember. But I should have explored the possibility that pressure in the holding tank was pushing back. If the vent had been doing its job, there would have been no pressure in the tank.
If the ventilating hose becomes completely clogged at the through-hull fitting (insects love to nest there), flushing the toilet builds up pressure in the tank and can force a leak somewhere in the maze of hoses. At the next pumpout, if air can’t enter to replace the pumped sewage, the powerful vacuum system at a pumpout station could implode the tank.
Reinventing the vent
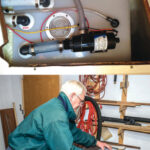
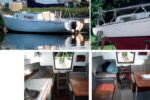
Replacing the entire length of the vent hose would have been difficult in my Catalina 28 Mark II. The hose rises from the tank fitting and disappears behind the back of the settee and icebox, then re-emerges to connect to the through-hull fitting in the space behind the electrical panel.
I had to come up with some other easy and inexpensive way to improve the system, and I devised a modification that will make it easy in the future to clean the vent hose and flush or back-flush the through-hull fitting.
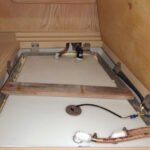
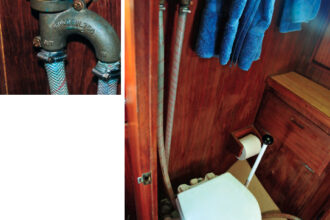
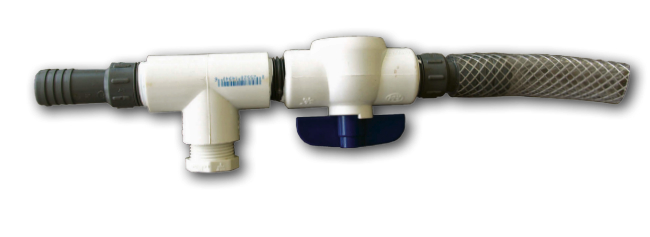
My first step was to install a PVC ball valve and a tee near the tank. With the valve closed, I can now use a garden hose to clean and flush odor from the vent hose and clear any obstructions at the through-hull or tank outlet. I can back-flush from outside the boat and choose whether I want that water to go into the tank or not.
In a bind, with the valve open, the assembly can also serve as a vent if the vent hose or fitting should be clogged when the tank needs to be pumped out.
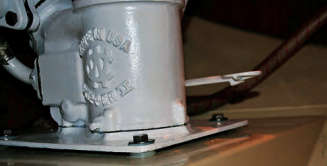
I tested the ball valve before buying it. Some are much easier to turn than others. Because this valve will be in line on a flexible hose, I didn’t want to struggle with opening and closing it. In addition, some valves are smaller than others for the same size of pipe. Since I didn’t have much space to work with, I chose the smallest I could find.
The ball valve, tee, and barbed nipples are threaded and sized to fit the 3⁄4-inch hose. I used Teflon tape on all the threads. During the installation, I cut about 1⁄2 inch off each barbed nipple to better fit the crowded space. I used a section of the original hose instead of new 3⁄4-inch tubing to connect the assembly to the tank. After I soaked it in bleach to remove any odor, it made the 90-degree curve without crimping better than the piece of new hose I had bought for the connection.
To begin the installation, I cut a tiny slit in the original vent hose just beyond the barbed nipple at the tank. This was to release the air pressure inside the tank. The smell was overpowering, but cutting the hose without doing this could have resulted in sewage spraying all over the cabin (and me) if the tank had been full or nearly full. Once the pressure was released, I found the hose had taken a “set” to the barbed tank nipple and couldn’t be pulled off. I slit it and peeled it off.
At the other end of the assembly, I cut the length of the original tubing to fit and used petroleum jelly to help slip the tubing onto the new barbed nipple. I secured the tubing connections with all-stainless-steel hose clamps.
I positioned the assembly so I can easily turn the valve. I can also use the tee as a port to flush or back-flush the vent hose and through-hull fitting.
Flushing and back-flushing
To flush the vent hose and through-hull fitting, I close the ball valve, remove the tee plug, and screw in a 3⁄4-to-garden-hose adapter. I attach a garden hose to that adapter and turn on the water. If the through-hull has been clogged from the outside (probably by dirt daubers) the water pressure from inside should blow out the clog.
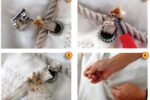
The valve and tee assembly also provides an easy way to back-flush the vent if the clog is from the inside. Most through-hull fittings have screens to prevent insects from entering the vent hose. But removing the through-hull fitting to clean a clog on either side would be a major project on most boats. After installing the assembly at the holding tank exit, I adapted a plumber’s sink plunger for the back-flushing.
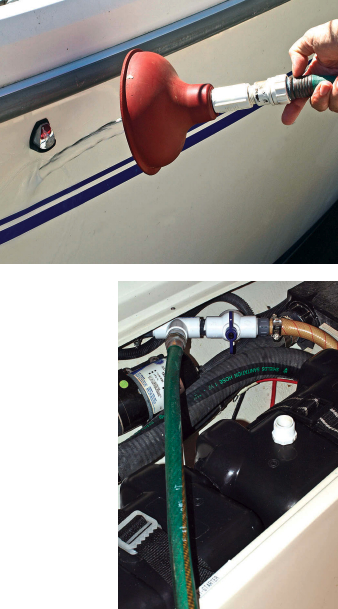
I removed the handle from the plunger and used a hole saw to cut a 3⁄4-inch hole into the inside of the rubber plunger. A short threaded 1⁄2-inch plastic nipple screwed into the plunger makes a watertight connection. On the outside (where the handle used to be), I screwed a PVC female garden-hose fitting onto the nipple.
To back-flush, I close the ball valve on the vent hose assembly. (If this valve is left open, the back-flush water will go into the holding tank.) I replace the tee plug with the garden hose adapter, then run a length of hose from the assembly to a bucket or plastic jug. If I want to clear the fitting at the tank, I just leave the valve open and the tee plug in place.
Outside the boat, with the water running, I hold the plunger against the hull over the through-hull fitting. A lot of water will escape during this process, so I can’t tell if the clog is cleared. If there’s water in the bucket, that means I’ve succeeded.
A better hull fitting
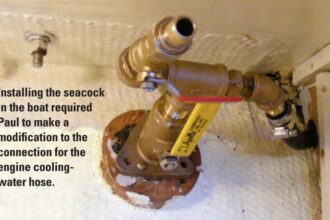
Back-flushing should clear the clog if it’s on the inside of the through-hull fitting. But my fitting was so clogged neither flushing nor back-flushing would work. I discovered when I removed the fitting it that its inside diameter was only 3⁄8 inch. This is far smaller than the 3⁄4-inch hose and clogs more easily, so I made a new fitting with two PVC elbows.
As it turned out, the hole through my hull was slightly less than 3⁄4 inch in diameter. Almost perfect for my project! I used a Dremel tool to enlarge it just a bit so a threaded 1⁄2-inch PVC nipple would go through the opening with a tight fit.
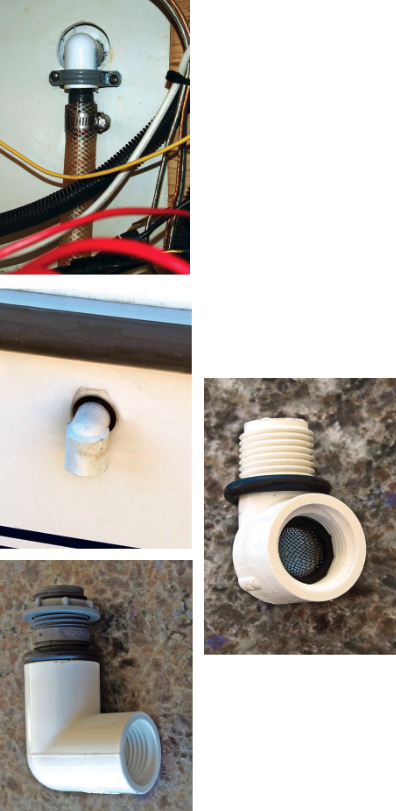
On the inside of that hole, I used a 1⁄2-inch PVC elbow, female-threaded at both ends. I screwed a 2-inch-long nipple into one end of the elbow and then lubricated that nipple and pushed it into the 3⁄4-inch flexible plastic tubing. A stainless-steel clamp secures the tubing on the nipple. A 1-inch pipe strap fastens the elbow in place centered on the hole in the hull.
On the outside of the hull, I used another 1⁄2-inch threaded elbow, male on one end and female on the other. Because the elbow inside the hull was held in place by the pipe strap, it was easy to screw the male end of the outer elbow into the female elbow on the inside. An O-ring against the hull made the fitting watertight.
As it turned out, the space between the inside and outside of my hull was exactly what was needed for a tight fit. If this distance had been either longer or shorter, I could have drawn the outside elbow and O-ring tightly against the outside of the hull using a plastic nut (made for electrical conduit) inside the hull on a close-threaded nipple between the two elbows.
Before installing the outer elbow, I trimmed a screened garden-hose washer so it would fit inside. A threaded elbow is better than a smooth, “push” fitting designed for PVC glue as the threads will hold the screened washer more securely in place. The stainless-steel screen prevents bugs from nesting inside, it won’t rust or corrode, and can be easily and cheaply replaced if necessary.
I felt very lucky to have discovered the clogged vent before pressure in the system caused a major leak or my holding tank imploded during a pumpout. I’ll be more careful in the future. It’s just one more critical item on my sailboat checklist that I’d never thought about before.
Clarence Jones began sailing in a 12-foot dinghy 40 years ago, then sailed through a series of trailerable boats — two MacGregors, then two Precisions. The big change occurred in 2007 with his 28-foot Catalina, which he moors behind his canal-front home on Anna Maria Island in the mouth of Tampa Bay. Part of the joy of sailing, Clarence says, is inventing modifications for his boats. He has published almost two dozen magazine articles about them, and two books: Sailboat Projects (2012) and More Sailboat Projects (2015).
Thank you to Sailrite Enterprises, Inc., for providing free access to back issues of Good Old Boat through intellectual property rights. Sailrite.com