Recycle shrinkwrap and save time and money
Issue 77 : Mar/Apr 2011
It was the worst of times: I didn’t know if I would launch our beloved 33-foot Cape Dory, Femme du Nord, in spring. I didn’t know if I would be out of a job come haulout time. What’s worse, I couldn’t remember whether there would be any appropriate beverage aboard when we came up for spring cleanup and fitting out. These thoughts had been brewing all winter.
As it was the height of the recession, I was also brooding about the shrinkwrap we laboriously cover the boat with each fall — could I possibly use it more than once? These thoughts were accompanied by other seasonal worries about whether it would rain or be too windy to get the job done over the one springtime weekend my work schedule would allow.
But after I made it up to the boat in the spring of 2009 — my head cloudy and the car dragging low with all the tools, food, and supplies stowed in the trunk — everything became perfectly clear as I stood on the foredeck under the pale white, shrinkwrap-filtered sun.
Cut to a plan
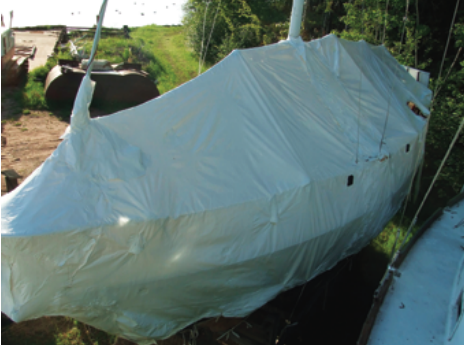
Figuring I had nothing to lose by trying to salvage the shrinkwrap film, I started cutting the film off more carefully than usual. Normally, we slice away and get the stuff off as fast as possible to open up the boat to the sky and sun again. This is a ceremonial ritual as much as a basic job. But this time, I first thought about how I should do it if I wanted to reuse it in the fall.
To begin, I made one cut athwartships just behind the mast, cutting from the topsides up over the frame to the other rail. I also cut the longitudinal strapping embedded in the bottom of the shrink film we call the skirting. (During the regular shrink process, the skirting strap is run all around the boat just above the waterline. This is normally set up before the shrink film is added as a place under which to tuck the extra film. This strap and the folds of shrink film are then welded together with heat to make a strong edge that can be used to tie the cover to the cradle.)
After making the big athwartships cut, I had two big pieces of shrink film. I then had to make a series of smaller slices so I could remove them from the boat. One cut was to the mast, one was just off the bow from the waterline up to get around the forestay. I made a horizontal slit each side at the shrouds and a vertical slit for the backstay. You’ll note that most of us store our boats with the masts proud here in the northern lake country.
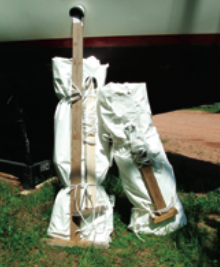
Next, I pulled the two sheets of film off the boat, rolled them up, marked them “bow” and “stern,”and stowed the rolls away for the summer in a shed. Each roll measured about 4 feet tall by 2 feet in diameter. I saved the 2 x 4 framing posts and some extra strapping and scrap film.
Pre-shrunk cover
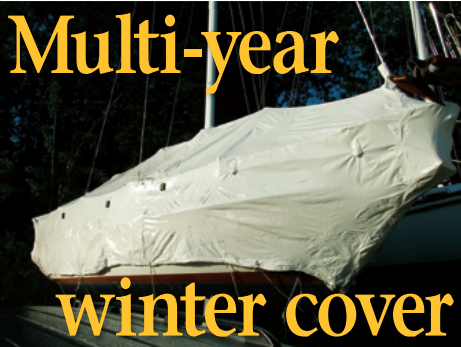
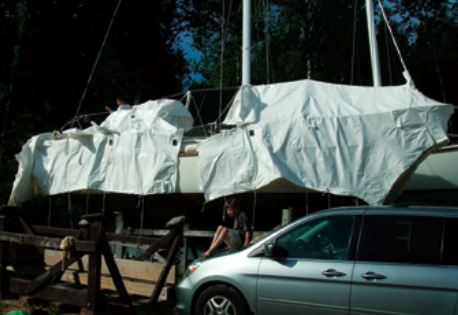
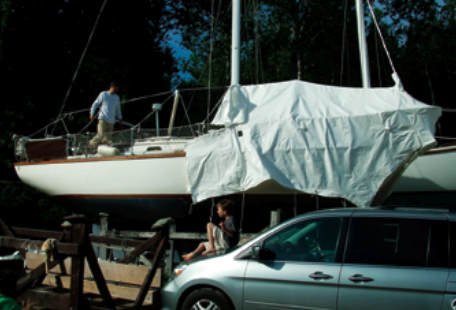
We had a nice sailing season and, come the fall of 2009, we set up the frame as usual, taking care to put the posts right where they normally were. We hauled the rolls up, rolled them out over the frame, and fitted them as tightly as possible, first the bow section, then the aft section. We got everything pretty close to where it had been the year before, pulled the two sections together as tightly as we could, then laid on the tape.
We did not skimp at this stage. We taped both sides inside and out and also made several cross sections for added strength. This took two of us and was the hardest part. You could do it with one, but you wouldn’t get the cover nearly as tight. The bow and stern came together well. We needed an extra 2- x 6-foot sheet of film to close the aft portion where we had made the slit for the backstay. It seemed to work and, although it was a little less tight and wrinkle-free than a fresh job, it was still better than some pro jobs I have seen. Our goal has always been to have the end product look as good as a professional shrinkwrap job. We added some strapping to tie the skirting together, tied down the whole thing to the cradle as usual, checked for holes, and were done.
Labor saved
This process saved three major steps in our normal routine:
- Tying, tucking, and welding the skirting
- The cutting and fitting of new film
- Moving around the entire boat with a flamethrower, setting up ladders and planks, and tearing out our deltoids
In addition, we saved the time we usually spend cutting in the 10 vents (God smiles on a sailor who ventilates his boat) and doing “hole patrol” to find and repair the inevitable burn holes. Since the process of recycling last year’s shrinkwrap starts out with a custom-fitted plastic tarp, it took us two thirds of a day instead of the full day and a half needed when doing the complete job from scratch. As a bonus, I didn’t worry as much about the weather, although the shrinkwrap must be dry for the taping step. When shrinkwrapping a boat with new film, rain or wind really make the propane shrink process hopeless.
For my recycling project, I bought a roll of strapping and two rolls of tape from Dr. Shrink, at a cost of about $50, and I have enough left over to do it again. Assuming you reuse the frame, to reuse the old shrinkwrap you only need strapping, tape, and a little film to cover up the tight spots.
There is the question about the effect of ultraviolet light on the film’s strength, but in our region the sun is pretty weak over the winter and many boats have film covers that are still good after a few years on the hard. I have heard of some folks doing this for years on end. I don’t think I would do it longer than two or three seasons but, for saving labor, time, and money, reusing the winter cover really worked well for me during the worst of times.
Paul Danicic directs a small environmental non-profit in Minnesota. In the past, he has managed a YMCA wilderness expedition camp, held a US Coast Guard Masters License, taught sailing, and worked in marinas. He and his family sail their almost 30-year-old Cape Dory around the Apostle Islands.
Thank you to Sailrite Enterprises, Inc., for providing free access to back issues of Good Old Boat through intellectual property rights. Sailrite.com