One man’s response to an emergency haulout
Issue 49 : Jul/Aug 2006
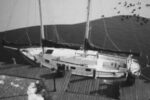
When my wife and I were trapped by fog in Burgeo, Newfoundland, we met Dave and Fran Dickenson, who were trapped there as well because their engine had blown up. They were cruising on Saskatchewan, a beautiful cold-molded, wood/epoxy composite boat Dave had built in England. They were in Burgeo because the province of Newfoundland maintains many marine centers with Travelifts.
While Ellie and I were alternately having fun and being bored in the fog, Dave and Fran were preparing their boat for winter storage. Their summer cruise had ended abruptly.
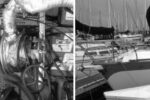
Canadian marine centers are designed to support fishing boats and make no provision for blocking up sailboats for storage on land. This meant that Dave had to build his own cradle. Fortunately, Dave is a shipwright who, when not out cruising, maintains a fleet of wooden shrimpers on Chesapeake Bay. I was awed by the prospect of having to build a boat cradle, so I watched Dave in action and took notes and photos. Later, Dave and I worked together and prepared these instructions.
The cradle I describe works for a boat with a full keel or a keel long enough to support a boat on blocks, and the weight of the vessel on the crossbeams provides an anchor point for the hull supports. When these supports are all tied together, they resist any forces that could cause the boat to topple over.
For a yacht that will remain unattended for months, we believe a cradle is superior to jack stands because wind-generated vibration can sink metal stands into soft ground and loosen them from the hull. A cradle, with its heavy load, will sink into the ground as a unit.
An emergency of the sort Dave and Fran faced is not the only reason to build your own cradle. A new steel cradle could cost as much as $2,000. Dave’s self-built cradle cost only a few hundred dollars and is just as good.
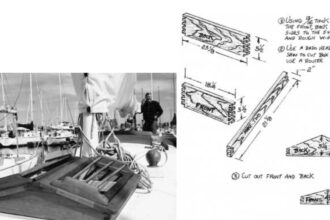
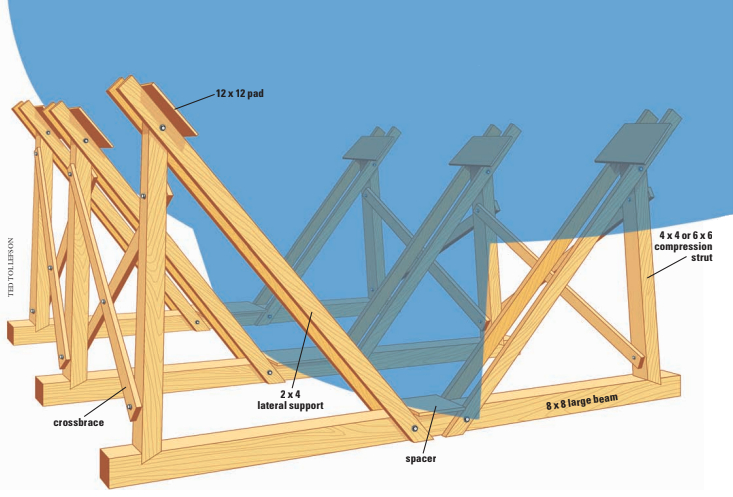
To begin with, you need three large beams, the bigger the better, but try for 8 x 8s or larger, depending on the weight of the boat. If necessary, you can laminate each beam out of three or four 2 x 10s. The wooden beams can be a little longer than the beam of the boat itself, but they must not be shorter. Cut notches at the ends of the beams as shown in the illustration. Mark the center of the beams.
Place the beams on the ground with the notches up. Place a 1-inch-thick spacer on each beam astride the centerline. Using the Travelift, move the boat over the beams. Lower the boat onto the beams, adjusting them to get the boat exactly on the center lines. Later the lift can raise the boat just enough to remove the spacers so the weight of the boat descending that final inch can spring the cradle into tension. Construction will probably take a few hours, so work out the timing with the lift operator.
Through-bolt 2- x 4-inch lateral supports to the beams so the ends of the supports clear the turn of the bilge and touch the hull at about the waterline. Place one on each side of each beam on both sides of the hull.
If bolts of proper length are not available, use threaded rod cut to length. Place washers between all nuts and wood. The project requires a handsaw, hammer, suitable wrenches, and a drill capable of pushing a long 9⁄16-inch bit through soft wood.
Cut one end of each of six 4 x 4 or 6 x 6 compression struts shaped to fit the notches previously cut into the ends of the beams. Cut each strut to length so that each pair of lateral supports and its strut (with the lower end of the strut lodged in the notch at the end of the beam) all come to rest at the same point on the hull. The struts must stand at least vertically. It’s better still if they lean in toward the hull.
Bolt the upper ends of each pair of supports and its strut together, tightening the ends of the supports to the strut. Mount 12-inch square pads covered with carpet material between the supports and the hull. Place the supports and struts in position with the pads against the hull and the lower end of each strut lodged in the notch on the beam.
Now using the Travelift, lower the entire weight of the boat onto the cradle. This puts the structure into compression and makes the notches in the beam ends work for a living. The lift can now be removed if necessary, but it’s best to keep it in place until you have bolted crossbraces on the struts to minimize any fore-and-aft lean. There you have it.
At that point, all Dave had left — after decommissioning the boat — was to build a frame on deck and cover the boat with tarps and fishnet, all properly tied down. Oh, and then there was the small detail of the blown engine. Well, you get the idea. Let’s hope the rest of us never have to face such an ordeal. But thanks to Dave, at least now we know how!
Thank you to Sailrite Enterprises, Inc., for providing free access to back issues of Good Old Boat through intellectual property rights. Sailrite.com