Thorough preparation is the golden rule
Issue 62 : Sept/Oct 2008
Before you apply any bottom paint to your sailboat, some basic preparation is in order. This includes not only having the proper application equipment and the correct amount of paint on hand, but also having the necessary safety and cleanup equipment assembled.
By its very nature, bottom paint is toxic. And, since the majority of the work will be conducted over your head, bodily contact with the paint is seemingly unavoidable. Proper personal protective equipment (gloves, clothing, eye goggles, and a respirator) will help prevent overexposure to any sanding residue or to the paint. It’s also a good idea to place a tarp beneath the boat. The tarp collects any sanding/scraping debris and paint splatters, and it may help keep dust off the freshly painted surface.
Surface preparation
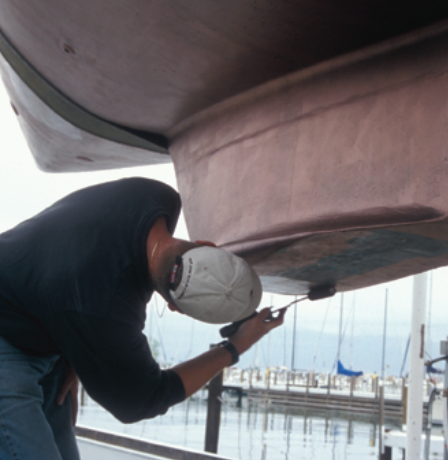
Adhesion of the new paint is directly related to the quality of what’s beneath it. If the old bottom paint is in good condition, all you need to do is sand it with 80-grit paper, wash off the dust, and roll on a fresh coat or two of new bottom paint. With an uneven or thick build-up of paint, it may be necessary to resort to a more aggressive approach such as scraping or chemical stripping. Once the loose or flaking old paint has been removed, the surface should be sanded.
If this is the first time that the boat’s bottom is to be painted (or if, after sanding/stripping, a significant amount of gelcoat is showing), it would be wise to either apply a primer or sand the boat’s hull with 80-grit paper prior to applying the first coat of bottom paint. Fiberglass, by itself, is not the best material for holding paint. Applying primer or sanding the bottom creates a surface porous enough for the bottom paint to adhere. Additionally, a new boat that has not been previously painted has mold-release wax on its fiberglass. This wax must be removed before any kind of paint will stick. Clean the hull thoroughly with a dewaxing solvent, changing rags often throughout the process. Once cleaned, the hull is ready for sanding or priming prior to the application of bottom paint.
Application
At last, it’s time to roll on the bottom paint. Assemble your application and cleanup equipment: short-nap roller, sponge brushes (for use in tight areas where the roller can’t reach), paint tray, mixing stick, solvent, and rags. Once you’ve marked off the waterline with masking tape, don your disposable clothing, such as a Tyvek suit, and put on your gloves and goggles.
Mix the paint thoroughly with your mixing stick, making sure to stir up all the sediment from the bottom of the can. In most instances, it’s the cuprous oxide biocide that’s on the bottom of the can. Once the paint is well mixed, decant some into the paint tray. To make cleanup easier, use a disposable tray liner. Place the lid securely back on the can to minimize evaporation and to prevent an expensive accident. This is the voice of experience speaking.
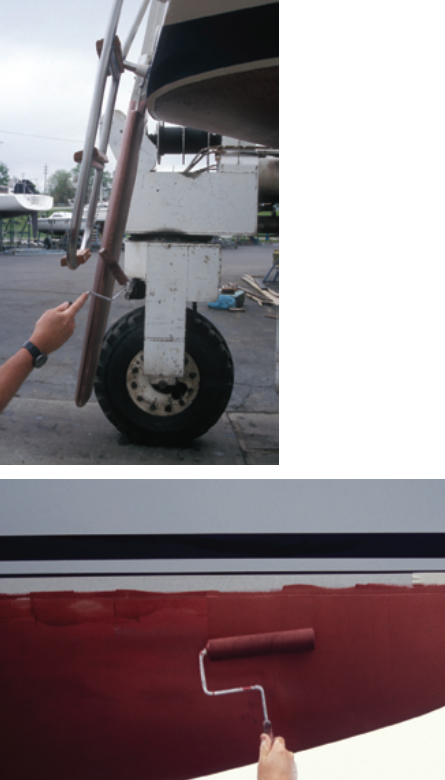
Start painting at the bow. Try to work at a comfortable height. Kneepads help, and a roller handle extension saves a lot of stretching and makes painting the keel easier. Dip your roller into the paint tray, unload the excess paint on the tray’s slope, and begin by rolling it up and down on the hull from waterline to keel. To insure proper coverage, go over the area from side to side. Using this technique, work your way aft.
The cuprous oxide is a high-density material that settles fairly rapidly. Therefore, each time you refill the tray, be sure to stir the paint. If the cuprous oxide is not evenly distributed within the paint, some areas of your hull won’t be adequately protected. Apply an extra coat of paint along the waterline and on the leading and trailing edges of the keel and the rudder. Bottom paint doesn’t last as long in areas where there is constant water turbulence.
Performance and thickness
Generally speaking, the performance of bottom paint is directly proportional to its thickness. Don’t try to economize by thinning the paint. Follow the manufacturer’s recommendations. For the first coat (the flag coat), use a bottom paint of a different color. When applying additional coats or when sanding, the flag coat will signal when you’ve obtained complete coverage or when you’ve sanded enough.
There’s no need to paint the prop or shaft. Also, be sure to leave all zinc anodes unpainted. And if you’re planning on installing fresh zincs, make certain that their mounting locations are paint-free. To protect any underwater transducers, use specially formulated transducer antifouling paint.
Lastly, keep your receipts and make note of the paint’s batch number, just in case there’s a problem later on.
Gregg Nestor, a contributing editor with Good Old Boat, developed a keen interest in sailing while growing up on the southern shore of Lake Erie. His third book, currently at the publisher, has a working title of To Windward at 55: The Trailer Sailer Owner’s Manual. When not writing about sailing, Gregg and his wife, Joyce, cruise aboard Raconteur, their Pearson 28-2.
Thank you to Sailrite Enterprises, Inc., for providing free access to back issues of Good Old Boat through intellectual property rights. Sailrite.com