Delaminated fiberglass may conjure up images of free-falling straight through to the bilge but it need not frighten the most resourceful among us.
The word “delamination” causes instant visions of a good old boat coming apart at the seams. Worse, those visions may be equated with an unsalvageable hulk lying in the mud of a river bank. Bad jokes have been published of a prospective buyer falling through a deck or into the bilge. These visions and jokes ring somewhat true sometimes, but does a delamination problem predict the end of a good old boat? Is there useful life after delamination? Let’s examine the causes, effects, and eventually the cure for this common good old boat problem.
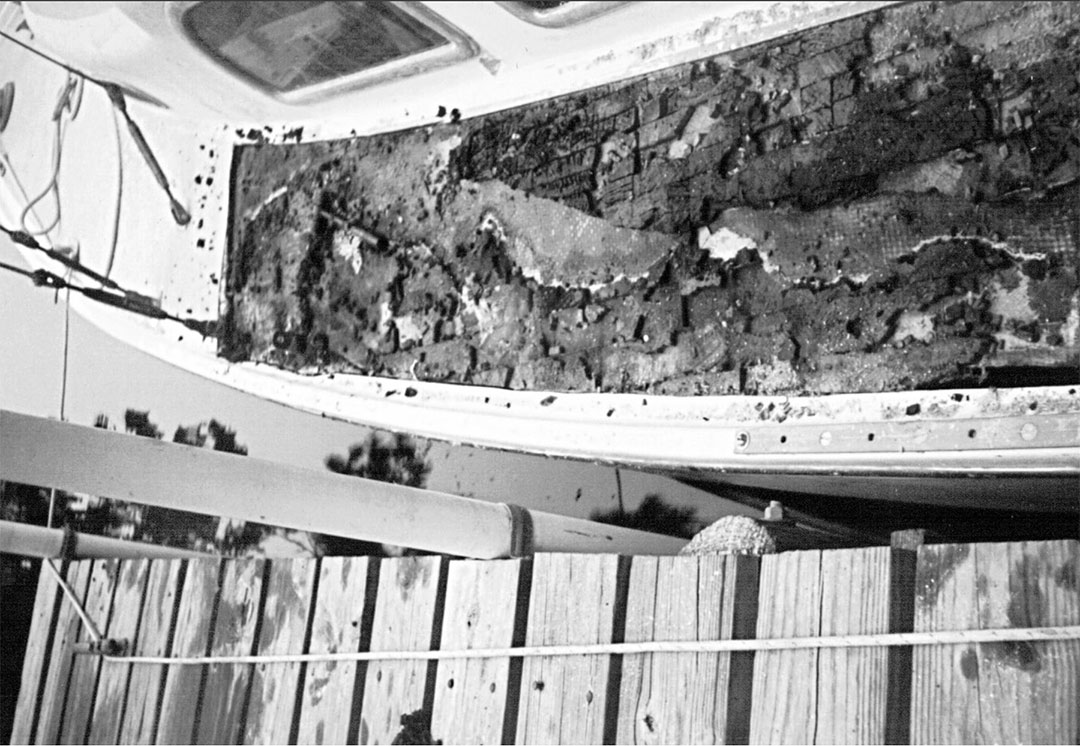
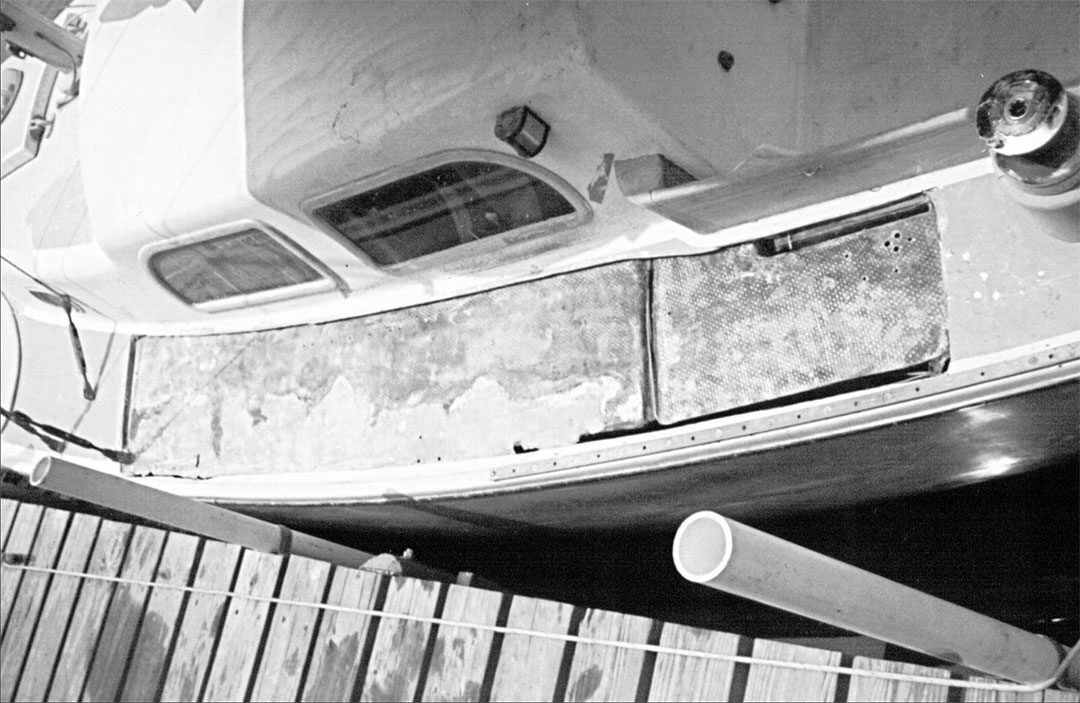
The Rotted Core Just Below the Fiberglass Was Not a Pretty Sight.
Delamination is the separation of layers of fiberglass cloth and resin from each other or from the core sandwiched between the layers. The cause of fiberglass delamination is usually physical stress to the fiberglass surface. This ruptures the surface skin and allows water to enter the laminate and migrate into the core. Delamination can also occur from repeated surface impact even if the skin is not broken and water does not enter.
Most delamination occurs on the decks or in the cabinhouse structure of a boat, although it is possible for delamination to occur in the hull itself, particularly if the hull is cored.
Some builders used cored hulls for rigidity, as well as for sound and temperature stability. The core material (usually end-grain balsa squares, occasionally plywood, and sometimes foam) separates from the fiberglass skin above or below. Once the separation takes place, the core deteriorates from water intrusion or turns to dust with repeated impact.
When an area has delaminated fiberglass, it is substantially weaker and will feel soft when walked upon. An easy way to check for delamination on a horizontal surface is to walk barefoot on the surface and to dig your toes into the deck or cabinhouse. A soft or giving feeling will indicate potential areas of delamination. These can then be critically examined. A solid deck should feel like a rock.
Depending on the size and location of a boat’s delaminated fiberglass area, a cure may be possible, affordable, and prudent. It is never cheap or easy. Commercial boatyards charge exorbitant sums just to attempt fiberglass repairs and usually will not guarantee their work. The reason is that without totally disassembling the area, cleaning out the damaged core, and recoring the structure, it is often difficult ensure that the fiberglass delamination repair has has reached all impacted areas.
Is Delaminated Fiberglass an Easy Fix?
Several technical publications recommend an “easy” fiberglass delamination repair which involves drilling a series of holes through the top skin of the deck and forcing epoxy resin into the holes until it fills the void and emerges from another hole. This method is unsatisfactory for the following reasons.
The delaminated fiberglass area must be completely dry for the epoxy to bond to the top and bottom skin. There is no way, even if core samples are taken, to know if all of the area is dry. Due to working “blind,” you cannot be certain that the epoxy completely fills all the voids. A small solid, non-delaminated area may form a dam and restrict the epoxy from flowing into all areas of delamination. The cost and physical effort required to attempt this cure are not justified, given the unknown final results.
There are two other methods to solve the problem and, though costly in time and material, will guarantee a successful result. Depending on the construction of the vessel, one or both of these methods may be used to make the fiberglass boat repair.
My own 1961 Pearson Ariel is a good example of both. In a nutshell, the entire main deck and cabinroof were one spongy mess that gave under a person’s weight. The foredeck aft to the chain plates had been destroyed over a number of years by “deck apes” jumping on the deck in race conditions. The forward cabin under the foredeck did not have a liner installed, so the underside of the deck was fully visible. The sidedeck and main cabin area had an interior liner which precluded direct access to the underside of the decks and coachroof. The side decks were delaminated as a result of improperly filled holes when the genoa tracks were moved. The coachroof was delaminated due to the roof-mounted winches, cam cleats, etc., being mounted, moved, and remounted without properly sealing the original holes.
The mast was deck-stepped and had sunk three inches into the deck due to water-induced rot in the mast support beam. This was caused by poorly sealed fittings around the base of the mast.
If you have read this far, you’re probably saying, “What did this nut see in a totally destroyed boat? He must be crazy!” Well yes and no. I had very little money (less than $2,000) and wanted a capable sailboat very badly! The price was right. The Ariel was the boat I wanted, and I had a plan. The boat’s past racing life, which had caused much of its problems, also provided the method to afford the rebuild.
First, the Good News
The boat had eight good racing sails. I sold the six I did not want for more than I paid for the boat. I made a $300 profit and became the proud owner of a Pearson Ariel with an Atomic 4 engine, a good mainsail, a good 120 genoa, hull, mast, boom, and rigging. The only problem was the deck, maststep, and, oh yes, the bunk had rotted out, and the galley area was trashed.
To get the boat home, I fixed the engine and felt I should be able to sail (in case the engine quit). I used 4 x 4s and a hydraulic jack to support the mast and push it back into its correct position. And on April 1, 1990, (April Fools Day/Ship of Fools!), my wife and I departed the New Orleans Municipal Harbor for home on the Mississippi Gulf Coast, 11 hours away. Since I am writing this article, we obviously succeeded in completing the voyage. Would I do it again? Of course! There is little enough adventure in this world, and taking the tried and true route is no adventure at all!
We were towing a dinghy with a motor to provide a third method of propulsion (or lifeboat, if need be). We had picked a bright sunny day with a good forecast, filed a floatplan with our children, had a VHF radio onboard, and stayed close to shore in about eight feet of water. We figured we could fill up but not sink below the surface. You may be asking, “What does all that have to do with delamination?” Everything. It shows that a boat can have an extreme problem and yet be saved. Here’s how.
Start with the Worst Case of Delaminated Fiberglass
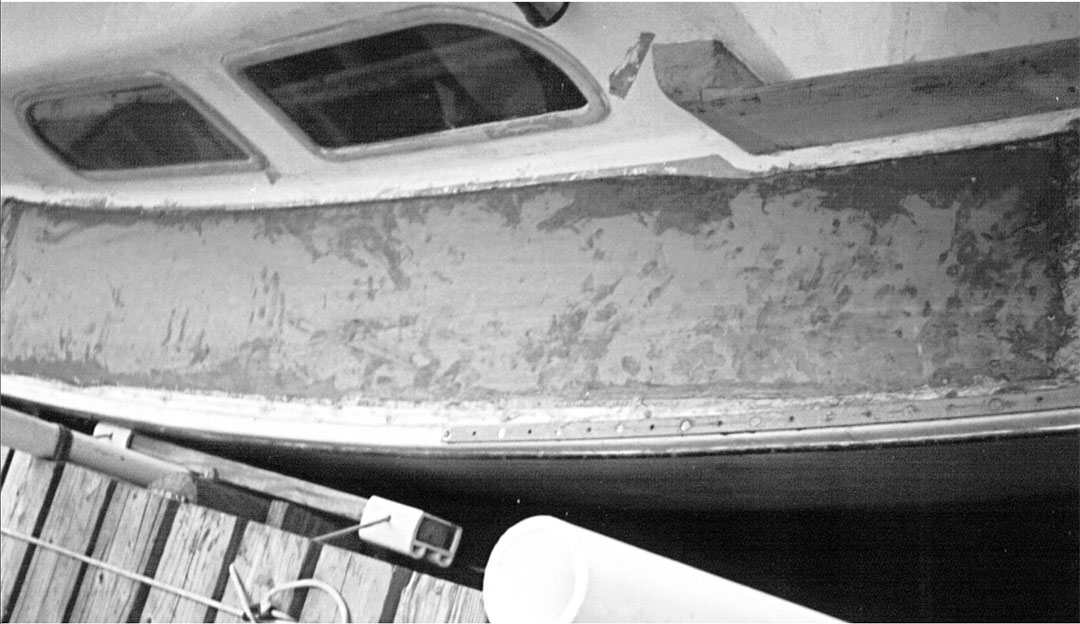
The side deck was cleaned, sanded and ready for a new core.
The first task was to remove the mast and all of the deck fittings, lifelines, bow pulpit, and so forth. The foredeck was the worst case, so I tackled it first. I determined what the camber (crown) of the deck was and laminated wood beams to conform to the curvature and length required to span the deck on the underside.
Once the beams were made, I cut out the entire underside of the deck fiberglass laminate and core from below. I scraped all the coring off and sanded it so only a very thin (1/16-inch) fiberglass skin remained. I cut waterproof K-inch mahogany plywood panels into four sections in the shape of the deck. Then I fitted new beams and plywood to the underside of the deck and prepared to push them up against the underside of the foredeck, forming a new wood deck beneath the old skin. I assembled the beams and panels in the V-berth area, screwing and bonding them together with epoxy. After a “dry fit” to assure that all was well, I coated the new deck with a mush of epoxy mixed with chopped mill fiber (at a mayonnaise constancy), raised it up, and propped it in position against the deck skin.
Working from a dink in the water to avoid putting any weight on the fragile deck, I set stainless steel screws through the top skin of the deck into the deck beam to assure complete contact between the interior wood deck and the exterior fiberglass skin. The old deck skin was so thin it was possible to be sure that there were no air bubbles to interfere with full adhesion.
When the epoxy cured, I removed the props and taped the beams to the hull sides for final strength. Next I removed the stainless steel screws and filled the holes with the epoxy/chopped mill fiber mush, faired the deck epoxy, sanded it, and painted it with non-skid paint. I used the same method to refurbish the coachhouse overhead in the forward cabin.
Next, the Side Decks and Roof
The new core was installed on the side deck.
The sidedecks and main cabinroof area could not be worked from the inside, due to the liner, so this time I started from the outside. With a circular saw (carbide blade), I carefully cut the sidedecks and roof out in one rectangular-shaped piece each. I lifted them off as three pieces (two sidedecks and one roof). I scraped each clean of the wet balsa core and set it aside. I removed the ruined core down to the outside of the inner liner, sanded each area clean, and allowed it to dry.
I cut strips of K-inch mahogany plywood about three inches wide and the length of the area to be filled, taking care that the strips landed on a solid support surface or bulkhead fore and aft. I cut and fitted enough strips to build up the new area to the level of the old roof and decks, with the exception of the “saved” pieces of deck and roof. The strips were numbered, so they could be replaced exactly where they had been fitted.
With all in readiness, I mixed the epoxy/mill fiber mush mixture and coated the outside of the liner. I wet out the strips with unmodified epoxy (no mill fiber filler), and set these into the mush on the liner. I followed this process until I had reached the desired height.
Next I coated the roof and deck panels with the mush and returned them to their original positions on the hull. I allowed the epoxy to dry, taking care to assure a complete bond between the strips and the underside of the old panels.
The reason for using the old panels is twofold. First, it saves material and, if carefully prepared, reduces fairing of the surfaces to the original camber. Second, the roof panel incorporated the rails for the sliding hatch which would have had to be remade in wood, bedded, and so forth.
I simply removed the mast step beam and replaced it with a new beam when the coachhouse roof was replaced.
The final finish work was not as hard as you might imagine, due to the reuse of the old skin panels. After a good fairing with a long board and 80-grit sandpaper, I rolled high build epoxy primer paint on the panels. These were sanded and primed again, sanded a third time, and then painted with three coats of polyurethane one-part deck paint, sanding between each coat. I mixed the final coat with non-skid compound for a non-slip finish.
More Good News
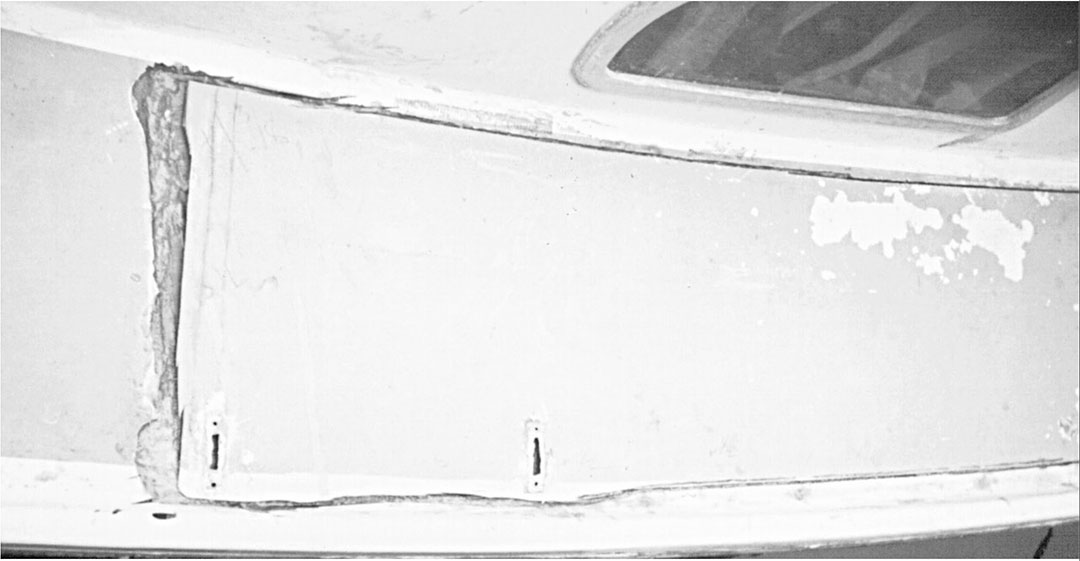
The original deck piece was replaced.
Did it work? The answer is a resounding “Yes!” After eight years of 12-month-a-year service, averaging three days a week, there have been no failures, no leaks, and no soft spots. I’ve repainted the deck once more for cosmetic and aesthetic value.
Was it worth it? Again, “Yes.” The boat became ours April 1, 1990, and we motored it out of the harbor. We have motored, sailed, motorsailed, and used the boat ever since. The work on the deck was done during intense weekends over a two-month period. The boat was “out of commission” for two-week periods as each stage was accomplished. The deck, beam, interior, and so forth were done afloat between uses.
I prioritized the work. The foredeck came first, mast beam next, bunk and interior third, side decks and coachroof last.
Since we live in a southern climate, it was possible to complete all the work over the span of one year. The non-structural work – replacing the pulpit and lifelines, putting in new port lights and running lights, etc. – was worked in as time and budget allowed.
When I review the refurbishment work done over the past eight years, the volume seems overwhelming, but when viewed in small segments, it was achieved and has not been onerous.
I had the assistance of family and friends some of the time, but the bulk of it was done without help. Having the use of the boat while working on it was a big plus and kept my spirits soaring. I believe if I had chosen to lay the boat up until everything was complete, I would have become discouraged and lost interest and momentum.
My wife loves the boat but hated the project “mess.” For this reason, I kept one or two areas neat so she could feel comfortable while I messed up the other areas. The V-berth area was torn up considerably, but the main cabin and cockpit were usable and neat. Doing the sidedecks did not mess up the interior, and the V-berth was completed and “neat” by that time. The same is true for the coachroof.
Today, the boat is in excellent condition. Motor and sails are without problems, and it looks great. Now, if I could just figure out how to stretch the boat to a 36-footer in the same condition. Hmmmmm.
Article originally appeared in Good Old Boat Volume 1, Number 3, November/December 1998.