Beginners save thousands, get professional finish
Issue 62 : Sept/Oct 2008
Want to lose weight, meet interesting people, and sleep like a baby at night? Then paint your own boat.
My husband and I could deny it no longer. Our 31-foot fiberglass yacht, Coco, designed and built by Halvorsen, Mawson, and Gowland, Australia, badly needed painting.
At first we thought we’d pay someone else to do the job, so we called around asking for quotes. But after deciding that we didn’t want to sell a kidney each to make our boat look decent, we opted to do the job ourselves.
We aimed to tackle the project during the Christmas holidays, which for us were five weeks long.
“Yeah, Lou, we’ll put her on the hard just after Christmas,” said my husband, Stephen. “We should have her finished in a couple of weeks, then we can have the rest of the vacation to cruise and relax.”
Sounded great.
Well, we were a little optimistic about our time frame. We actually finished her three months later. But she looked sensational. We were very proud of our mammoth effort and we really enjoyed working together.
OK, that’s the story in a nutshell. Let’s get on with the technical stuff.
Step one was to contact local boatyards for a place to keep the boat while painting. Like most people, our budget was tight so we wanted a good price. However, we also wanted a professional setup with reliable lifting gear, security, and a decent chandlery. We found all this in a yard only an hour’s cruise from our mooring. The cost was $18 (Australian — about the same as the U.S. dollar) per day, with an additional charge of $3 per night if we wanted to camp on the boat while working. Showers and toilets were available in blocks dotted around the compound.
As part of our research we spoke to a lot of spray painters, boatbuilders, and others within the industry. Like most professionals, they were more than happy to share their knowledge and experience. It was quite a daunting project, so we were really grateful for the advice we received and made notes on everything.
Last-minute tips
Once the boat was on the hard we asked the resident spray painter, Dave, if he would mind looking over our boat before we started and for any last-minute tips. He was great and talked to us about all the different paint choices. We could choose top-of–the-line, medium-quality, or “trawler” paint. We wanted a two-part preparation as we felt it would give us a tougher, longer-lasting finish. We use our boat a lot and probably aren’t careful enough about throwing things around the deck. Dave gave us brochures and a DVD on different products and methods, then told us to treat the job as we would a house: start at the top and work our way down. We read the literature and watched the movie 400 times. We then compared prices of various suppliers and finally chose mid-priced paints for the deck, the hull, cove stripe, and boot stripe. All advice told us that, if applied correctly, the paint should give a good 10 years’ service. Antifouling paint would be applied a couple of days before we put the boat back in the water.
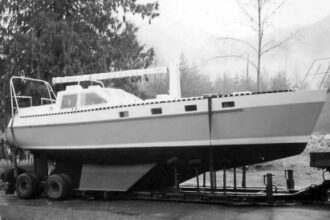
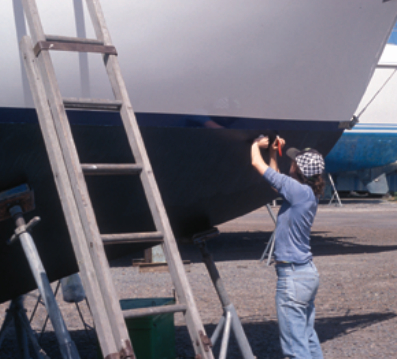
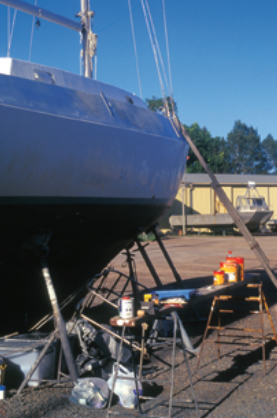
We chose a day to start and rolled up to the job fresh, eager, and a little scared. We had decided that — as we were on vacation and our kids had left home— we would camp on board to save ourselves a daily commute. We stowed our clothing and groceries and then planned our workspace. Because Coco was up on supports, we could store our equipment under one side of her hull in two large plastic tubs with lids; these were great for keeping everything tidy and protected from the weather. We also had trestles and planks that we used as a workbench: on these we could lay out everything we needed for the job with space on the end for sanding, polishing, or mixing. Other trestles were set up to give access along the sides and stern of the boat.
It was important to keep a tidy worksite, as nothing is more depressing than trying to sift through a huge mess to find tools and equipment. Garbage bags were kept handy and emptied each day into the bins provided by the boatyard. The yard had a good recycling system to separate all manner of metal, wood, and fiberglass, which was cleared away at no extra cost to us. After securing a ladder up one side of the boat to allow us on and off, we were ready to attack the job.
Stripped for action
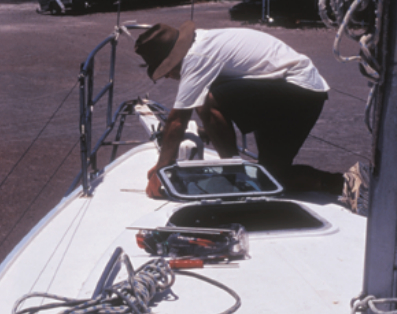
First, we stripped the deck. We didn’t pull down the mast, but we taped the chainplates and took off the pushpit and ladder; removed all the stanchions, the pulpit, hatch covers, traveler, and anchor cleats; and pulled out all the portlights. We taped pieces of plastic to the inside of the portlight frames to keep out any adverse weather.
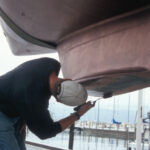
Now it was fun time: sanding. We started off quite timidly until we realized that we needed some heavy-duty action if we wanted to get the job done. We had bought a couple of disk sanders and an orbital sander, so we got to work with those until the sandpaper ran out a couple of days later. I went into the chandlery to buy some more and was dismayed to find the price double what I’d paid elsewhere. I wasn’t dismayed for long, however, because after 10 minutes of using the more costly stuff, I realized it did a far better job than the cheaper paper. That was an important lesson: some things you can buy cheaply; others, you shouldn’t.
We used 80-grit paper on most parts of the deck and then finished off with 120-grit. On other parts we actually had to use a belt sander with 60-grit paper. Not everyone would need to go to such lengths, but Coco had suffered a fire with her previous owner, who had repaired her with timber and a fiberglass finish. Some places were very uneven but, because Stephen had experience as a drywall plasterer and fiberglasser, he sanded back and reset the problem areas. He was advised by a boatbuilder to use an epoxy resin with micron filler (almost like car filler) and he did a great job.
While Stephen was making repairs with that epoxy resin, I finished the nooks and crannies along the toerail and around the hatches and anchor locker. I then attacked the woodwork on the hatch covers and frames. Now I was ready for the next step, so we decided I could start on the cove stripe. Even though Dave had said to treat the project like a house, there were times when we had to leapfrog each other to work on different sections or we would have wasted time hanging around waiting for one of us to finish. But we never got too far ahead of each other.
It was while working on the cove stripe that we discovered delamination had occurred in a couple of places due to the fire. Delamination occurs when layers of fiberglass separate under some forms of stress, and this compromises strength. You can imagine how happy we were to find this problem when we thought we were nearing the end of our preparation. We knew, however, that we had to strip it back and re-glass or we couldn’t have slept at night.
Great for the biceps
The hull didn’t need as much work as the deck, so I sanded the cove stripe and the rest of the hull with a disk
sander and 120-grit paper. It was great for the biceps. And that brings me to another important point: breaks.
It’s essential to stop regularly to eat and drink. Even if you don’t feel like consuming anything, make yourself drink plenty of water and eat something substantial. At lunch- time we would sit and chat about our work plan and dream of what Coco would look like when finished, and this inspired us to keep going. We even made sure we had a walk to loosen up a bit. We’re quite fit but we were using muscles we never knew we had. It was also important to have a set finishing time. The work was really physical and repetitive, and it helped to know that we could put in a big day and put down tools at a certain time.
Anyway, back to the hull. Once I finished sanding, Stephen got out his trusty plastering tool and, using a microsmooth product, proceeded to fill every nick and scratch he could find. I’d sand with 240-grit paper over his repairs once they were dry, and he’d go ’round again looking for anything we’d missed. We must have gone over the hull four times before we were satisfied.
That, perhaps, was one of the biggest obstacles we had to overcome — knowing when to stop sanding. We had been told so many times that the paint job would only be as good as the preparation, and we knew that was true. After all the hard work we had done we wanted the job to be as near to perfect as we could get it. But to tell the truth, we were frightened to start painting.
Finally, a friend we met in the yard said to us, “For goodness’ sake, guys. It’s only paint.” That spurred us on.
To begin, we washed the whole boat with a good dirt-and-grease remover. We then rinsed and wiped all over with clean cotton rags. From then on it was “socks only” on board to keep everything clean and ready for the paint.
The paint was a two-part preparation with instructions that would have scared Michelangelo. Warnings regarding painting in the correct temperature and humidity had us running for our thermometers and reading the same literature over and over. The reason temperature is important is so that the paint won’t cure too quickly after it’s mixed, which would make it hard to apply. And too high a humidity will make your paint job “bloom.” This means that after drying, the paint will have a dull appearance rather than the slick shiny one you’re after.
An early start
Because we opted to paint in the summer (Christmas in Australia, remember, is in summertime), we knew we had to start early in the morning. A day dawned where no rain and low humidity were predicted, and we set to work in the early-morning darkness. Our project for the day was the deck.
On our workbench were sponge rollers, good-quality brushes, trays, thinners, and cloths. Stephen mixed the paint thoroughly and then left it to stand the required half an hour to allow any bubbles to disperse. Meanwhile, I wiped down the deck with clean rags to remove the dew. The time had come.
We both started at the bow and worked our way down the respective sides of the deck. We rolled on the paint and then “tipped off,” using just the end of the bristles of a good-quality brush. This method, together with the levelers in the paint, produced the lovely smooth finish we were after. Two important tips: make sure to finish by the ladder so you can get off without stepping on any wet paint, and wear long pants to protect your knees.
The deck required four coats of paint: two of a thick heavy undercoat and two of the finishing coat. Between each coat we allowed for curing time, then lightly sanded with 120-grit paper, and then wiped down with clean cloths. As you can imagine, it took quite a few days to finish the deck since we had to do all this under the right conditions. We also wanted to add a non-skid agent to our final topcoat so that the finished deck wouldn’t be too slippery. However, we didn’t want the non-skid all over the deck, so we defined the areas that would receive non-skid by taping around them. Our final topcoat was done in two stages.
First, we painted around the taped spaces, lifted the tape, and lightly sanded the edging. Then, we re-taped the perimeter of the designated non-skid areas and painted inside those areas with paint containing non-skid agent (1 tablespoon of agent to 1 liter of paint).
Incidentally, be sure to stir the paint regularly while applying, to ensure an even coating of non-skid. We chose to make the non-skid areas the same color as the rest of the deck, so perhaps we could have added the agent to the entire final coating. But we had never used the product before, so we used it conservatively. Non-slip adhesive cutouts work too.
A confidence boost
The finished deck looked sensational, which was a great confidence boost and inspired us to complete the rest of the boat as soon as we could. The cove stripe was our next step, which was exciting and a bit nerve-racking, as we decided to use color.
Because we had a lot of white paint, we bought a small can of navy blue paint and mixed the two paints to produce a light shade of blue for the two topcoats. You can buy cans of colored paint, but the shade we were after would have taken a week to get on order, so we mixed our own. The first topcoat looked so bright — like something out of a Disney cartoon — that we added more white to the final batch. Perfect.
The kids came over and gave us a hand painting the hull, which was a treat after the more intricate areas of the deck and cove stripe, and we completed it in record time. However, as with the rest of the job, we always adhered to the rules of sanding between every coat with fine sandpaper (240-grit) and wiping down with clean cloths. And we always checked humidity and temperatures if we had any doubts.
By this time, people from all over the boatyard were dropping by. We met sailors from the U.S., England, the Mediterranean, and of course our local waters. The camaraderie was great. Everyone offered advice, help, and encouragement. The funny thing was that whoever started painting became a hero, with those still preparing to do this sort of project gazing at the shiny new paint and asking questions, questions, questions! We offered encouragement and passed on advice that we had been given.
Just before we put our final topcoat on the hull, we met an old painter who told us that he thins every coat he puts on to a ratio of 25 percent for the first undercoat; 20 percent, second undercoat; 15 percent, first topcoat; and 10 percent for the final topcoat. We thinned our final topcoat because of that advice and it worked so well that we wished we had known to do it with all the coats.
Mission complete
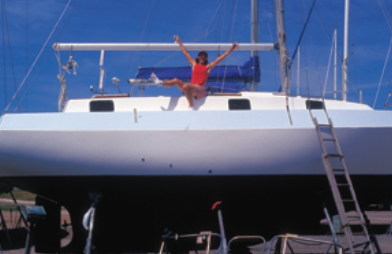
We were so pleased with how the job was looking that by the time we reached the boot stripe we were really brave, and we opted to paint it navy blue. It finished the boat off beautifully. We applied two coats of good quality antifouling and our mission was complete.
It’s hard to believe how it makes you feel to work so hard for so long and to be so proud of a finished product. We cleaned and stored all our tools and equipment and then spent a weekend just walking around and around our boat: high on the hard, glistening in all her glory. We’d go for a walk just to be able to come back and see her fresh all over again. Sound pitiful? Yep, it was, but it was great. Stephen, the kids, and I had worked hard, through all the dust, dirt, heat, and insecurities of painting our own boat. We saved thousands of dollars, learned a lot, and we’re now proud to take Coco anywhere.
Mind you though, if the paint doesn’t last for the promised 10 years, heads will roll!
Louise Krick lives in beautiful Hunter Valley, New South Wales, Australia, where she works with at-risk teens and finds writing a great way to download at the end of the day. In their spare time, Louise and her family are either on the water or under it, all being keen sailors, surfers, and divers.
Thank you to Sailrite Enterprises, Inc., for providing free access to back issues of Good Old Boat through intellectual property rights. Sailrite.com