Bet on it before you bet on luck
Issue 85 : Jul/Aug 2012
Many boat projects require a reasonable amount of skill, but for the most part it’s your determination and vision that become the most important factors for success. Skill, after all, is nothing more than the accumulated refinement of your first and subsequent efforts. Many say I’m lucky to possess the skills I have but, truth be told, I worked long and hard to achieve what some shrug off as simply luck.
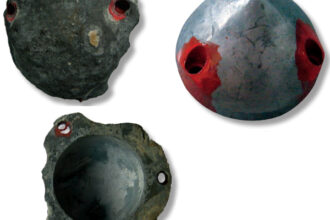
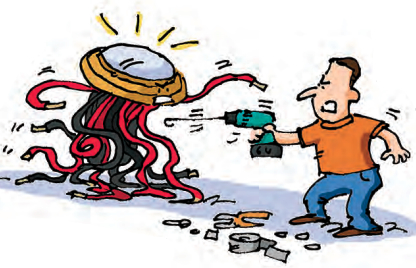
After a few nights aboard our Pearson 365, Maruska, it became obvious to me that it would be nice to install an overhead dome light in the V-berth to improve overall lighting and provide the option of red night lighting when required. It seemed simple enough.
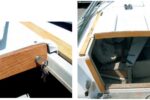
Simply by knocking on it I could hear that the space between the inner deck liner and the deck was hollow. I had to run a wire only about 3 feet in the overhead to reach an area in the head where I could easily connect it into the forward cabin lighting circuit. By removing the trim on the overhead hatch in the head I could see the gap between the liner and deck. This further supported my belief that running a wire up there would be feasible. The dome light installation was going to be a welcome fill-in project between all of the other more complicated items on my fitting-out list. I expected this simple job to provide some instant gratification.
With the preliminary investigation complete, I measured to the center and drilled a 1-inch access hole where the new dome light would be located. The gap between the inner liner and the deck matched what I saw on the hatch end and I began to snake the wire toward that hatch opening. What could possibly go wrong?
A setback
As it turned out, the wire would slide in only about 18 inches and stop . . . right about at the forward bulkhead. Try as I might — a little to the left or right — the wire simply would not go.
As I struggled with these unsuccessful attempts, Plan B began to form in the back of my mind: install a cap plug in the new 1-inch access hole and call it a day. But I wanted that dome light.
I tried inserting a single piece of wire instead of the duplex cable and it made much more progress. I could shove foot after foot of this wire into the overhead. However, the wire never came into view on the hatch end . . . or anywhere else for that matter. I tried to feed the wire from the hatch end looking for that 1-inch diameter hole in the haystack, but fared no better. After several hours, I moved on to other projects.
Throughout that season, in available moments, I made several more attempts to fish that wire from one end to the other . . . with no satisfaction. I tried the old straightened-out wire coat hanger approach without success. I used an electrician’s fish, a tool designed to do exactly what I needed. I even tried a string and shop vacuum at the other opening. But all came up short, so to speak.
I used a mirror and flashlight to probe the mysterious overhead cavity, but could not discover any reason a cable might not pass through. I shone the flashlight through the passage at night. Light could exit the hole, but the wire would not. At one point, I resorted to hunting for alternative routes I could use for running the wires but all came up unusable.
After hours of frustration, all I had to show for my efforts was a now worn hole in the overhead where the dome light should be. Finally, on a whim, I tried a length of 3⁄16-inch-diameter steel rod chucked in my drill motor. The spinning rod would bend its way through the open hole, yet be stiff enough to make considerably more progress through the overhead. The rod met with small pockets of resistance that apparently were rogue strands of fiberglass from the initial layup. Over time, the spinning rod cleared a path and emerged out of the gap at the hatch. Progress!
I taped the electrical cable to the rod, then lost the cable in the overhead several times. Apparently, the gap somewhere along the way was too narrow for the cable with a lump of electrical tape around it. I replaced the rod with string, but the string broke or the tape let go in the narrows. I then went to a small length of rope, but try as I might, the cable hung up on the tape or the tape parted when the going got tough. Eventually, I removed some of the cable’s outer insulation jacket and stripped back the ends of the exposed wires. I then soldered the wires to the straightened coat hanger so I could pull the cable home. Victory!
Once the cable was in place, it took mere minutes to terminate each end and screw the dome light into position. Success was mine as the new light brightly illuminated the V-berth . . . a proud moment. Lucky indeed.
Obstinate windlass
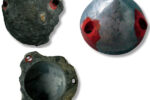
The boat came equipped with an Ideal windlass, a beast of a machine that would surely pull any anchor from the depths. Its chrome was badly worn and I quickly discovered that it did not run. The limited and uncomfortable view from the anchor locker told me that the windlass would have to be removed for it to be repaired. The good people of Ideal Windlass in Rhode Island sent me an exploded assembly drawing and a few encouraging words of advice on disassembling the windlass.
Unfortunately, years of neglect and exposure made what appeared to be a straightforward disassembly come to a complete halt when I tried to remove the very first item. The procedure seemed simple enough: unscrew the top cap and the whole rope drum and gypsy can be lifted off the main vertical shaft in several pieces. The problem was unscrewing the cap. It was manufactured with two vertical holes. The removal tool, containing two pins, was designed to mate with these holes. Unfortunately, I didn’t have the removal tool.
After pondering, I took a short section of steel bar and carefully drilled holes that lined up with the holes in the stubborn cap. I used the proper diameter bolts as surrogates for the pins. The whole bar and bolt/pin idea fit just fine, but I could not unscrew the cap. One tool leads to another and eventually I owned a “Monster Garage” steel bar more than 4 feet long. I attached a block to its free end and ran a line from a chainplate through the block and back to my primary winch. Only after such extremes did the cap reluctantly unscrew. What luck!
With phase one complete, the extraction of each subsequent piece of the windlass disassembly required excessive persuasion and extensive patience. One would think that, once stripped of all the exterior parts and pieces and once the mounting bolts were removed, the windlass would be in my trunk and on its way home for the autopsy. Not so fast.
I initially suspected 3M 5200 was the root cause when the main housing of the windlass would not drop out of the deck, but the underside revealed no evidence of its use. I did see fiberglass cloth and resin holding the backer and leveling blocks to the underside of the deck, however, and feared someone just might have assembled it in the “wet stage” leaving the unit “glued” to the deck with runaway resin. I decided that, if I could get a wedge of some sort between the windlass mounting flange and the wood mounting blocks, it might just part ways with the deck.
The anchor locker is a unique torture chamber enhanced by the presence of the windlass. The relatively small access door is just high enough off the V-berth to be a real back breaker. The opening is just large enough to snuggle into, but once I’m there, the inner area is not of a size to allow my elbows clearance to reach back out to acquire a tool. The small confines quickly elevate any temperature, adding to the less-than-desirable working conditions.
After burying four brand-new putty knives — by pounding them between the mounting flange of the windlass and the wooden mounting blocks — I gave up for the season.

Annual exertions
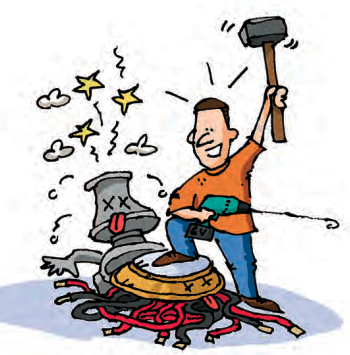
The following year, I even resorted to a teetering wood block on the upright shaft of the windlass sticking out of the deck and a 20-pound sledgehammer. The result was lots of noise, a broken wood protector block, an unanswered prayer, and absolutely no movement whatsoever.
The year after that, I attempted to rotate the entire windlass assembly, hoping to shear off whatever was holding the beast and freeing the windlass from its tomb. Hours of invested time paid zero benefits, just more bloodletting and sweat. Oh to be so lucky!
This was the year I planned to paint the cabintop and deck. If the windlass was going to come out, this had to be the year.
To get a better idea of what was underneath, I drilled an exploratory hole through the deck next to the shaft and its housing. The deck-side mounting flange was large enough to conceal any reasonable exploratory surgery. This hole reinforced what I already believed: there was no reason why the windlass (although at this point that was not the name I was calling it) would not drop down and out.
The portion of the windlass housing that protruded through the deck was indeed tight in the hole, swelled fat with years of rust. I figured if I could open up the hole in the deck around the rusted housing, the added clearance would be of benefit — some benefit, any benefit.
To achieve the needed clearance, I modified a hole saw that would ride around and follow the shaft housing down through the deck. I cut the drive end off the hole saw and had a 14-inch length of steel pipe the same diameter as the saw itself welded in between the two pieces. Armed with my new long hole saw, I proceeded to cut the deck down along the windlass housing.
All of this, of course, in real time took days . . . and those days add up into weeks. Apparently, luck does take its sweet time. Just as luck would have it, rust is harder than it looks and does not cut very well. It wasn’t long before my special hole saw refused to cut any deeper. I had made progress, however, as I had cut approximately 1⁄2 inch into the deck. Careful inspection via my exploratory hole showed that I only needed to go another 3⁄8 inch or so deeper to reach through the underside of the deck down to the wooden mounting blocks. But I had dulled and wrecked my special hole saw, and things were looking bleak.
As I sat for hours that night pondering and picking away at the rust with a screwdriver, I determined that, with a small punch and a hammer, I could knock the remaining rust down into the mounting-block hole, which was larger in diameter than the hole in the deck. So, 1⁄8-inch-punch-width at a time, I worked my way around the windlass-housing outline while knocking the rust through the deck following the hole-saw groove. I felt like a sculptor, tap tap tapping my punch through years of accumulated rust deposits. It wasn’t until just a few small sections of rust remained that the windlass, punch, hammer, and four long-forgotten rusty putty knives all dropped into the anchor locker without any warning.
I was as giddy as a love-struck schoolgirl. Four years of effort over! Four years of trying this, well, how about that, no, perhaps this, followed by one dead end after another was over. In retrospect, I was indeed lucky that the 60-pound windlass did not damage whatever it landed on below.
Success comes to the persistent
From conception to finish, the dome-light project had taken three calendar years of accumulated sessions. Each came and went with a renewed enthusiasm and a fresh idea to fish that uncooperative cable end to end. Each idea faded into frustration and temporary defeat as I went on to other more-important projects.
The windlass removal project took four years. It has been completely disassembled and rechromed now and I have determined that its only real problems were neglect and frozen bearings from years of accumulated water. I never gave up, though. and now realize that skill and experience had little to do with my success. Ultimately, it was stubborn determination and the vision of how nice a newly chromed functional windlass would be that saved the day.
People tell me all of the time, “You know what you are doing.” The truth is, I know what I want to accomplish and just keep trying and learning until I get it right. Success is for those who persist. Try it. You might just surprise and amaze yourself. My father told me at an early age, “Son, if it already doesn’t work, you have nothing to lose by trying to fix it on your own.” Good words to live by.
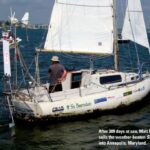
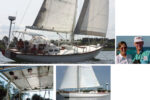
Dale Tanski soloed at the age of 10 in the family’s Sunfish. Forty five years and way too many boats later, his sailing obsession is still going strong. Currently cruising the family’s Pearson 365 ketch, Maruska, with his wife Sharon and their two youngest, Alden and Morgan (yes, nautically named), he also races their J/22 with the oldest children, Rian and Eric, in Buffalo’s competitive weekly series. A self-professed boat-project addict, Dale has resurrected and maintains a small fleet and lives by the motto: he who dies with the most boats wins!
Thank you to Sailrite Enterprises, Inc., for providing free access to back issues of Good Old Boat through intellectual property rights. Sailrite.com