Wire leashes tame hardware wanderlust
Issue 98: Sept/Oct 2014
The tack of the mainsail on Ternabout, our 20-foot Matilda sloop, was clipped to the gooseneck with a big cotter pin. It did its job well, but every once in a while I would drop that cotter pin and — as is likely to happen — it would bounce overboard. Replacement cotter pins didn’t cost very much and I’d learned to keep a couple of spares in the toolbox.
Still, it was a pain in the neck every time a pin made the “boink-boink” journey that ended with “splash!” I’d have to stop rigging the sail, go below, dig out the toolbox, and locate another one. If I’d forgotten to replace the last pin I’d dropped, this small splash resulted in a trip to the store to stock up on replacements.
When I go to the boat store I spend a little time finding the item I came for. The rest of the time I wander the aisles to see what catches my attention. On one of those visits something called a Ball-Lok pin caught my eye. This neat piece of hardware has a shaft with a ball detent in one end and a circular hub around a push button on the other. A push of the button retracts the ball detent and allows you to pull the Ball-Lok pin from whatever it is pinning.
I immediately thought of replacing that wandering cotter pin with one of these pins. They’re available in a variety of shaft lengths and diameters. The next time I was at the boat, I spent some time measuring the tack grommet and the holes in the gooseneck. I found that, with minimal drilling, I could use a 1⁄4-inch Ball-Lok pin to replace the cotter pin.
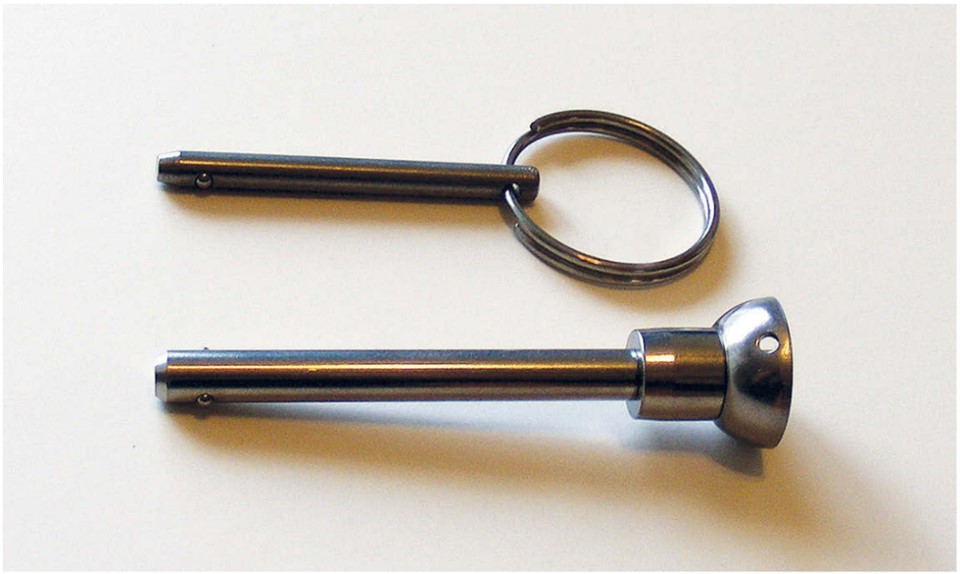
The quick-release functionality of the pin coupled with the smooth, rounded shape won me over. No more snagging clothing, sails, or parts of my anatomy on the sharp ends. The downside was the cost: nearly $12 to replace a 17-cent cotter pin. At that price, I couldn’t see dropping many of those guys over the side. However, the design of the pin makes provision for a solution. The hub has a hole in it for attaching a tether.
This tether would need to be strong, thin, flexible, and corrosion-resistant. String wouldn’t do; anything small enough to pass through the hole in the Ball-Lok hub would be too small to hold up to normal wear and tear.
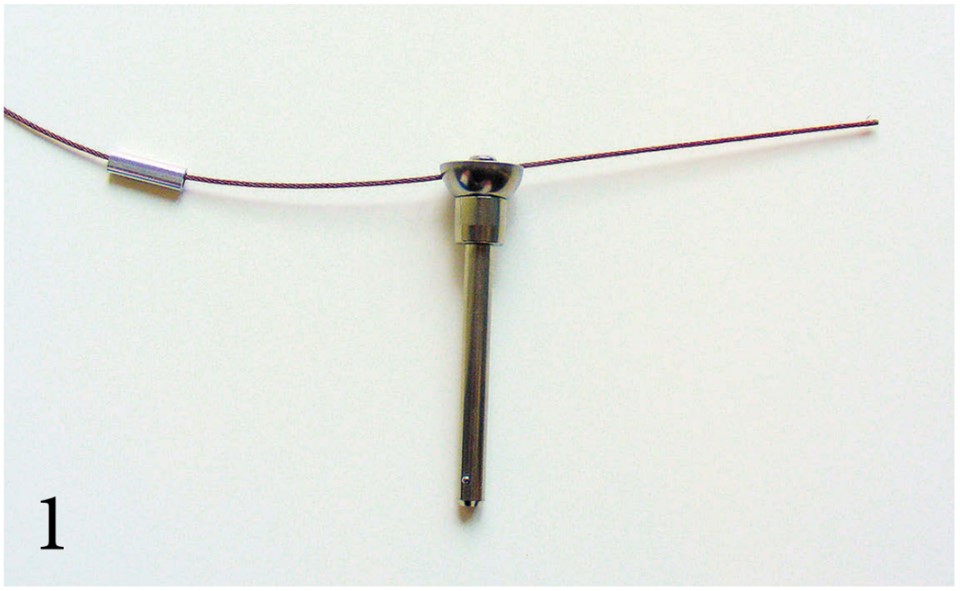
An aeronautical inspiration
I remembered my days flying U-Control model airplanes. We flew these planes on dual braided steel cables 60 feet long. The two steel wires were attached to a handle at the pilot’s end and a bell crank in the model plane. The bell crank moved the plane’s elevator up or down, controlling altitude.
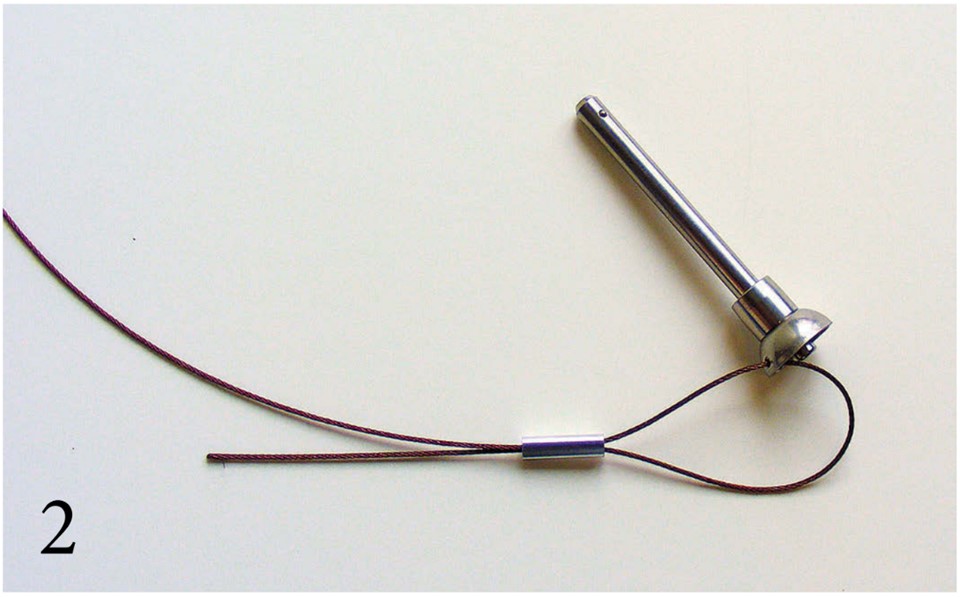
We made our own wires that extended from the bell crank out to just beyond the wing tip. Loops in the ends of the wires allowed us to switch wires from one plane to another using quick connectors. We made the loops by crimping small lengths of copper tubing around the wires. I decided to use a similar technique to make up a lanyard to keep that Ball-Lok pin from becoming errant.
It has been more years than I care to remember since I last flew U-Control. Radio-control model airplanes have come to dominate the market and I couldn’t locate the braided steel wire at my local hobby shops. My boat store carried sailboat rigging wire, but the smallest diameter was 1⁄16 inch, too thick and stiff for this application.
A fishing fix
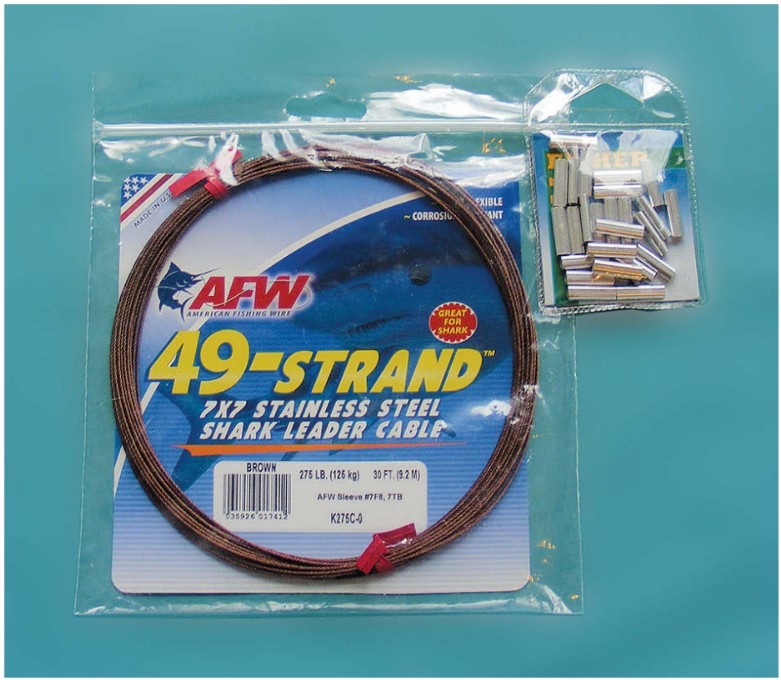
On my way out of the store, however, I passed through the fishing section and noticed packages of stainless-steel wire in various sizes for making fishing leaders. Nearby were packages of leader sleeves that could be crimped around the wire ends. Leader wire is available in monofilament, stainless-steel wire, and braided stainless-steel cable. I chose the braided cable because of its flexibility, durability, and resistance to corrosion.
Leader sleeves are available in aluminum, steel, copper, or plastic. Use only the steel or copper with the braided stainless-steel cable. Aluminum sleeves will corrode in a remarkably short time when used with stainless-steel cable in salt water. I used aluminum sleeves in the photographs illustrating the process only because they’re easier to see.
Sleeves are also available in a variety of cross-sections: round, oval, or double-barreled. Choose a larger size than recommended on your leader wire package as, using this method, you will end up with three wires, rather than two, going through the sleeve.
Cutting and crimping
With these materials at hand, it was time to make up a lanyard. Cutting braided stainless-steel cable of any size is problematic. A sharp pair of cutting pliers might do the trick, but this can leave a ragged end on the cable.
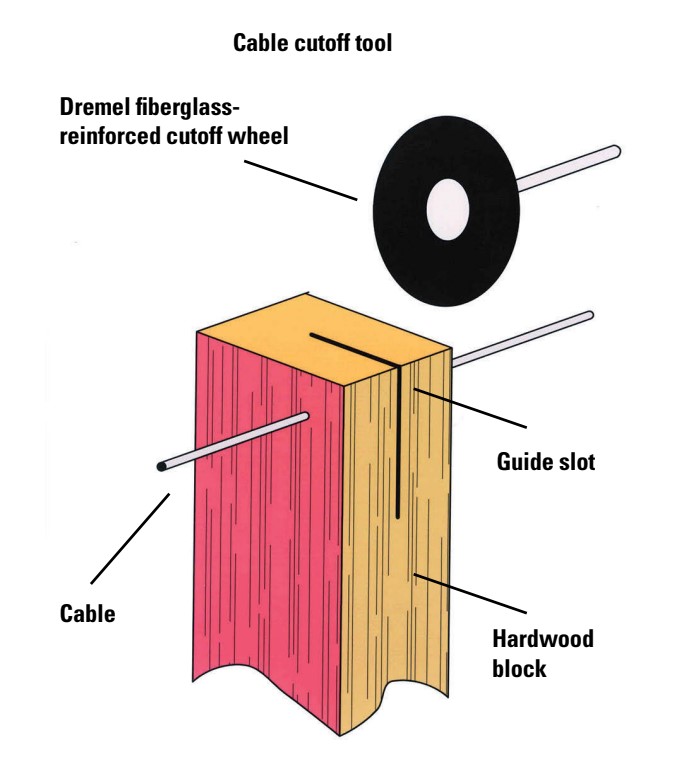
I have a trick for cutting cable. Starting with a piece of hardwood, I drill a hole the diameter of the cable near the corner. I cut the cable with a fiberglass-reinforced cutoff wheel in my Dremel tool. First, I use the wheel to cut a slot in the hardwood, crossing the previously drilled hole. To cut the cable, I pass the wire through the hole in the hardwood block and use the slot to guide the cutoff wheel while cutting through the cable. It cuts quickly and leaves a neat end.
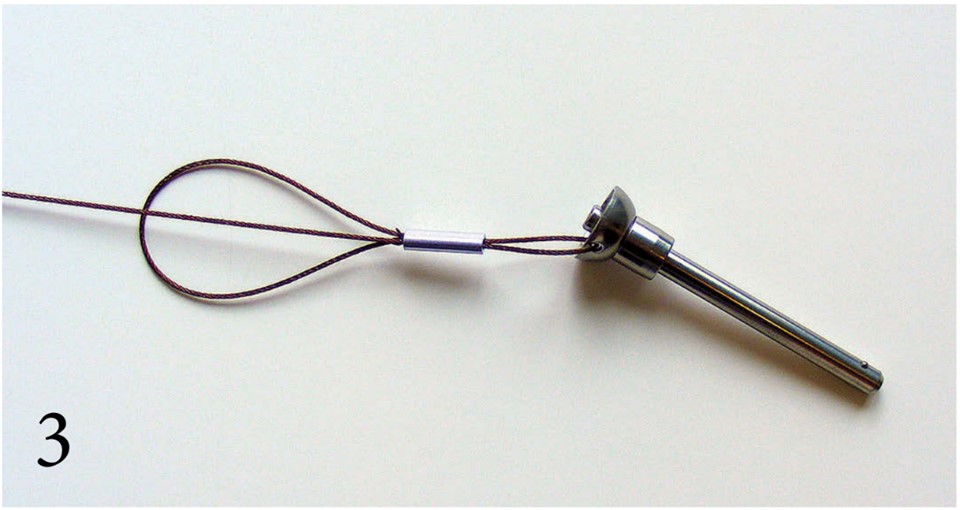
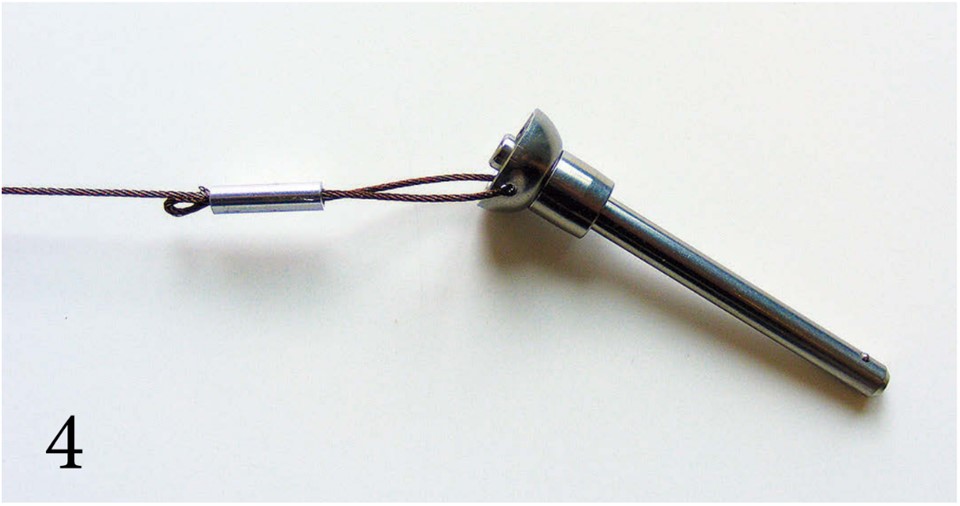
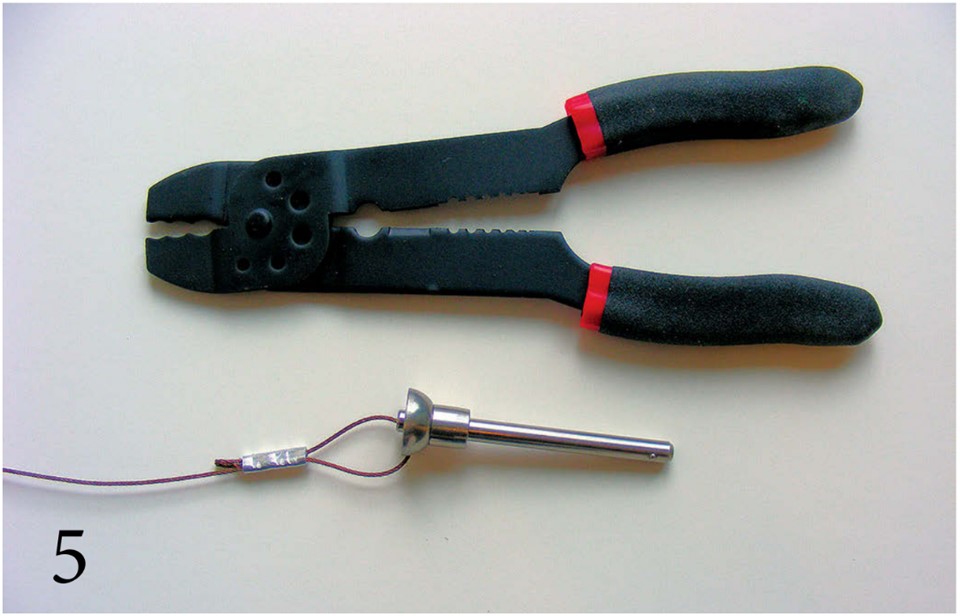
To form the loop, I passed the tail of the leader wire through a leader sleeve. The wire then went through the hole in the Ball-Lok hub and back through the leader sleeve. After a bit of juggling with the wire length, I left enough of the tail end of the wire sticking out of the leader sleeve to bend back over and shove back into the end of the sleeve. It took a little work with the needle-nose pliers, but was worth the effort in that the tail of the braided wire was now protected from unbraiding or snagging anything or anybody.
Once the loop was properly formed and the end tucked out of sight, I crimped the leader sleeve in place. This can be done using Vise-Grips, pliers, wire crimpers, or by simply beating it with a hammer against a solid object. The small secondary loop prevents the larger loop of wire from pulling through the sleeve.
I formed the loop in the other end of the tether around a fitting on the boom. The pin always stays with the boom and can never go “boink, boink, splash!”
There you have it: a quick, easy method for making sturdy tethers of almost any length. This is worth the cost if it saves just one of those pricey Ball-Lok pins.
Paul Esterle has been boating since the early 1960s. Starting out with a wooden Sunfish, he graduated to stripper canoes and sailing wooden Folkboats on Lake Erie. Paul is currently based at the head of Chesapeake Bay, where he works on and sails his small fleet of classic plastic sailboats.
Thank you to Sailrite Enterprises, Inc., for providing free access to back issues of Good Old Boat through intellectual property rights. Sailrite.com