Eat at it, work at it, or park it . . .
Issue 75 : Nov/Dec 2010
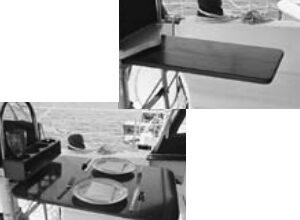
On many good old boats, the saloon table is mounted on a post bolted to the cabin sole. The post-mounted Formica table on my Bristol 30 was also designed to rotate on the post, a feature that was moderately useful but could be made better with a modification or two.
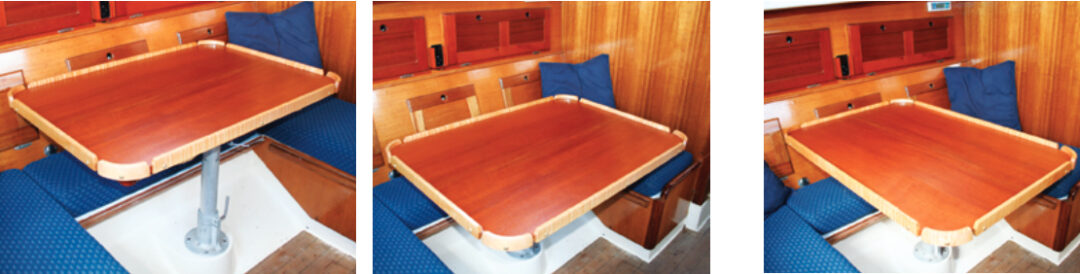
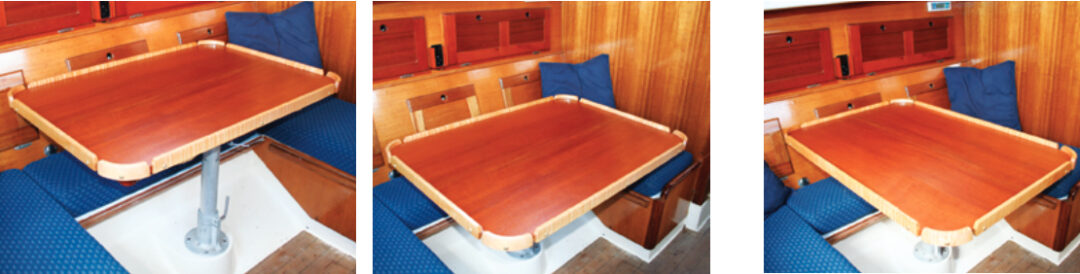
I realized we could have a more flexible setup in the cabin if the table could slide as well as pivot. The table could be put completely against the portside cabinetry to increase floor space or it could slide and rotate to serve one bench seat while creating room for lounging on the opposite bench. It could also slide well away from the cabinets and make room for seating on the third bench that completes the U-shaped dining area.
The original table was also designed to drop to seat level to convert the settees into a bunk. I retained this possibility in my modifications, but I cannot imagine going through an exercise at bedtime and again in the morning that involves lifting the table from a massive pipe and removing the pipe from its base.
Tabletop
While I was at it, I thought I should treat the table to a general upgrade and add the sliding feature along with a new top and two drawers underneath.
I built the new top out of two book-matched mahogany planks and added curly maple fiddles around the edges. Since I wanted to remove some of the fiddles occasionally to use the table for chart work, I attached them with threaded brass thumb screws that fasten into 1⁄4 x 20 threaded inserts embedded in the edge of the table. Nothing is too good for my Bristol.
Since I am a woodworker, I chose to make a rounded corner fiddle, but that sort of detail is not necessary. You could choose to leave the corner fiddle off entirely, since you need a gap in a fiddled surface anyway for sweeping out crumbs. You could also design a table with square corners.
I make my living building furniture, so these improvements were routine work for me. Still, the core elements of this project could be easily fashioned with a minimal tool set and modest skills. Any one of the three elements of this project — the table, the slide, and the drawers — can be executed separately from the others. I will assume that most readers will work with their existing tabletop. Given that, let’s look at the sliding mechanism first.
Slider and rails
The first step is to acquire the hardwood. Cherry or maple are suitable for the central slider block and the tracks in which it slides. For these you want milled hardwood stock that is S2S or “surfaced two sides.” If this is not available from your lumberyard, a local cabinet or furniture shop could provide you with the wood, and might also do the machining for you if you don’t have a table saw. Approach a cabinet shop with a rough drawing of your parts and, if you have done your homework, they will be happy to help. It would represent no more than an hour or two of labor for a well-equipped shop.
Begin by unbolting the existing plate from the underside of the table. You will be attaching that mounting plate to a hardwood block that will slide in a pair of rails. I made my block 6 x 6 x 1 3⁄4 inches — wide enough for the plate and for tongues that slide in the grooves in the rails.
To create the tongues, rabbet the top and bottom of the sliding block on two opposite sides. Cut the tongues across the grain of the wood for strength. All my tongue-and-groove runners are nominally 1⁄2 inch x 1⁄2 inch. The block and the rails can be machined with a single blade on a table saw. Make multiple passes to clear out the grooves. These cuts could also be done on a router table, but that would be a distant second choice for me.
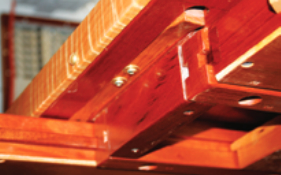
Make the rails 2 x 1 1⁄4 inches and a couple of inches shorter than the width of your table. Cut the tongues on the slider block for a sloppy fit in the grooves. The play could be close to 1⁄16 inch with no harm done — you don’t want it to stick. Space the slides on the underside of your table appropriately for your block and screw them down.
I used 1⁄4 x 20 threaded inserts attached to the underside of the tabletop for mounting the slides. Self-tapping screws through the cleats into the top would also work well. I just prefer the extra security and adjustability of the threaded inserts. I drilled oversized holes in the slides so I could fine-tune the mounting position to make sure the block would slide easily. Oversized holes also allow a solid top to expand and contract without cracking.When assembling parts like this that have to move against each other, I place thin strips of wood between them to create uniform gaps.
I finished by screwing a small wooden stop at each end of the tracks to prevent the table from escaping the post. That is not a detail to overlook.
Cannibalized C-clamps
The last part of the sliding mechanism is the locking clamp —I used two, but one would be fine. I bought two C-clamps at the hardware store, backed the screws out of the frames, and threw the frames away. Then I drilled a clearance hole for the 3⁄8-inch bolt and installed T-nuts on the upper side of the slider block. A nut could also be buried in the side of the block by drilling a hole from the edge of the block to intersect the bolt’s clearance hole. Make sure the nut will not turn in the hole. A square nut works better with the buried nut approach.
I threaded the bolt onto the T-nut and re installed its little pad. Tightening the clamp causes the clamp bolt to bear on the underside of the tabletop, pressing the tongue of the sliding block against the bottom of the groove. The result is a solid and reassuring stop. You do not want that table sliding around at the wrong time.
I varnished and waxed everything. Multiple coats of paste wax really help it slide well. That completed the sliding mechanism.
Drawers
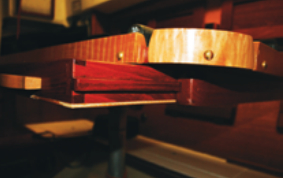
The drawers turned out to be my favorite part of this project. For some time, I had wanted drawers to hold navigation tools, playing cards, and other small items. It was great to make a permanent home for little stuff that tries to get lost. To ensure we have leg room when seated at the table, I made my drawers very shallow. They are 2 inches deep including the 1⁄4 -inch plywood bottoms.
Instead of fitting the drawer bottom in the conventional groove, I screwed it to the box sides. Securing the sides to the bottom in this way makes the box strong without the need for a great joint at the corners. It also maximizes depth inside a shallow drawer. I through-dovetailed my drawers, but a single screw or dowel in each corner would be adequate.
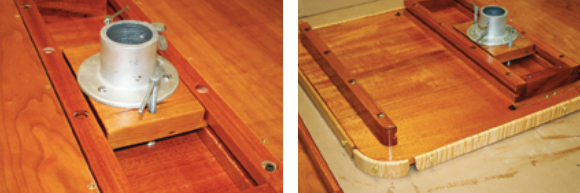
The drawer runners are an extension of the tongue-and-groove system used for the table slide. If you’re adding drawers, as I did, you need two additional cleats to serve as runners for the outside edges of the drawers. Groove both sides of the two center cleats. Then make tongues that slide easily in the grooves and screw them to the sides of the drawers. A shallow groove machined in the side of the drawer will make mounting the drawer runner strips easier. This stuff will swell on the water, so make the fit loose. It will run well with a loose fit.
The final element for the drawers is a system of stops. My solution calls for a bit more woodworking than the rest of the project. Some people might find a hardware solution more appealing, but my stops rely on the natural springiness of a sliver of ash or oak and are a pleasure to operate. I put a stop at the front and the back of the drawers so they could be opened from either side of the table.
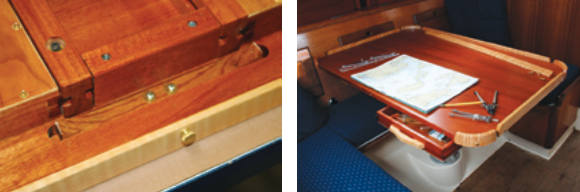
I shaped ash into strips 9 inches long and 3⁄4 -inch wide. They are 1⁄8-inch thick at their centers and the thickness increases to 1⁄2 inch at each end to create the stop. I drilled through the thick part of each stop and inserted a brass escutcheon pin to prevent the short grain on the stop from breaking off.
With a router, I cut recesses under the tabletop to receive the thicker ends of the stops. (These recesses could also be cut with stopped drill bits and cleaned up with a chisel.) At rest, the stop stands proud of the bottom of the table and prevents the drawer from opening. When depressed with a finger, the thick part of the stop retracts into the top, allowing the drawer to open. It’s easy to open and close the drawers from either end. They have never escaped the stops.
I have used the table for two full seasons and I am very pleased with it. I don’t hesitate to adjust it to accommodate a new activity or combination of people. The small cabin of a 30-footer needs to be adaptable. This more flexible table definitely reduces frustration and makes life aboard more comfortable.
Joe van Benten sails his 1977 Bristol 30 out of Pocasset, Massachusetts, at the top of Buzzard’s Bay. For the last 32 years he has operated Joseph van Benten Furniture makers in Brookline, Massachusetts, specializing in hardwood furniture built to order.
Thank you to Sailrite Enterprises, Inc., for providing free access to back issues of Good Old Boat through intellectual property rights. Sailrite.com