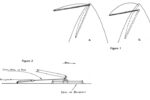
Rolling out a mirror finish is all about preparation
Issue 75 : Nov/Dec 2010
Few upgrades can change the looks of your boat as dramatically as a gleaming new coat of paint on her topsides. Modern two-component polyurethane paints, when professionally applied by spraying in a controlled environment, can produce results that rival factory finishes in every respect, but the cost can be prohibitive. Do-it-yourself owners can apply these paints using the roll-and-tip method, which is easier to master and can produce good results, though usually not as good as a professional spray job.
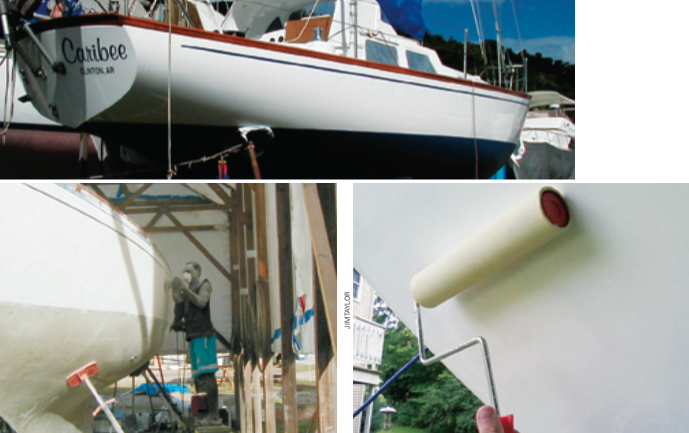
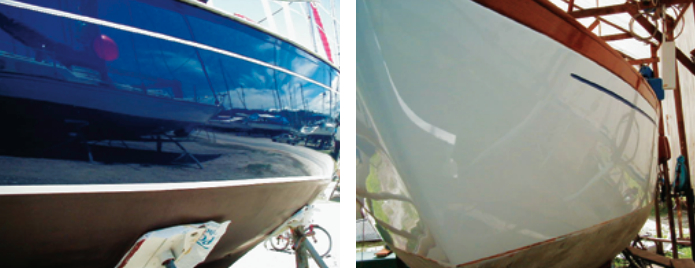
Another application method is rolling alone, without tipping off the wet paint with a brush. This is the technique we used on Caribee. I don’t think it’s an exaggeration to say the result was excellent. Many boatyard passers-by had difficulty believing it wasn’t sprayed. We even had a few professional spray men ask how we did it.
It’s not particularly difficult to get this kind of finish by rolling, but there are a few tips and tricks. The first thing to understand about any brand of high-gloss catalyzed linear polyurethane paint, no matter how it’s applied, is that preparation of the surface is key. These paints produce an extremely thin coating. Unlike enamels, they hide nothing in the way of surface irregularities or imperfections. Instead, the high gloss and thin film magnify any dings, bumps, sanding marks, and spots where the hull is not fair. It’s essential to do a good prep job if you expect showroom-quality results.
Not all two-part linear polyurethane paints are created equal. We experimented by rolling a few different brands. Not one was capable of producing the kind of sprayed look we could get with Awlgrip. Although most other brands are less expensive, the quantity of paint needed is fairly small and the savings are not substantial relative to the labor you’re investing in the project. If you have the equipment, knowledge, and skill needed to spray, or if you choose the roll-and-tip method, you may be able to get reasonable results with other brands, but for getting a sprayed look by rolling alone, genuine Awlgrip is the way to go.
Degree of perfection
If your hull wasn’t entirely fair even when brand-new, you have to decide if you want to invest the considerable labor involved in fairing it to perfection or whether you’re willing to live with a finish that’s essentially as good as when it was new. Most owners will be content with that.
If that’s how you feel, you’ll only have to fill small dings and dents, sanding everything smooth with an orbital or dual-action sander fitted with 220-grit sandpaper. Use epoxy fillers, not polyester auto body fillers like Bondo. Epoxy fillers are less subject to shrinkage, bond failure, and water absorption. You can also use the recommended AwlFair filler. Sand the filled areas smooth and repeat the process until you’re sure the area is perfectly smooth.
Most people can feel any roughness or unfairness in a surface more easily than they can see it. Close your eyes and slowly pass your fingers over the spot in question. You should not be able to tell if you are touching the repair. If you can feel the repair, you have more work to do. After all the dings you can see or feel are filled, sand the entire hull with 220-grit paper to prepare for the next step, which is to apply an epoxy primer.
Primer as base
It’s essential to use a primer, not only to provide a barrier and tie coat but also to produce a film that can be sanded to a perfectly smooth base. There are several good high-build epoxy primers suitable for an undercoat, but it’s a safe bet to use the genuine Awlquik primers recommended in Awlgrip product literature for rolling and brushing applications.
Before applying the primer, wipe down the faired and filled surface with an acetone-soaked rag to remove any oily contaminants. Apply two coats of primer as recommended over the clean, dry surface of the hull using a good-quality foam roller. (These are made of a thin layer of yellow foam over a cardboard tube. They are also what you will be using to apply the topcoat.)
Sand the primer smooth with an orbital sander fitted with 320-grit paper. A neat trick is to mix some black or blue printing ink (any ink that’s soluble in alcohol, such as that used to refill inkjet printer cartridges) with alcohol and wipe it onto the dried primer with a rag before sanding. This will produce a telltale guide coat. When all the ink disappears during sanding, you will know that you have sanded away all the tiny “hills” left by the roller and have reached the bottoms of the “valleys,” leaving the micro-smooth surface necessary for a good finish.
If the primer seems very thin after this, or if it’s not yet perfectly smooth, repeat the process, using more reducer in the primer for this application.
When you think you may be ready for the polyurethane topcoat, you can use another trick to see how well you’ve done. Spray the sanded surface with a light misting of water and sight down the wet hull at a narrow angle. Your eye will catch the light reflected off the surface and any areas that need more attention will be obvious.
You’re almost ready to apply the first coat of polyurethane. Mask off all surfaces immediately adjacent to the topsides with quality masking tape.
Time to roll
If you’re working outside, make sure there’s no rain in the forecast. You’ll need a minimum of five hours drying time in summer weather and a few hours more in cool weather before the fresh paint will tolerate any water. Less than that, and you’ll be sanding most of it off before the next attempt.
Which brings up another point. Your first coat is a learning experience. If you’re attentive, you’ll have it all figured out by the end of the second coat. It’s a good idea to practice on some small surface that’s not part of the hull. With the first coat, you’ll undoubtedly make mistakes — like runs and holidays — and wind up with bugs stuck in the paint. Pay attention to what’s causing problems and each successive coat will be an improvement. You’re never finished until you roll on the last coat, and it’s never the last coat until you’re satisfied. You’ll be sanding out mistakes after each coat, so don’t be intimidated by difficulties when you start rolling.
Until you do apply that first coat, it’s possible for one person to do all the prep work, but you’ll need a helper when you start rolling the topcoat. Once you start, you can’t stop for any reason or you’ll lose the wet edge and ruin the gloss of the finish. Your helper’s job is to keep your rolling tray filled and watch for runs and holidays. The highly volatile reducer will evaporate quickly in the open air, causing the paint mixture to become more viscous. To keep the paint’s consistency stable, your helper will need to keep the catalyzed mixture in a covered jar or can and frequently pour small amounts into the roller tray.
Mixing tricks
Before opening the cans of topcoat components, even though you are not spraying, put on a respirator mask fitted with carbon filters. The fumes from polyurethane are toxic.
Mix, by volume, two parts Awlgrip Topcoat Base with one part Awlcat #3 Brushing Converter (H3002). It’s essential that you use only original Awlgrip Topcoat Base, not Awlcraft 2000, which is not suitable for roller or brush application.
Reduce 25 to 33 percent with T0031 Brushing Reducer. Example: 8 ounces base, 4 ounces converter, 3 to 4 ounces reducer. These are the proportions Awlgrip literature recommends, but we obtained a higher sheen by pushing the upper end of the reducer envelope, sometimes reducing the mixture by as much as 50 percent. This was in hot weather, about 85° F in the shade. Cooler weather calls for a little less reducer, but the paint should seem very thin. If you don’t think it looks too thin, you probably don’t have enough reducer. Very low viscosity is one of the keys to getting a high gloss without tipping. Strain the paint through a fine-mesh paint strainer into a clean container that can be covered.
Mix enough paint for one full coat before you start. How do you know how much this is? Awlgrip says theoretical coverage for the recommended finished dry film thickness is 285 square feet per gallon of mixed paint. That’s about what we used when reducing by 50 percent, applied in five coats. If you plan to use five coats, as we did, mix at least 25 ounces for each 285 square feet. It’s much better to have too much, because there is no cure for running out before the coat is finished, except to sand down the edge where you ran out and cover everything with the next coat.
This brings up another handy trick we discovered quite by accident. Mixing too much can be a good thing. If you put the excess in a sealed container in the refrigerator as soon as possible, you’ll find that its rolling properties the next morning will be much nicer than those of freshly mixed paint.
We noticed that freshly mixed paint tended to leave lots of air bubbles on the surface when we began rolling, one of the prime reasons for tipping with a brush when using the roll-and-tip method. Eliminating these bubbles requires making multiple passes over the wet surface with the roller before moving on with the wet edge. However, when we stirred the leftover amount into some freshly mixed paint, it rolled out beautifully with very few bubbles. We learned that mixing the paint the night before and keeping it in the refrigerator worked best. With experimentation, we later found that, when kept refrigerated, Awlgrip could be used for as long as five days after mixing. If you keep it more than two days, it may be necessary to add a little more reducer before rolling. Make sure the container is tightly sealed, or any food sharing the refrigerator may acquire a very unpleasant smell and taste.
The first coat
Work in the shade if possible. If not, try to start painting early in the day, right after any moisture in the air or on the surface has dried. If you have to paint in direct sunlight, start on the sunny side and progress toward the shaded side so you’ll be moving toward the cooler side of the boat. After circling the hull, you’ll finish where you started, so remember to start at a natural break in the surface, such as the sharp edge where the transom meets one of the sides.
Before you begin painting, wipe the hull with acetone, followed by a clean tack cloth. Pour a small amount of mixed paint into your tray and start rolling at your chosen point, using a yellow foam roller cover. Lining the tray with aluminum foil makes cleanup a breeze; just throw away the foil when you’ve finished painting for the day.
You will be using a new roller in the beginning. After finishing the first coat, if you immediately wrap the roller cover in plastic and put it in the refrigerator in a sealed container, it will work better than new in the morning. You should be able to extend the life of the roller, but by only one day, as the solvents eventually cause the foam covering to separate from the cardboard core. For this reason, always have at least one new roller cover ready to go before you start to roll a new coat.
Begin rolling with what seems like very little paint in the roller, almost like dry rolling. Chances are you’ll have too much on the roller in the beginning, which will cause runs. These runs may not develop until you’ve moved on, making it too late to fix them on this coat. You’ll find that you can work an area only so long before moving ahead with the wet edge. You’ll know when you’re spending too much time before moving along: the roller will start to “pull” on the surface and you’ll hear a faint popping sound as you roll. When this happens, it’s too late to fix any runs or to work out air bubbles; mistakes after this point will have to be sanded out and covered by the next coat. You’ll notice that bubbles you’re forced to abandon will often disappear on their own, due to the almost magical self-leveling properties of Awlgrip.
Move along at a moderate pace until you discover the rhythm that’s just the right compromise between keeping a wet edge and working the freshly covered surface. This is something for which you will tend to develop a feel as you work and should become second nature by the third coat. Make sure your helper is paying attention, watching for runs and dry spots and ready to add small amounts of paint to your tray quickly when needed.
It should take from 45 minutes to an hour and a half to paint an average 35-foot boat. When you arrive back at the starting point, let the roller just slightly overlap the edge of the paint where you started. This is easy to do at the transom corner, but may be tricky on boats with no angles in the surface. You’re now finished for the day. Store your excess paint and plastic-covered roller in the refrigerator right away.
Subsequent coats
Product literature specifies a minimum drying time of 16 hours between coats. In practice, you’ll normally allow the paint to dry overnight before an early morning sanding in preparation for the next coat. Unless you have a lot of serious runs, sanding and preparation should take between one and two hours. Use 400-grit sandpaper on an orbital sander. Move quickly around the hull, sanding just enough to dull the sheen. Spend more time on any bugs, dust specks, or runs. The paint film is so thin that small runs will often be almost invisible until sanding highlights their outlines. They can be sanded away easily after overnight drying, but if you wait longer, the film will have cured to a hard, abrasion-resistant surface.
Wash the sanding dust away with a water hose and dry the hull well with a towel or chamois. Wipe down the surface with acetone and follow with a tack cloth. Mix another batch of paint, adding any refrigerated mixture from the previous day. If you have mixed the paint the night before, remove it from the refrigerator an hour or two before painting, to allow the temperature to equalize and the viscosity to thin out. Strain the mixture through a fine-mesh paint strainer.
Start rolling again just as you did on the first coat, making adjustments in technique as needed to fix problems you may have had the day before. You may need to use more or less reducer or apply less or more paint to adjust for runs or areas that are too dry. One sign that an area is too dry is a stippled finish that lacks a high gloss. Working an area for too long after the paint is rolled out can also cause stippling.
Each coat requires one day, but you won’t really be spending more than three or four hours sanding and painting. The rest is drying time. You may find that as few as three coats are enough or you may need as many as six, depending on the thickness of each coat and whether you have a lot of mistakes to cover.
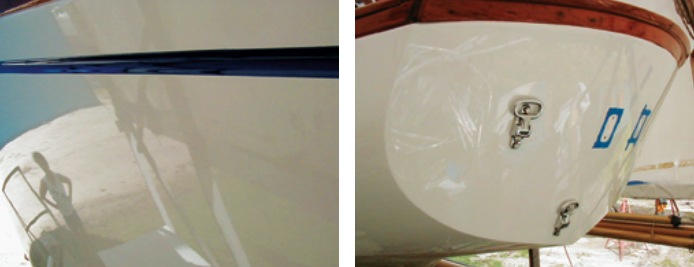
We could still see some faint traces of filler after three coats and four still seemed a bit thin. Five was the magic number for us, producing a high-luster finish with almost no flaws. If you’ll be adding a cove stripe or boot stripe in a contrasting color, give your new paint job at least 24 hours to dry before applying masking tape. Also wait that long before removing masking tape at the edges of the finish. If you detect any tendency for the paint to lift as it’s removed, carefully run a razor knife along the edge of the tape before you pull it away.
Bask in the glow
Your beautiful new topsides will be a source of pride for years to come. Enjoy the admiring gaze of fellow sailors, happy in the knowledge that you did it yourself for a reasonable cost. You’ll be surprised at how many people think they’re looking at a professional spray job. You may also be surprised to find that you’re not too concerned about picking up small dings and dents, because you now know you can easily make her like new again whenever you wish.
Randy and Cheryl Baker have been living aboard and cruising Caribee, their 1968 Nicholson 32 sloop, since 1992. They completed a major three-year refit and upgrade in Trinidad in 2004. In 2008, they transited the Panama Canal and sailed across most of the Pacific. After spending the 2009/2010 cyclone season in Tonga, Caribee sailed to Fiji to continue her Pacific explorations.
Thank you to Sailrite Enterprises, Inc., for providing free access to back issues of Good Old Boat through intellectual property rights. Sailrite.com