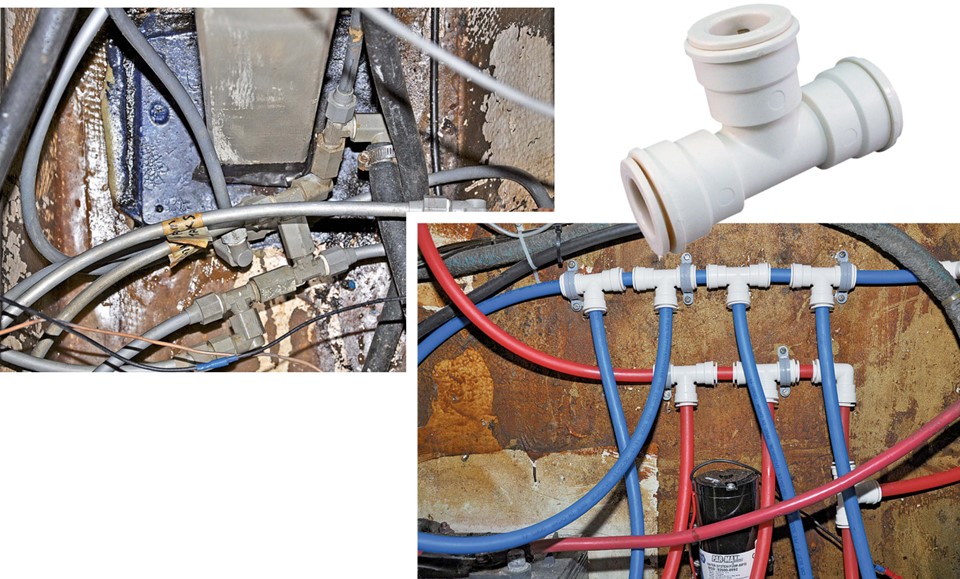
cursed it every time a connector leaked. The new hot and cold manifolds are easy to inspect, identify, and repair, right.
When water pipes reach the end of the line
Issue 112: Jan/Feb 2017
The plastic freshwater plumbing that had been in my Down East 45 schooner, Britannia, since 1977 was a horrible spaghetti-like mess at the bottom of the bilge that leaked constantly. The piping just hung there unsupported and fittings would vibrate loose or crack from old age. Tightening a connection or making a repair was a job for a contortionist.
Talking to other old boat owners — and owners of old boats — I learned that problems with old pipes are common. Plastic pipes and fittings become brittle due to heat, cold, and plain old age.
I decided to bite the bullet and replace the whole system with new fittings and pipe, along with a more powerful water pump. Our 3-gallons-per-minute (gpm) pump did not have the capacity to serve multiple outlets simultaneously.
I found a nice-looking plumbing system at Lowe’s, something used in new-home construction as an alternative to expensive copper pipes. I reasoned that if this system was considered suitable for installing permanently behind walls, then it would also be suitable for my boat.
I bought two 100-foot coils of 1⁄2-inch-ID crosslinked polyethylene (PEX) tubing for $27.95 each. One coil is red for hot water, the other blue for cold water.
Color coding by itself would be an improvement. Because all the old pipes were gray, it was difficult to know which was which without running hot water through them. Also, the original pipes were routed behind bulkheads and panels, where they were easy enough for the boatbuilder to install but inaccessible to the owner trying to do maintenance years later. I planned to re-route my new pipes where they would be more visible and I could inspect them and get to the connections. By doing so, I could also make the pipe runs shorter.
Lowe’s also sells the matching PEX pipe connectors made by Blue Hawk and guaranteed to 100 psi. Ace Hardware stores sell similar fittings under the trade name Watts. Although a bit more expensive, the Watts 1⁄2-inch female adaptor (of which I needed seven) has a useful advantage: an internal sealing ring on the straight threaded adaptor eliminates the need for reams of PTFE tape to form a watertight connection.
I estimated how many elbows, tees, and straight connectors I thought I might need, but ended up having to change some for others (I used 28 in total). An advantage of buying from large chain stores is that I was able to return items for exchange or refund.
Running pipe
Uncoiling the tightly rolled plastic pipe was like wrestling an octopus. It didn’t want to form into anything like a straight length. I decided to tie one end to the pulpit of the boat and uncoil it down the deck, then tie it to the stern rail and leave it there in the Florida sun. Within a few hours, the pipe had succumbed to the heat and become workably straight.
To route the pipes more directly to the aft cabin head/shower, the forward head/shower, and the galley, I had to drill 3⁄4-inch holes through bulkheads, some of them in hard-to-reach places. Britannia has 10 hot and cold outlets, including for a washing machine. By the time I’d run twin pipes to all of them, I didn’t have much pipe left over.
We had been living with a 3-gpm electric pump for years, but it never really had enough pressure to supply the washbasin faucets in both heads at the same time. Simultaneous warm showers were out of the question.
I decided to double the flow, using a 6-gpm Par-Max Plus pump by Jabsco that I bought at West Marine for $187. This is a powerful pump and I was a bit wary of increasing the pressure from 35 psi to 60 psi, but I knew, if it proved to be too much, I could return it in exchange for a lower-capacity pump.
I first set about making hot and cold manifolds, using tee connectors joined together. I screwed these to the side of our machinery bay just below the cabin sole, where they would be easy to get to in the event of a failure. I installed the heavy pump just below the manifolds, head down, per the instructions.

It was then just a matter of leading each pipe to a manifold connector, trimming it to length, placing the insert in the pipe end, and pushing the pipe into the connector. The best way to cut this type of pipe is with pipe-cutting shears that slice through the pipe perfectly square and leave no burrs.
Pieces of pipe are easy to join using the connectors: simply place a small insert into the end of a pipe and then push the pipe end into the connector until it bottoms out through an O-ring in the fitting, which seals the joint. An internal barbed ring prevents the pipe from blowing out.
These fittings are surprisingly easy to disconnect. Place a small C-shaped removal tool over the pipe, push it against the fitting while pulling the pipe, and out pops the pipe.
The Watts connectors are a far cry from those I replaced, in which the female outer bezel first had to be slid onto the pipe, along with a sharp barbed ring (that I cut myself on more than once) and a plastic ferrule. The outer coupling then had to be screwed into its male connector — but not too tight or the plastic coupling could crack and I would have to begin again. Repairing one of these in the bottom of the bilge was a tedious operation, especially if it was behind a panel.
Out with the old
I’d spent two days getting this far. To keep our water supply on, I had left the old pipes and pump in place. This also allowed me to double-check the old connections against the existing layout to be sure I was joining the right pipe to the correct side, whether hot or cold. (The color-coded pipes made this much easier to do.)
On the third day I was ready to disconnect the old pipes. We knew we would not be able to run any water until all the faucets were reconnected, so we first filled a few pans and the kettle with water. I then spent the better part of a day stretching inside lockers, unscrewing the old connectors, and “piping up” the new ones. One reason it took so long was because the threads on the faucets were not all the same size. After all, it’s a boat! So I made the inevitable trips to the store to buy adaptors and exchange fittings.
I fitted stop-cocks in the hot and cold supplies at the washing machine. We close these when the machine is not being used in case the machine’s internal valves fail.
I also replaced the 15-amp circuit breaker in the electrical panel with a 20-amp breaker. The new, more powerful pump would draw more current than its predecessor.
The pressure goes on
After all this came the moment of truth. Because there was only air in all the new pipes, I opened all the faucets, checked all my fittings for the third time, said a little prayer, and then pushed the breaker. The pump immediately started up . . . then ran, and ran, and ran, but with absolutely no sign of water at any faucet. The newer diaphragm pumps like the Par-Max Plus are capable of being run dry, so I was not immediately bothered by this turn of events. But after a few minutes passed, I wondered why I wasn’t seeing even the slightest spurt coming from the outlet nearest the pump.
Then it dawned on me: both water tanks have shut-off valves that enable either one to be used as required. I remembered closing the valves to prevent leaks while I connected the new system, and I couldn’t remember opening them. Without thinking to switch off the pump, I lifted the floorboard above the valves. Both were closed. I quickly opened one.
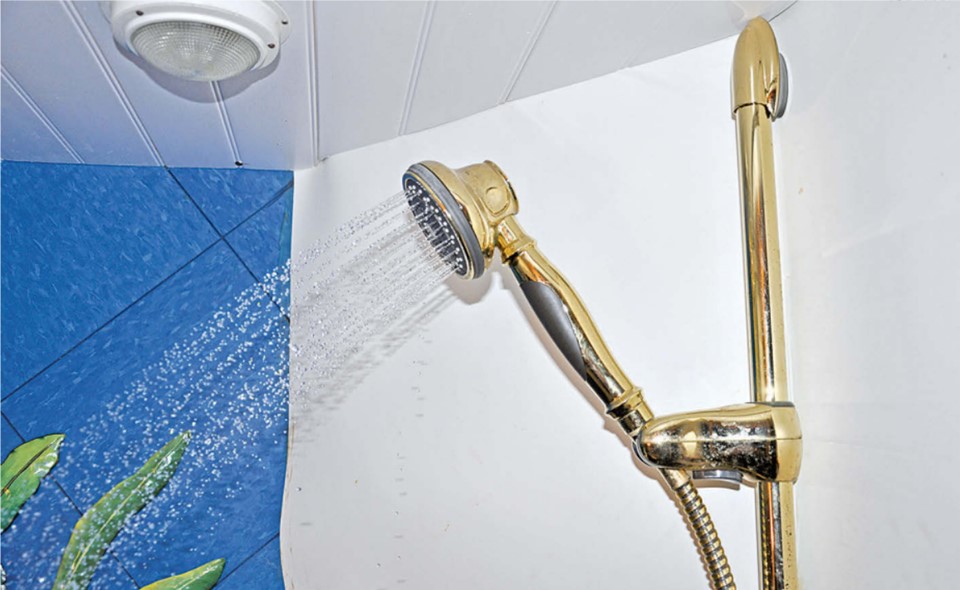
The pump instantly changed its tone, as though it were talking to me . . . and what it was saying was not complimentary! In an instant water gushed from all the faucets with much more force than we had been used to. I switched some off, then turned on the shower in the aft cabin — it was as powerful as our house shower!
I quickly inspected all the connectors. I would be lying if I said I had no leaks. On three connectors, I hadn’t pushed the pipe fully enough to engage the O-rings, but that was easy to remedy. A couple of the threaded connectors dripped, too, but a few extra turns of a wrench took care of them.
After this, all became silent . . . until I opened a faucet and the pressure drop activated the pump. The moment I closed the tap, silence again. Wow! But that means we might need a larger hot water tank. Six gallons will not last long in a powerful hot shower, even if it is mixed with cold water.
Repercussions
Few improvements you can make on a boat are without some sort of downside. In this case, the greatly increased water flow and pressure would likely cause us to use much more water than previously, especially in the shower. Luckily, the boat has a larger than average water capacity for its size, 330 gallons. Still, at 6 gpm, it doesn’t take long to use a lot of water. This would be no problem when we had a shore supply, but we recognized that we would need to be more frugal at sea. It’s just a matter of remembering to not open a faucet quite so wide as we were used to.
Then again, we could always buy a watermaker. After all, as a very famous yacht designer once told me, “You can do anything you want to on a boat. All it takes is money.”
Roger Hughes has been sailing for nearly half a century as a professional captain, charterer, restorer, and happy imbiber on a lot of boats. His present project, the restoration of Britannia, a once run-down Down East 45, is nearing completion after five years. (Roger thought it would take two at the most.) Roger and his wife, Kati, look forward to cruising later in 2017 and using all the innovations he has incorporated into the boat, many of which have been featured in Good Old Boat. To see more of Roger’s ideas and innovations, visit his website at www.schooner-britannia.com.
Thank you to Sailrite Enterprises, Inc., for providing free access to back issues of Good Old Boat through intellectual property rights. Sailrite.com