Two dollies make keel hauling a one-man job
Issue 113: March/April 2017
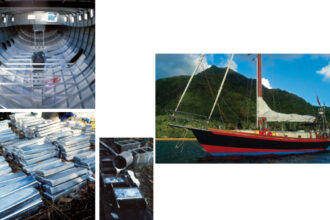
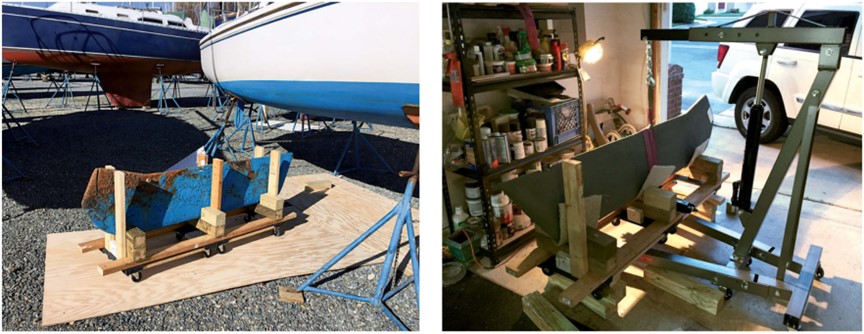
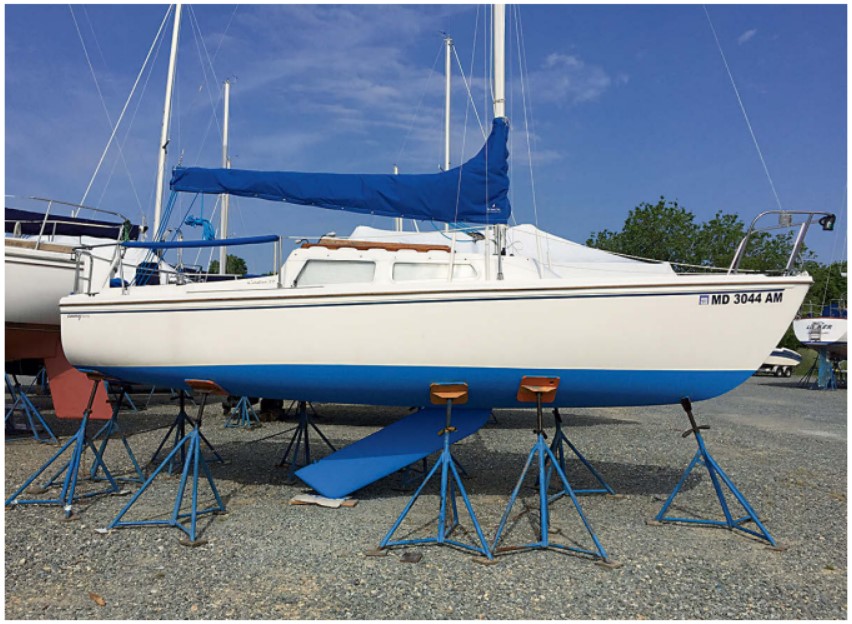
When I pulled Carolyn’s Eyes, our 1984 Catalina 22, out of Chesapeake Bay in the fall of 2015, I saw at once that her retractable keel needed some rehabilitation. I had planned only to inspect the keel trunk and replace the four bolts attaching the keel to the boat. However, a large area of rust indicated a change of plans was in order. Having heard tales of keels, “just falling off” when they were lowered, I decided to remove the keel, have it sandblasted, and then refurbish it in the comfort of my garage. The first order of business was to build a cradle that would allow me to safely remove, transport, and then reinstall the 500-pound keel.
I wanted to build a cradle that would receive and hold the keel in an upright position as it was lowered from the boat. The cradle also had to be movable and robust enough to withstand transport from the boatyard, to the sandblasting facility, to my garage, and back to the boatyard.
After considering the keel’s dimensions, I decided two 1,000-pound-capacity hardwood dollies fastened together with 2 x 4 lumber would meet my support and mobility requirements. To hold the keel upright, I made a slotted base with lengths of 4 x 4 lumber. Additional 2 x 4s served to guide the keel in its upright position during removal and reinstallation.
Cradle on the move
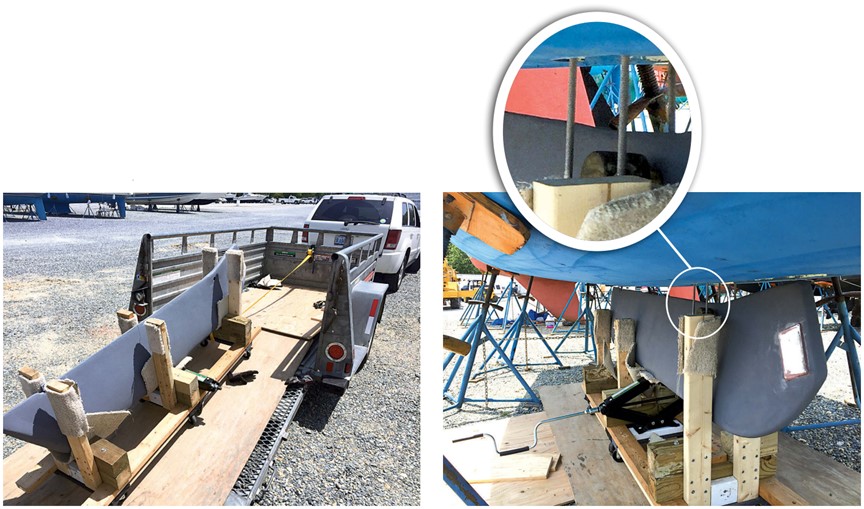
Carolyn’s Eyes was supported by jack stands on the boatyard’s gravel surface. Because there was little hope of the dollies rolling over gravel, I laid a trail of plywood sheets from the boat to the U-Haul trailer I’d rented to transport the keel.
After rolling the cradle into position, I lowered the aft end of the keel into it, using the keel’s cable winch. With the keel supported by a hydraulic car jack, I removed the four bolts that attached the keel to the pivot assembly, then slowly lowered the forward end into the cradle, guided by the uprights. Thanks to the cradle’s eight caster wheels, I was able to maneuver the 500-pound load between the jack stands and out from beneath the boat with little difficulty. The plywood creaked and crackled as I rolled the cradle to the trailer, but otherwise held up. Finally, I used a come-along to coax the keel up a ramp and into the bed of the U-haul trailer. Surprisingly, this was one of the more time-consuming and frustrating tasks of the whole operation. Because of the come-along’s short reach, I had to frequently stop the process, chock the cradle’s wheels, and then readjust the come-along. Every pause was a potential runaway-keel situation.
Once I was home with the keel safely in tow, overconfidence got the better of me. No doubt influenced by the frustrating process of winching the cradle up onto the trailer, I decided to forgo the safer option of winching the cradle down the ramp. “How heavy can 500 pounds be?” I thought to myself, and pushed the cradle past the point of no return on the ramp.
My next thought was “Force equals mass times acceleration,” as the cradle dragged me down the ramp and toward the recently-replaced garage door. But like a dragging anchor that finally digs in, the cradle and I stopped, just short of the garage door. After looking around to make sure there were no witnesses, I nonchalantly rolled the keel into the garage as if what had just transpired was all part of the plan.
Having just witnessed the power of gravity, over the next few days I contemplated how I would reinstall that 500-pound beast. It was going to be a challenge to safely lift and maneuver the keel into the exact position necessary for me to pass four 5/16-inch bolts through holes in the keel hangers and thread them into holes in the bottom of the boat. What I needed was a lifting capability that would move along with the cradle as I fine-tuned its position to align the holes. With that in mind, I added a scissor jack to the cradle exactly where the keel’s center of gravity would be. My plan was to roll the cradle into an approximate position, raise the keel using the scissor jack, and then fine-tune the position to line up the bolt holes.
Installing the keel
In the spring of 2016, the day arrived to reinstall the now-refurbished keel. Rather than use a come-along to load and unload the keel onto the trailer, I upgraded to a portable trailer winch with a 900-pound capacity and a 20-foot strap. Loading and unloading the keel then became a simple task. Once the keel was under the boat, I installed long threaded rods into the attachment points to use as guides when maneuvering the keel into position. These rods were actually 6-inch bolts with the heads cut off and a notch ground in using a Dremel tool so I could install and remove them with a slot-head screwdriver.
When the cradle appeared to be properly aligned, I began cranking up the keel with the scissor jack, making position adjustments as necessary. When the keel rose high enough that the threaded rods penetrated the holes in the keel hangers, I put nuts on the rods and tightened them with a wrench, drawing the keel up into position while adjusting the jack to ensure it supported the majority of the weight.
Meanwhile, I applied blue Loctite to the threads of the proper keel-attachment bolts. Then, one at a time, I removed the rods and replaced them with the bolts, which I torqued to the appropriate tension. I raised and lowered the keel a couple of times to ensure all was well. A few days later, a fresh coat of bottom paint signaled the installation was complete and Carolyn’s Eyes was ready for the sailing season.
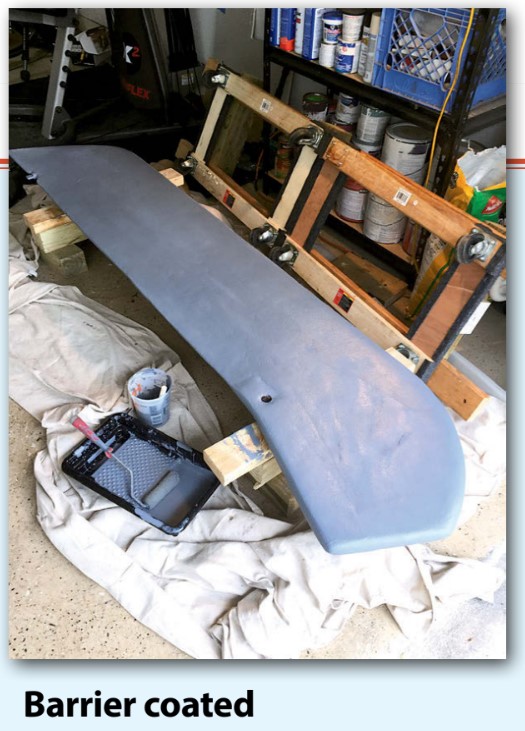
Refurbishing the keel
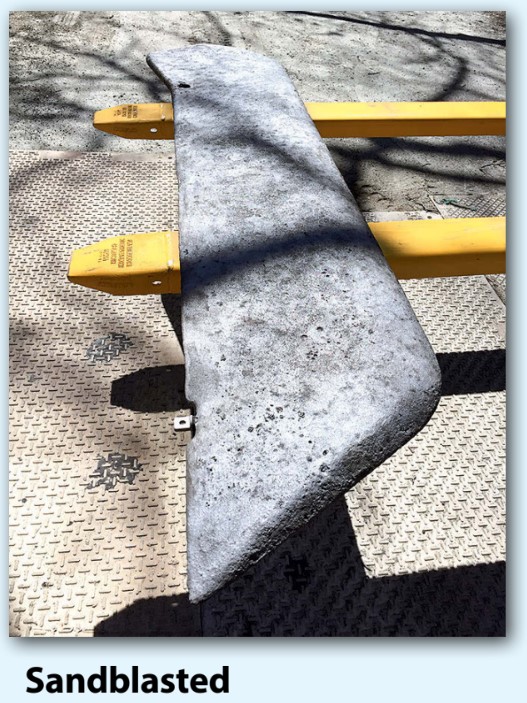
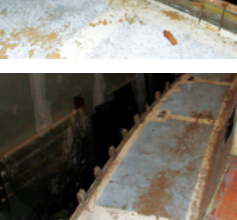
Refurbishing the keel consisted of sandblasting, priming, fairing, and barrier coating. Rocco used a shop crane to load and unload the keel into its cradle and to reposition it for refurbishing work. He later sold most of the tools, including the keel cradle, on Craigslist, offsetting his project expenses.
Rocco Dryfka and his first mate, Carolyn, have been refurbishing and updating their good old 1984 Catalina 22, Carolyn’s Eyes, over the four years they have owned her. They currently enjoy sailing her out of Herring Bay on the Chesapeake.
Thank you to Sailrite Enterprises, Inc., for providing free access to back issues of Good Old Boat through intellectual property rights. Sailrite.com