Under its dull, chalky finish lies a shiny boat
Issue 85 : Jul/Aug 2012
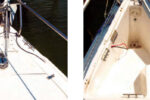
Believe it or not, it is possible to bring the shine back to a good old boat. Most of the thousands of aging fiberglass boats out there are still doing great service. However, after a few decades, the rain, sun, heat, and cold will have inevitably taken their toll on the fiberglass gelcoat. Unless meticulously maintained, once-gleaming decks and cockpits (and to a lesser extent the topsides) will have turned dull and chalky. Dirt and grime become embedded in the pores and removing footprints, stains, and scuffmarks becomes an almost impossible chore. While not much can be done about deep scratches and cracks, in most cases a good dose of elbow grease and some polishing can transform the gelcoat to the point where it gleams like new.
Assessing the gelcoat’s condition
Before getting started, evaluate the existing finish. A dull surface on which water doesn’t bead is clear evidence that the gelcoat has lost its protection from the elements and has oxidized. That oxidized layer, however thick, will have to be removed before the “good” gelcoat can be polished and waxed. In extreme cases, old gelcoat can wear down to the point where it is transparent and patchy or the fiberglass substrate is visible. Once that point is reached, painting is the only option.
Washing
The first step in restoring the gelcoat’s luster is to thoroughly wash the boat with soap. If necessary, use a stain and/or mildew remover on spots that can’t be cleaned with soap. Normally, you would not use household dishwashing liquids on gelcoat because they are formulated to dissolve oils and grease and will strip off the vital layer of protective wax. If the hull is heavily oxidized, however, the wax coating will be long gone and need not be protected. Rinse well and use a chamois or clothto dry the surface and remove any lingering residue.
Rubbing compound vs. polish
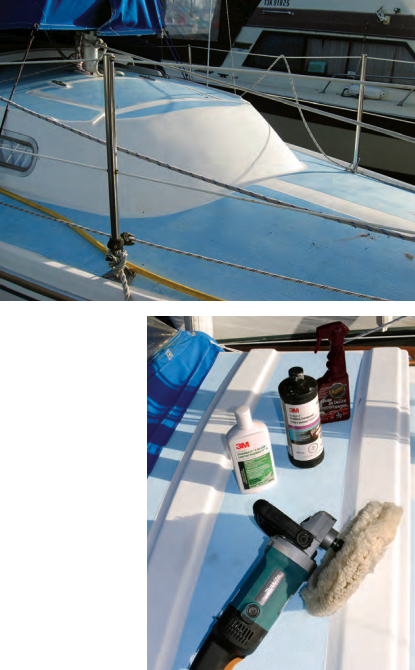
Many abrasive products are available for removing oxidation prior to waxing. The terminology used by different manufacturers makes comparison a little confusing. Essentially, the higher the content of abrasive material, the deeper it will penetrate into the gelcoat finish. Rubbing compounds (also called cut polishes), such as 3M’s Super Duty Rubbing Compound, contain the most abrasives. These products are best for removing the most heavily oxidized finishes.
Something called a polish contains the least abrasives. One of these is 3M’s Finishing Compound. In contrast to rubbing compounds, polishes contain a higher percentage of “feeder” oils, so called because they “feed” the gelcoat. After the application of rubbing compounds, polishes are used to remove hazing, return oils to the gelcoat, and put the gloss on the finish. Polishes are also used as a first step where a finish isn’t damaged enough to require the use of rubbing compounds. Polishes are especially good at removing swirl marks and fine defects from a good finish.
Some one-part products, such as 3M’s Compound and Finishing Material, fall between the cut polishes and polishes. They are designed to remove loose material and minor defects and to enhance a dull finish.
The important thing is to use the least-abrasive product that will still do the job. If the product is too aggressive, it will remove more of the finish than is necessary and result in extra, unnecessary labor. If there is any doubt, experiment first with a less-aggressive product on an inconspicuous section of the hull.
Rubbing compounds and polishes, however, do not protect the finish. It’s essential to wax the surface as the last step in the process.
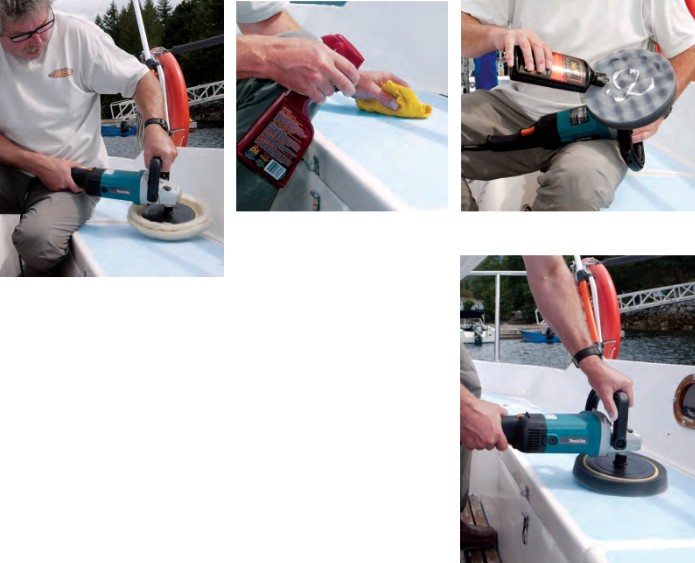
Tools
While it is possible to cut, polish, and wax by hand, it’s almost impossible to do so effectively because elbow grease simply can’t match the torque and speed required to remove deep oxidization and polish effectively.
A good-quality electric, variable-speed rotary polisher can be used for cutting, polishing, and waxing and will definitely give the best results. Orbital buffers can be used for polishing and waxing, but they don’t have variable speeds or the action required to remove heavily oxidized material. One option is to rent a polisher, but you’ll likely need it for several days. If you want to get really serious, a good Makita unit costs about $250 and can be used again and again.
Backup pads are used to mount the pads to the polisher. I prefer the ones that attach with Velcro as they make changing pads faster. Other pads have a screw-on fitting.
Pads
There are many types of pads on the market. Use wool pads to apply rubbing compounds and polishes as these have a rougher surface and provide for the deepest cutting. Wool pads come in different grades for cutting and polishing.
Before using a wool pad, remove the loose or excess wool. Mount the pad on the polisher, mist it with water, turn the polisher on at low speed, and run your fingers or a tool known as a spur through the pad until it has shed all the loose bits of wool (and it will shed quite a lot).
Use foam pads for waxing. These can also be used for polishing, but aren’t aggressive enough for cutting. Foam pads are designed to bring up the luster in paint and are good for removing minor swirl marks with polish. Foam pads with waffled finishes work best because they run cooler than flat-surface pads.
Cloths
Microfiber cloths are much more effective than old cotton cloths and T-shirts. Cotton rags have flat surfaces that quickly become clogged. As a result, they tend to wipe residue instead of removing it. Microfiber cloths have much rougher surfaces and do a much better job of picking up residue.
Application
Cutting compounds, polishes, and wax should not be applied in direct sunlight. This is easier said than done. The products tend to dry before they can soak into the surface. It is similar to cleaning a ceramic stovetop. If you try to scrub it when it is warm or hot, the cleaning material will dry before it can do its job. The surface should be cool. Mornings or evenings are best, and work under a tarp or on the shady side of the boat as the day progresses. Whether applying rubbing compound, polish, or wax, apply it sparingly — about 2 tablespoons at a time — to the center of the pad. Most people use far too much. More isn’t better.
Press the polisher against the surface before turning it on so the product doesn’t fly off the pad. Start off slowly. If using rubbing compound, increase the speed to between 1,400 and 1,800 rpm, whatever feels and works the best. For polishing, keep the speed between 1,000 and 1,200 rpm. The faster the speed, the more the surface will heat up and the faster the product will dry out. Keep the pad flat to the surface, or angled by a few degrees at most. Apply a fair amount of pressure to the polisher and move it very slowly across the surface in an up-and-down or side-to-side motion.
Polishers have plenty of torque, enough to rip the polisher out of your hands or cause it to fly along the surface in all directions. To counteract this, try locking your arms against your body and moving your body up, down, and side-to-side.
Work an area of only a few square feet at a time. Ideally, there should always be a thin film between the pad and the surface to prevent hazing and overheating. Continue to polish until you can see the shine coming up to the surface. The idea is to polish the polish, not to polish the product until dry.
When using cutting compounds or polish, keep the pads away from corners, sharp edges, and deep grooves (such as cove stripes) — the pads can burn through the gelcoat. Tape these areas off and do them later by hand, working lengthwise, not across the sharp edges. Without a tool, you’ll have to use lots of elbow grease and even then those areas will never look as good as areas hit by the polisher.
If the pad becomes caked with material, let it dry and then run your fingers or a spur through the slowly spinning pad to clean off the excess. A good pad should last for years.
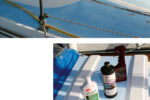
After cutting or polishing a section, wipe the surface with a cloth dampened with a boat (or car) detailing spray to remove excess material. (I’m not sure what’s in the stuff, but it works a lot better than water.) Doing this prevents excess material from being ground into the finish during the next step.
Waxing
A good-quality boat wax protects the gelcoat from the elements. There are many brands and formulations and you really do get what you pay for. That said, any wax is better than no wax protection at all. Better products will likely have better ingredients, the wax will last longer, and you won’t have to wax quite so often. Automotive waxes are similar to boat waxes but are formulated slightly differently, as the finish on most cars is acrylic urethane, not gelcoat.
As noted, carefully wipe down the surface with detailing spray and cloths before waxing. Waxing is an important step and the detailing spray really makes it easy.
For waxing, use the softest foam pad available. Apply the wax to the pad sparingly, about a tablespoon at a time. The idea is to apply only a very thin layer of wax. Too much and it will end up being wiped off and wasted.
Polish out the wax as you did with the cutting compounds and polishes but use a lighter touch and keep the speed of the polisher down to about 1,000 rpm. Don’t over-polish to the point where the wax gets dry and white. Stop buffing while the wax is still wet and then finish-wipe each section with a microfiber cloth to remove dried wax before moving on.
Upkeep
To help maintain that wax coat, wash the boat with a boat wash containing wax (remember, don’t use household soaps on waxed surfaces).
Wax a boat that is stored outdoors at least twice a year, especially the horizontal surfaces, as they will wear more than the topsides. When water stops beading nicely on the finish, it’s time to bring out the wax.
There’s nothing more rewarding than seeing your dull gelcoat transformed into a gleaming finish that beads water and repels dirt. Not only will the finish be easier to clean, it will give you a whole new sense of pride in your good old boat — like getting a new boat without the cost.
Peter A. Robson is an award-winning author, journalist, and former editor of Pacific Yachting magazine. Over the years, he’s owned a number of good old boats, both power and sail. He hails from Garden Bay on British Columbia’s Sunshine Coast and is currently the editor of Cottage magazine.
Thank you to Sailrite Enterprises, Inc., for providing free access to back issues of Good Old Boat through intellectual property rights. Sailrite.com