Illustrating a technical article calls for a different set of rules
Issue 15 : Nov/Dec 2000
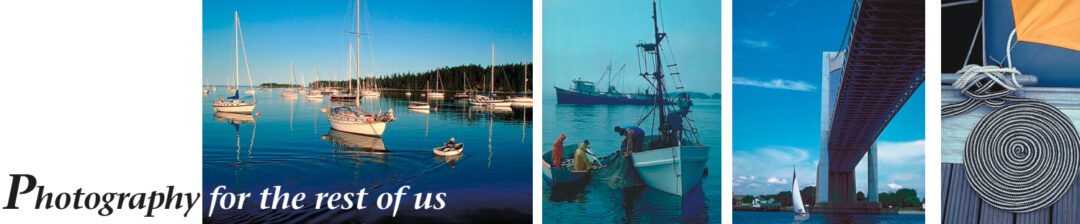
Have you ever written an article and then had trouble taking a picture that did it justice? Don’t worry. It wasn’t your fault. Shooting pictures for a magazine article violates most of the classic rules of photography. Forget about framing, saying “cheese,” and avoiding the tree behind your brother-in-law’s head. You’re trying to deliver the essence of the article in an image-byte an editor can fit on the page with your article. That is no small task. It requires that you change the way you set up a shot, use your camera, and think about what you’re trying to photograph.
The key to article (rather than scenic) photography is picture content. The subject and technique you use to shoot it will make or break your article. You’re going to take pictures of a subject that you’re not accustomed to photographing, and you’re going to set up the shot with techniques you don’t normally use. It doesn’t matter if the subject is a product bucket with print on it, an accessory buried deep in the engine bay, or a boat on the hard. While each sounds like a different project, they all follow the same rules.
Size
Fill the viewfinder with the subject. Unless you’re writing a travel article, the background and framing are irrelevant. The editor will size the picture to fit the available space and crop anything left over anyway. The largest subject image possible gives the editor the sharpest picture to work with.
Reflections
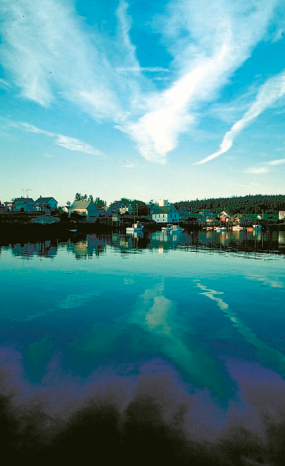
These reflections are not on the water, but rather on the subject. You’d be amazed at how many subjects will cause reflections in the viewfinder. One of the toughest is a book with a glossy cover. If the light is wrong, you will see yourself in the picture. A single-lens reflex (SLR) camera helps. You can see the reflections and move the camera to minimize them. Look at the subject on the ground glass as a picture and not as an object. You want a dark-to-neutral ceiling. White can reflect a lot of light. Available light should be flat. But you still need enough light to shoot without a flash. I usually use my front porch in the morning. It faces northeast. Place the camera directly over the object and rotate the object for multiple shots. You will be amazed at how many shadows creep into a picture. Having residual shadows at the bottom of the object is the most natural orientation.
Contrast
Background color should contrast with that of the object, but not be its opposite. Most pictures will be printed in black and white. If the color values of the background and the object are the same, it will be hard for the object to stand out from the background. If the color contrast is high, that is, black and white, your meter will not expose the object correctly.
When you’re photographing big stuff, you may have to move it for the right background, wait for the right light, or move yourself. Where do you find backgrounds in various colors when you are photographing little stuff? The linen closet. Towels and sheets are excellent backgrounds. Think about that when you want to photograph something even slightly greasy. Shop towels might be a better choice if you want your significant other to be enthusiastic about your photographic hobby.
Flash
Forget the strobe. If you have trouble with reflections in natural light, can you imagine what a flash will do? Professional photographers have light boxes and reflectors and diffusers to handle the problem. We don’t. Stick with flat light on the porch whenever you can. When you shoot into the recesses of your engine compartment, however, use a flash.
Focus
The slowest shutter speed will give you the deepest depth of field, the area that is in focus, but it also makes it harder to achieve a sharp focus. It is hard to achieve a depth of field deep enough to keep a three-dimensional object completely in focus in the relatively low light we will often deal with. In that case, focus on the key detail of the object. Work on focus. Vary it in several photographs. Sharp focus is one of the keys to a usable photograph. A zone-focus camera is not good enough. You need a camera that will allow you to focus precisely on what the reader will be looking at.
Background depth
You’ve seen snapshots taken in a large room where an automatic flash bleaches out people in the foreground as it tries to light the room behind them. The same thing happens in daylight when there is a lot of dark space behind what you are photographing. Most cameras use an averaging meter. The light meter exposes for the average light value coming into the lens. If you’re shooting a light object against a dark background the object will be overexposed as the camera attempts to compensate for the dark area in the picture, even without a flash. A spot meter allows you to set the exposure for the subject. Your camera operations manual can tell you which you have. If it is not specific, assume that you have an averaging meter. Reduce background depth for more consistent exposures.
Equipment
Close-ups are difficult with pocket cameras. They tend to have 35 mm or even 28 mm lenses. A wide-angle lens will distort the center of a closeup and exaggerate the center of the picture. A 50 mm lens will give you the most realistic image. What about Polaroid cameras? I don’t know whether it’s the zone focus of most Polaroid cameras, or the developing process, but these pictures do not reproduce well. Don’t be afraid to use a mild telephoto (85 to 110 mm) on round objects. It will tend to flatten them out and make a label more readable. The downside is that you have to be farther away from the subject. Telephoto lenses also require more light, increasing the reflection, shadow, and focus problems. Using a telephoto lens on a boat shot raises another issue. The hull looks fine in the viewfinder, but it is foreshortened on film. A 200 mm lens can turn an Alberg 35 into a Cape Dory Typhoon with the click of a shutter . . . 70 mm is about as far as you can go before the distortion becomes apparent. There is no such thing as a free lunch in photography. You’re trying to balance film speed, shutter speed, lens opening, lens focal length, and ambient light to achieve a usable photograph. They are all related.
Film
The slower the film speed, the better the resolution and color saturation. Professional photographers like ASA 64 slide film. Find out what your editor prefers. (Good Old Boat likes Fujichrome’s Provia slide film. It’s a 100-ASA film with nice resolution. Fuji makes some other good slide film as well.) Most small-publication editors using flatbed scanners prefer prints, although publications printing four-color illustrations prefer slides. I shoot ASA 200 for faster shutter speed in available light. Fast film needs less light for a given shutter speed. It’s a compromise. Select the film speed based on the amount of light you have available where you’re going to shoot.
Technique
Professional photographers have a trade secret. They don’t take just one picture. They shoot lots of pictures. You should do the same. Do the best you can on setting up the shot. Then burn up a roll of film. Shoot with the f-stop on both sides of where you think it should be. Ditto for the shutter speed/f-stop combinations. Rotate the object so that the light falls on all sides. Focus on all of the key points in the shot. Then take the roll to a quality one-hour photo lab while the shot is still set up and your selections are still fresh in your mind. When the roll is developed, pick the shot that works and toss the rest. Your family, your friends, and your editor will think that you are a great photographer. All for the price of a roll of film and processing. Who’d have thought the price of fame could be so small?
Lighting
The overriding factor in all of the above is lighting. The best book I’ve found on the subject is The Lighting Cookbook, by Jenni Bidner, Amphoto Books, 1997. Each chapter discusses how to light and shoot a different situation, including portraiture, kids, pets, and glassware. The relevant chapter for us is the one on corporate and industrial shots. The choice of techniques is impressive and imaginative.
Subject
The old adage that says a picture is worth a thousand words is never truer than it is when you’re deciding on a picture for an article. You’re shooting one picture, a small picture, that will be printed in black and white. Choose it with care. It has to tell the story of the article in one image. Think about what you are trying to say. Think about what you want readers to see when they first look at your article. Think about what you want them to remember when they have finished reading it. That’s your picture.
To sum up, you should use the best camera, the fastest film, the slowest shutter speed, and the flattest light you have available. Then spend some time looking at your subject through the viewfinder. Think of it as a picture on the wall, not as a snapshot. If you pick the right subject, shoot a bunch of pictures, and vary the focus and exposure settings with every shot, you will make your favorite editor very happy. Your article will read well too. You will be amazed at what a good photograph will do for your style and grammar.
Peter King grew up on Peconic Bay on the end of Long Island, N.Y. He raced Lightnings during his formative years and spent a portion of the 1980s as a member of the Hudson River sloop Clearwater Foundation. These days he spends more time in a sea kayak, an Old Town sailing dinghy, and a Newport 27s MkII. A sailplane pilot, he’s been published in a variety of aviation magazines.
Thank you to Sailrite Enterprises, Inc., for providing free access to back issues of Good Old Boat through intellectual property rights. Sailrite.com