Make them yourself this easy way
Issue 52: Jan/Feb 2007
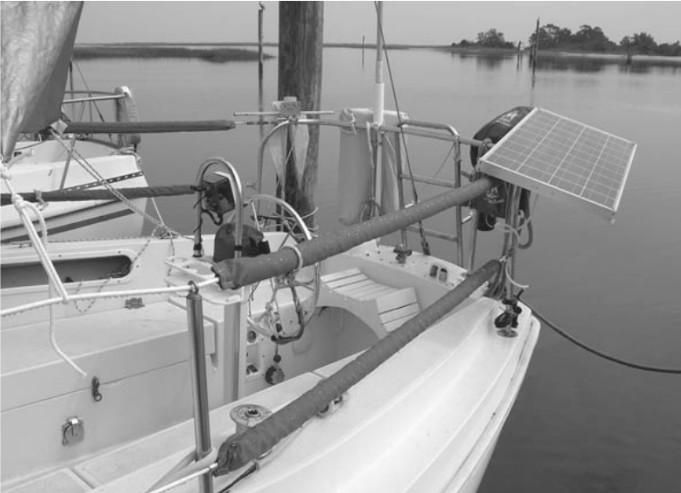
A LIFELINE CUSHION IS SOMETHING YOU CAN THROW TOGETHER from materials intended for other projects, and you can save a nice wad of cash while you’re at it. A good lifeline cushion has a flexible, hard-walled tube inside against the lifeline. This is stored inside a cylindrical foam cushion. The outside layer is a UV-resistant cover. Sunbrella or a similar boat-canvas fabric makes an ideal covering. The hard tube keeps the line from cutting into the cushion and makes the cushion more comfortable to lean against.
First, measure for the length of your cushions. Exclude turnbuckles, pelican hooks, and other hardware thicker
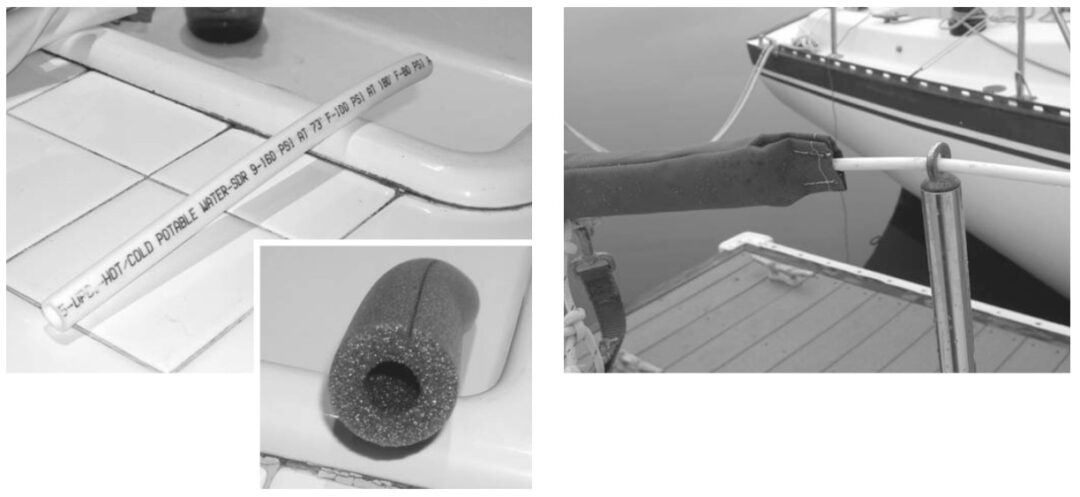
than the lifeline, as these won’t fi t through the cushion tube. Don’t assume that upper and lower lifelines, port and starboard, are exactly the same length. Buy some PEX (cross-linked polyethylene) tubing in the plumbing section at your local hardware store. This is the flexible white plastic tubing used for hot and cold potable water. If you live somewhere cold — where PEX may be banned by your plumbing code — you may have to look for another type of semi-rigid plumbing material.
Select an inside diameter that will fit around your lifeline loosely so the lifelines have some ventilation (1⁄2-inch should be fine for almost any application). While you’re there, get some pieces of foam pipe insulation with an inside diameter the same as the outside diameter of your PEX, also pick up a roll of electrical tape.
The only other thing you need now is Sunbrella for the covers. You won’t need much; long scraps of material work great if you’ve got or can get them.
Sand inside edges
Cut the foam piece to the correct length with scissors. If your lifelines are vinyl-covered, fi le or sand the inside edge of each end of the PEX to keep it from cutting into the vinyl. Slide the PEX into the foam and cut to match. PEX can be cut in a snap with sharp pruning shears. Since the foam pipe insulation is pre-slit, wrap it in a spiral pattern with electrical tape, snug but not tight enough to deform the foam. The cushion is done.
Now it’s time to make the Sunbrella cover. You need enough fabric to make a fold around the foam with just
enough overlap to stitch through and enough excess at the ends to stitch in a hem. If you don’t have scraps of
your boat’s canvas from a previous project, the Sunbrella is the only thing that’ll cost you much of anything, unless you have to pay someone to sew it for you. In that case, go somewhere where they’ll only charge you for the exact time it’ll take to do it — which should be about 15 minutes.
To make the covers, cut the cloth so it’s 2 1⁄2 inches longer than the cushion. Fold it over the cushion and mark where it forms a 1⁄2-inch overlap. Take the slack out but don’t draw it up tight, or it’ll be a pain to get the cushion in it. Mark and cut for the lengthwise overlap. Take the cloth off the cushion. At each end, fold back 1⁄2 inch of material to form a 1⁄2-inch wide hem. (Remember that you’re making the cover inside out, so the hem should be facing up as you make it.) Once it’s stitched up, turn the cover right-side out and slip a nylon cord through each hem as a drawstring. Re-insert the cushions, draw up the strings, tie them, and slip them over the stud end of your lifelines. If you don’t want to mess with the drawstrings — which allow you to take the covers off to clean them separately — just sew the ends most of the way up, leaving just enough of a hole for the lifeline to pass through.
Thank you to Sailrite Enterprises, Inc., for providing free access to back issues of Good Old Boat through intellectual property rights. Sailrite.com