A stitch in time can extend the life of a sail

Issue 104 : Sept/Oct 2015
The monsoon season was upon us. Each day we spoke by high-frequency radio to friends clawing their way toward Palau aboard a 50-foot sloop. Plagued by multiple failures, including their autopilot, radar, and throttle cable, they remained remarkably cheerful despite making only 20 nautical miles to the good after two days at sea. Dead calm and steamy heat was interrupted by violent squalls that sometimes brought 50-knot winds and boarding waves. They were often over-canvassed and caught unaware by squalls that arrived at night.
When they made landfall, their staysail was in tatters, their furling line was broken, one genoa sheet was broken, and the other was badly chafed. Hours after arriving, they were absorbed into the fleet of cruisers who commiserated with them and toasted heartily to their safe arrival. They would assess the damage in the morning.
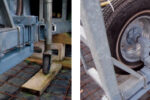
Makeshift sail loft
To assess sails and plan for repairs, you need plenty of room, preferably in a shoreside location protected from the weather, clean, and big enough to spread out a sail. In some places, finding such a spot is a challenge. Avoid dragging the sail across concrete or gravel as this will abrade the cloth. Grass can leave stains on the sail, but that’s better than spreading it out on tarmac or gravel. Use a large table only if the ground or floor is dirt or dirty.
Once a sail is laid out, you can figure out whether it can or should be repaired. We’re talking about repairing failures — rips, tears, chafe, and broken or lost hardware — rather than correcting flaws of draft or a wrinkle or two.
Condition survey
Of primary importance in such an evaluation is the overall condition of the sail, including the stitching and, in particular, the sailcloth. Does the sailcloth have sufficient service life left to justify the repair? If it does, it makes sense to proceed. Of lesser importance is the hardware: grommets, slugs, slides, rings, hanks, and the webbing used to attach them. These parts can be replaced as long as the foundation remains serviceable.
Once the overall condition is known, it’s a question of economics. How does the estimated cost of repair compare to the cost of replacement? This is assuming that replacing it is possible at your location and within your time-frame constraints.
Sometimes, even if the sail is in poor shape, if it is critical for moving the yacht, then trying to repair it may be worth the effort. In that case, you’ll need to make a more thorough evaluation and a plan for doing the repairs.
Cloth and panels
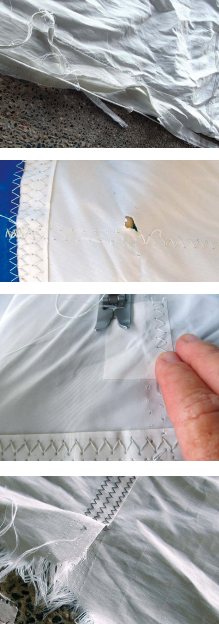
If there are no obvious tears or holes, remove your shoes and inspect the entire sail for chafe and small holes by crawling over it on your hands and knees. Mark places where the fabric has failed with colored masking tape.
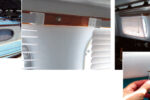
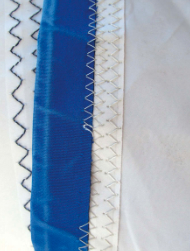
Repair small holes by applying two identically sized layers of adhesive Dacron, one to each side of the sail. Use a seam rubber to make sure the patches are well adhered, then stitch the patches down using zigzag stitching.
Large patches will likely require that new material be applied with an adhesive to keep it solidly in place while sewing. Adhesives can darken over time, promote the growth of mildew, and tend to collect dirt. When we must use adhesive (rather than staples, which we use for some jobs), we prefer two thin layers of contact cement. We were once asked to repair a cruising sail where the captain had used 3M 5200 to repair a tear. Perhaps a judicious amount of this adhesive might have been appropriate, but the sail had such a thick layer of 5200 that it was impossible to repair.
When designing a patch, try to match the fabric weight and orientation (warp/weft and bias) to the sail in its present state. Make the patch as big as necessary to ensure that it extends to good solid cloth. If you plan on cutting away the damaged fabric and you’re using adhesive, apply the adhesive to a seam allowance along the edge only. Once you’ve applied the patch and sewn around its perimeter with zigzag stitching, flip the sail and cut away the damaged cloth, leaving a seam allowance. Sew one or two additional rows of zigzag stitching to ensure the patch is firmly sewn to the sail.
Check all panel seams for chafe or rotting stitching. Remove any failed panel stitching and restitch. Long panel seams that have failed completely will require basting with double-sided Seamstick Basting Tape (or a similar adhesive) to keep the panels aligned while you’re sewing. Restitching panel seams generally involves rolling up the sail so it can be fed through the arm of the machine.
Corner patches
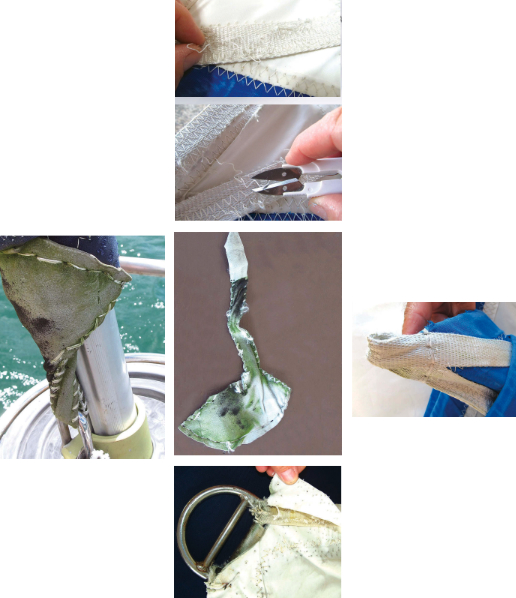
Check for damage at corner reinforcement patches. Layered reinforcement patches at the clews of headsails are frequently abraded. Remove any damaged thread and mark areas to be restitched with small pieces of colored masking tape.
Chafe patches
Replace torn or abraded chafe patches. For heavy chafe areas, you may wish to use alternative materials to protect the sail such as Top Gun, a tough woven-polyester material. Patches that have come away from the sail should be reattached with staples or adhesive prior to sewing or their positions will inevitably shift during re-stitching. Don’t forget to remove the staples when you have finished sewing.
Luff
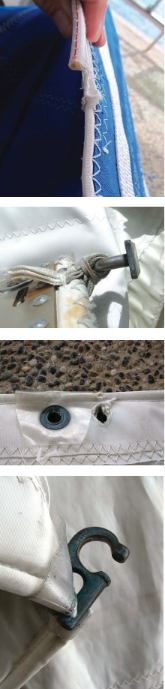
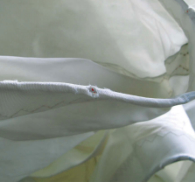
Inspect the continuous support tape of roller-furling headsails and in-mast mainsails for damage. Chafe or damage that exposes the small boltrope can generally be patched with a thin strip of adhesive Dacron and sewn down. Do likewise for damage at the head or tack ends where lightweight adhesive Dacron is folded over the cut end of the luff tape and sewn down. If the boltrope of the luff tape is broken, a sticky material patch is only a stop-gap measure and the continuous support tape should eventually be replaced.
Inspect mainsail slides or slugs for structural integrity, as well as the webbing and twine used to seize them. Webbing at the headboard is particularly subject to chafe due to the sharp edges of the headboard. Replace rings or grommets that have become separated or torn away from the sail.
Check the headsail hanks for excessive wear from the wire rope rigging and to make sure the pistons are functioning. Seized pistons can generally be freed with such products as PB Blaster or LockEase. If the hanks are the pressed-on type, examine the boltrope. If wear is evident, you may wish to insert and sew on a small piece of leather, since attempting to remove the hank is likely to break it. For sewn-on hanks, tug hard to determine whether the hanks remain securely seized to the sail’s boltrope. They should not move independently.
Leech
Carefully examine the whole length of the leech for chafe or tears to the leech tape and leech line. Areas of wear on the sail should be overlaid with folded Dacron tape of the appropriate weight and width. If the leech line itself appears abraded enough to make breakage likely, replace it. You can use the existing leech line as a messenger or remove the stitching along the entire leech to remove and replace it.
On a roller-furling headsail, also check the fabric and seams of its sun cover, particularly along the edge where it is exposed to UV when furled. Wear in the sun cover can be patched with matching Sunbrella or a more durable material in a similar color. We have used Top Gun and Sur Last for areas where abrasion is severe and chronic and where it is impossible to keep Sunbrella intact.
On mainsails, pay careful attention to the batten pockets, especially the stitching and the integrity of features designed to retain the battens. Address any abrasion caused by contact with standing and running rigging.
Foot
On headsails, examine the area near the tack where it chafes on the bow pulpit and lifelines. The other problem area is closer to the clew where the foot drags across the wire rope shrouds during tacks. The Sunbrella sun covers of roller-furling sails commonly suffer damage in this area.
On mainsails, inspect for damage from hardware such as reefing hooks or outhauls. Also inspect and repair as needed the seizing, webbing, and hardware of the slugs or slides as you already did on the luff.
Sun cover
Since it is continuously exposed to UV, the stitching securing a sail’s sun cover is likely to be weakened. This applies to roller-furling headsails as well as mainsails. Inspect the entire sun cover (leech, foot, and clew patch) for areas where the stitching has failed and remove any loose thread before re-stitching with zigzag stitches.
If long panels in the sun cover were not originally tacked down with diagonal seams, you may wish to add these if it appears the sun cover and sail are not rolling together synchronously. Also inspect the cover for torn areas that require patching.
Corners, hardware, and webbing
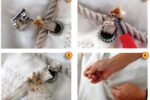
Check the stitching of all reinforcing patches, particularly for abraded thread. Appraise the condition of protective leather. Brittle, cracked, or torn pieces should be carefully disassembled so you can use them as patterns for replacements. You may want to remove the leather anyway so you can make a thorough inspection of the condition of the webbing that secures the corner rings.
Carefully inspect corner rings, particularly if they have welds. Replace any ring that is distorted or cracked. Replacement involves removing the old webbing and sewing in new webbing. If your sewing machine is not capable of sewing through webbing and the clew reinforcement patch, hand sewing is the alternative. Once the webbing is sewn down, seize the “throat” of the webbing to the ring using hand-sewing thread so the ring cannot move and then design a cover, to be made with sailmaker’s leather, to protect the webbing against UV and chafe.
Check the integrity of the small cleats (or hook-and-loop fasteners) that are often used to secure the leech and foot cords. Cleats are often sewn down with hand-sewing thread that will eventually break down in the sun. Hook-and-loop fasteners for leech and foot cords tend to fail with age.
Most roller-furling headsails we’ve repaired were originally delivered with corner webbing attachment points that had no protection from UV radiation. In some cases, the entire length of webbing, plus the stitching that secured it, was not covered. The critical attachment points of sails made this way are degrading from UV exposure every day the sail is on the furler. Such corners can be reinforced by adding one or two pieces of additional webbing, sewing it down to the corner reinforcement patch, and seizing it to the original webbing. However, if the webbing is no longer serviceable, it is better to pull it all off, clean up the thread nits, and re-web the corners. After re-webbing, protect the replacement webbing from UV exposure by covering it with shade cloth and leather.
With age and use, your sails will eventually fail. By periodically inspecting them critically and comprehensively and performing necessary maintenance, you can prevent profound failure while in use and avoid a failure that could endanger yacht and crew. Even if you have no desire to make your sail repairs yourself, it’s always good to know how they should be done so you can talk effectively to the sailmaker who will perform the work.
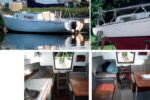
Leslie Linkkila and Philip DiNuovo came to cruising and boat ownership as adults and quickly developed a passion for small-boat travel. In 2003, they quit their professional jobs and left the Pacific Northwest behind to cruise the South Pacific in their Mason 33, Carina. They recently gave Carina a well-earned refit in the Philippines. Catch up with them at http://sv-carina.org.
Thank you to Sailrite Enterprises, Inc., for providing free access to back issues of Good Old Boat through intellectual property rights. Sailrite.com