Allied Seabreeze 35 refit: Make your refuge from the elements a place in which you’re happy to spend time
Issue 11 : Mar/Apr 2000

Your boat’s cabin is your refuge from the elements. It’s where you spend the quiet evenings relaxing with a favorite book or waiting out the fog with game after game of cribbage. Many good old boats are going strong, and many will be taking us wonderful places for years to come, but their interiors are often looking the worse for wear. While the obvious thing to spruce up the old girl is a slick and expensive topside paint job, it seems a lot of boats never really get the same degree of attention down below. Updating the interior is something we do for ourselves, not just for dockside admirers. Modern laminates are a viable, inexpensive solution for upgrading the dark surfaces of older fiberglass boats.
Step below aboard the average production yacht built in the early era of fiberglass. It is evident that builders were conscious of a certain chilling quality of fiberglass. Their solution was to revert to an age-old material that dependably conveys a feeling of warmth: wood. They built a boat from test-tube materials and then turned to mother nature to hide their handiwork. Because they loved their modern materials, they primarily used laminates with a wood-grain appearance. Formica is one brand of decorative high-press laminate, which, like Kleenex, has become a generic term.
Interestingly enough, Formica largely comes from trees. It’s basically made of paper and a binder with a top layer of decorative plastic, all laminated together under high pressure. It’s relatively cheap, not terribly difficult to work with, easy to care for, and so durable it seems to last forever. However, what looked good to builders in the 1960s unfortunately doesn’t necessarily thrill us today. If some manager was partial to pea green, you’re stuck with pea green. The most common pattern you’ll find is an attempt at teakwood grain, which turns many cabins dark and gloomy.
A few years ago, we purchased an aging Allied Seabreeze 35. Naturally, we consider her one of the best looking boats of her size and type. She’s got just the right bounce to her sheer, long overhangs, low freeboard, and a traditional transom with just the right amount of rake to it. (More on this Allied Seabreeze in September 2000, when she will be our feature boat. -eds.)
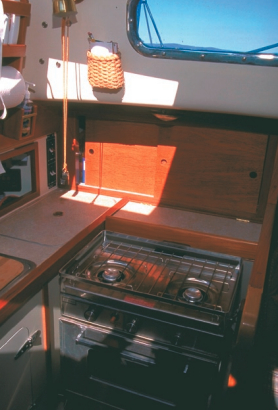
We’re delighted with her outward appearance, but down below she was a cave. Virtually all the bulkheads and cabinetry were covered with teak-grained laminate. The table and countertops were a light, textured pattern and actually quite attractive but, like the other surfaces, were showing the wear and tear of 35 years’ use. While the laminates may have looked passable when new, after three decades they were decidedly faded. They were also riddled with screw holes from every gadget marketed to the boating public. (Why is it that so many old boats seem to have at least one of those tacky plaques reminding us about the ineptitude of the skipper?) To compound the problem, the solid teak trim had never seen a varnish brush and was blackened with mold spores. Drastic measures were necessary to brighten things up.
One relatively simple approach that has gained popularity is to properly prepare the surface and paint it with a high-quality polyurethane paint. This is fine if you have the patience to cut in many linear feet of trim. The newly painted surface is still subject to nicks and dings, and you’ll likely feel the need to re-paint in a few years. I figured that since the original laminate has lasted more than 30 years and was still firmly bonded, I should make use of it again. My objective was to overlay the original plastic laminates by bonding the new material directly over the old.
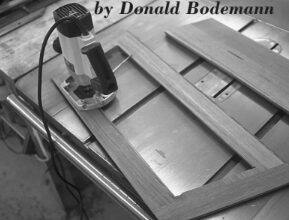
The tools required are neither too exotic nor too expensive. If you are handy enough to consider this approach, you probably have the usual collection of shop tools. The only special tools I purchased for the task were a high-speed laminate trimmer, laminate shears, and a set of Forstner drill bits. The high-speed trimmer and shears are available at your local Home Depot. This is also a source for the laminate, and they usually will have a modest selection of popular colors and patterns in stock. Generally speaking, you will have to make a special order of your selection. The Forstner drill bits are unique in that they produce a very accurate, flat-bottomed hole. They are available at good suppliers such as the Woodworkers Warehouse. (It is safer to order them through the mail, as I have discovered a personal visit can be a very expensive experience.)
To get a professional appearance, it is necessary to remove the existing trim. This allows you to cut the new laminate pieces a bit less than perfectly, so the rough edge will be covered when the trim goes back. Each builder installed trim in his own unique way, and its removal is perhaps the trickiest part of the job. Trim pieces can often be removed by carefully getting a wide woodworking chisel under an edge and slowly working it loose. If it was installed with brads, you may want to drive them through the trim with a small-diameter nail set and then fill the hole afterwards.
If you find it has been applied with a tenacious glue, you may want to rethink the project. There will undoubtedly be some pieces that are screwed in with the screw holes bunged with a wood plug. The simplest way to remove the bungs without destroying things is to select the proper diameter Forstner drill bit, usually 3/8 inch, center it carefully, and drill out the bung down to the screw head. You may have to clean the old glue out of the screw slot with a fine pick to back out the screw. This method also prepares the hole for the new bung. It’s entirely likely that you will break or damage several pieces, so be prepared to make a few replacements or glue up the remains with epoxy. Practice in an inconspicuous place on a piece that will be easy to replicate.
While the trim is off, take the time to sand and refinish it. My home has the good fortune to have the nearly perfect varnish shop. It is well lit and clean. It has doors to shut out airborne dust and a large, flat work surface. This same space reverts to its original function as a dining room for dinner parties and holidays. (I must add that my wife has attained sainthood status.)
A good brand of polyurethane varnish will stand up well for many years. Plan on a minimum of four coats, preferably six, to obtain a silky smooth finish that wipes down for easy maintenance. Gloss is traditional, but a satin finish is softer and more forgiving. (Many builders sold their boats with bare wood inside and out under the premise that teak doesn’t require any finish. The truth is that finishing woodwork properly is very labor-intensive and would have driven up the cost of the new boat significantly.)
Cutting and fitting the laminate is done with laminate shears. These specialized scissors actually remove a 3/16-inch kerf of material so the sheet of laminate doesn’t tend to curl, much as sheet metal will. I suggest you practice with smaller pieces and work up to the more difficult ones as you develop your technique. Always dry-fit the piece before gluing. Large complex areas such as bulkheads are best laid out with a full-sized paper pattern.
The old laminate requires a little simple preparation. Once the trim is off, wash down the surface liberally with alcohol. This will remove waxes and oils that may be present. Then simply rough it up with some very coarse sandpaper to give it a bit of “tooth.” Make sure that any old screws are removed. Run your hand over the area, feel for high spots, and make sure they are sanded off. Old holes, up to about one inch in diameter, need not be filled. The new laminate needs no special preparation other than assurance that no debris is on the surface to be glued. Any chips that get left behind in the glue joint can produce a slightly raised area.
The most common adhesive used for laminating is contact cement. I strongly urge anyone to use the new water-soluble neoprene-based products. They are much safer and easier to use and have the same bonding abilities as the traditional cement. If you have never worked with contact cement before, follow directions and keep in mind that you only get one chance to position the material. The laminate cannot be removed or shifted once it is applied. It’s a good idea to get a helping hand to position the large pieces. After you have it in place, you can tap it down with a hammer and a piece of soft wood to make a complete bond. (The pros use a J-roller, but buy one only if you’re a tool junkie. OK, I confess . . . I have one.)
Do not try to fit the material around openings such as drawers and lockers. Simply pretend they aren’t there. After the laminate is in place, trim these openings with the high-speed trimmer. Wherever you have used the trimmer, whether on an outside edge or an opening, it is wise to soften the machined edge with a file or 120-grit sandpaper. The edge left by the trimmer is very sharp. Also check to see that the new laminate edge is flush with the old. Any material standing proud will be prone to catching and damage.
This is not a task that can be tackled in a couple of weekends. It makes a good off-season project or can be done piecemeal over the span of a few years. If you elect to do it over a period of several years, it’s wise to purchase all the laminate stock you will need, as certain colors and patterns can be discontinued. I chose to work with an almond color. It’s been around a long time, it’s bright without being stark, and it should be available for the foreseeable future. Styles that have patterns or wood grain must be oriented in a certain direction, causing significant waste.
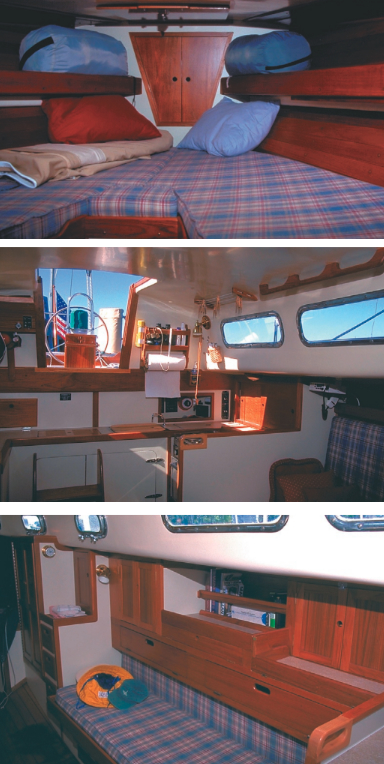
When it comes time to replace the trim, you will find that it doesn’t always fit quite right. This is because the laminate, thin as it is at approximately 1/32 inch, will cause the dimensions of some cabinetry to increase. This sometimes leads to narrow gaps at corners. I have found that by using tinted wood fillers, then varnishing, the small gap can be concealed. Good paint stores have a wide selection of colored fillers, putties, and crayons to choose from. Another source for a wood filler is to simply make a paste out of fine sawdust and your varnish.
This assures a perfect color match but tends to be a little harder to work with. If you drilled out old bungs with the Forstner bit, you can buy new bungs from most marine suppliers. I would suggest you purchase your own bung cutter, also available at Woodworkers Warehouse. (The rest of the world will refer to this as a plug cutter, but aboard a boat it’s always referred to as a bung.) The advantage of having your own cutter is that you can match the wood species, grain, and color to match whatever project you’re working on.
The Allied Seabreeze is a pedigreed class with renowned sailing qualities. The reputation she enjoys makes her an excellent candidate for the investment of time and money. The interior now has a new and larger feel, it is bright and easy to clean, and it will serve well for many years to come. I’m even looking forward to a day of fog and game after game of cribbage.
Art, a licensed chief engineer of steam and motor vessels of unlimited horsepower, is a lover of CCA-era “project boats.” So far a Pearson Triton and an Allied Seabreeze have seen vast improvements with Art’s ministerings. He sails coastal Maine with his wife, Sandy, and two daughters.
Thank you to Sailrite Enterprises, Inc., for providing free access to back issues of Good Old Boat through intellectual property rights. Sailrite.com