A nesting hard dinghy that’s enduring and endearing
Issue 83: March/April 2012
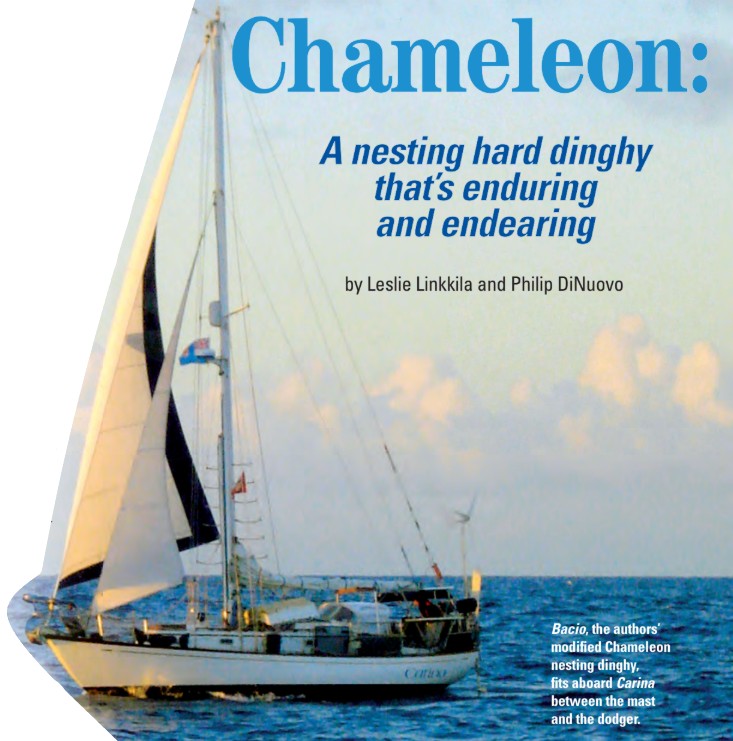
Many years before we cast off our docklines, sailed out the Strait of Juan de Fuca, and watched Cape Flattery disappear astern, we debated our choice of cruising equipment. One of our most important decisions was a yacht tender.
Every option had advantages and disadvantages, but our first criterion was that we had to be able to stow it on the deck of our 34-footer where it would not interfere the with safe handling of the boat under sail. For this reason, we did not want to stow a dinghy on the foredeck but, rather, between the mast and dodger.
We had other attributes in mind for our tender. It would have the capacity and stability to carry both of us, and possibly heavy payloads, through choppy anchorages. It would tow easily and move well through the water, even plane, with the smallest possible outboard engine. We would be able to row it effectively, into a stiff wind and up-current, should the outboard fail. It would be stable enough for us to climb into it from the water after swimming or snorkeling. It would be light enough to carry short distances but rugged enough to be dragged up on stony beaches. For long-term service, it would resist degradation in the elements when used every day and would be easy to maintain and repair. As to the benefit of a dinghy with a sailing rig, we had differing opinions.
We briefly considered a roll-up inflatable, but its poor performance when rowed in windy conditions concerned us. Also, better-quality Hypalon inflatable sport boats were expensive and subject to UV degradation. This choice also seemed to mandate the purchase of a large, heavy outboard engine that would dictate carrying significant quantities of gasoline when going offshore. A large outboard would also necessitate some sort of lifting apparatus, a further deterrent.
Next we considered folding-dinghy options (such as the Porta-Bote or the German Banana Boot), but the long dimension when folded would dictate that it be stowed along the lifelines. This would pose a safety hazard in rough seas and create something to trip over when going forward; we discarded this option.
A solution in two parts
About this time (this was 1996), we became aware of nesting dinghies in general and Danny Greene’s designs in particular while reading two of Dan Spurr’s books: Upgrading the Cruising Sailboat and his biographical tale, Steered by the Falling Stars: A Father’s Journey. A nesting dinghy is made in two or three separate sections that are bolted or clamped together to form the entire boat. For stowing aboard (or for transport), the sections are separated and nested together to take up minimal space.
The nesting hard dinghy seemed to us at the time, and in fact still does, like the perfect solution to the tender dilemma, particularly for smaller-sized cruising yachts. Eventually, we found an address for Danny Greene (a naval architect and nesting dinghy pioneer) and requested plans for Two Bits or For Pete’s Sake. We learned these plans were no longer available. His designs had evolved over 20 years into the pram he called Chameleon.
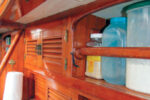
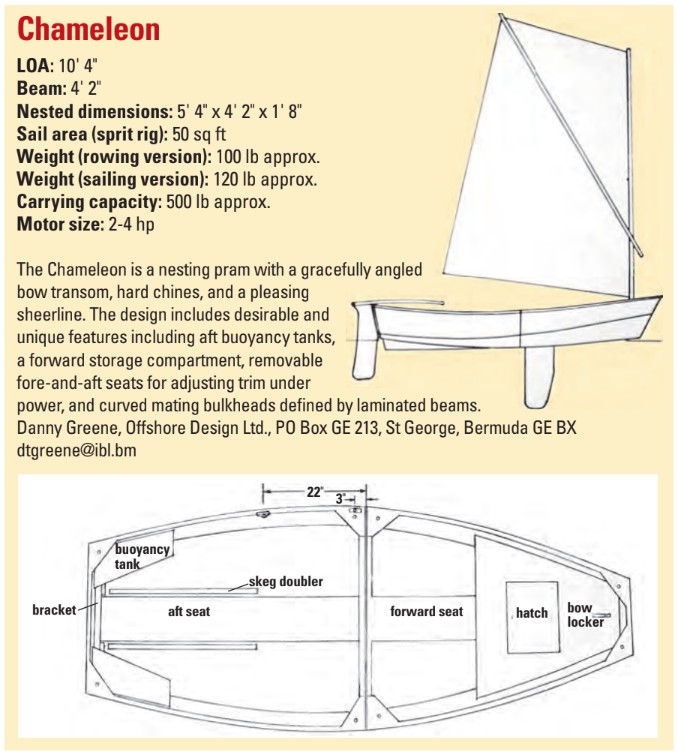
Chameleon is a nesting pram,10-feet 4-inches long when assembled, with a gracefully angled bow transom and hard chines but with a pleasing sheerline. It’s designed to be made of marine plywood, fiberglass cloth, and epoxy and has many desirable, and some unique, features: aft buoyancy tanks, a forward storage compartment, removable fore-and-aft oriented seats to allow for adjusting trim under power, and curved mating bulkheads defined by laminated beams. The sections are simply bolted together in three places to form the complete dinghy. Design options include a sliding rowing seat and a sprit-type sailing rig.
To quote the designer: “Over the years, I experimented with . . . {nesting dinghy} dimensions, hull shapes and construction details. I tried boats up to 16 feet in length and with two and three nesting pieces. Some towed beautifully, some sailed very well, some towed well, some were stable, some handled rough weather easily, some were light and compact to stow, and some were very easy to build. None, however, combined these qualities in a way that satisfied me, until Chameleon.”
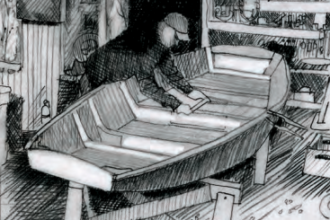
We bought the plans and the optional full-sized patterns for cutting the panels and built our first Chameleon, Diva, as a full-sized rowing version. Because it was our first boatbuilding project, and also our first try at stitch-and-glue construction, we worked slowly and methodically for about a year in our unheated garage on nights and weekends. We followed the plans carefully and made no substitutions or changes. We inevitably made mistakes, but soon learned our way with epoxy resins, filleting blends, and fiberglass cloth as Diva became a reality.
As promised, she stowed compactly, rowed effortlessly with 7 1⁄2 -foot oars, and towed like a dream. Importantly, when stowed securely behind the mast she did not interfere with sail handling. When assembled and under way, she was solid, and it was impossible to tell that she was joined at the mating bulkheads. In short, we were thrilled with her, except for one problem. When we sold our Hallberg Mistral sloop, Aria, and acquired Carina, a Mason 33 cutter, we found Diva’s nested length was just a trifle too long. It interfered with the use of a reefing winch mounted on the mast beneath the boom.
Chameleon reduced
To solve that problem, we decided to construct Bacio, a shorter version of the Chameleon. (Note: The purchase of Danny Greene’s plans allows for construction of one dinghy; additional boats require a small royalty payment to the designer.) We did not know it at the time, but others had reduced the size of the Chameleon as we had done . . . with mixed results.
One version we learned about, called the Gecko, was cut down by reducing all Chameleon dimensions proportionally, yielding an 8-foot 6 inch Chameleon. Though seemingly logical and appropriate on paper, the result was a dinghy with unacceptably low freeboard and insufficient clearance for oars when rowing. In the end, after devoting much labor to adding freeboard, the builder was very pleased with the boat.
Our strategy, done solely by instinct, was to maintain the Chameleon’s freeboard and beam but to essentially chop it off at both ends to reduce the overall length to an even 8 feet. We hoped this would allow us to retain most of the Chameleon’s carrying capacity and stability but make it fit the available space on Carina when nested. Concerned about modifiying individual panels, and particularly the size and configuration of the transom, we photocopied Danny’s plans so we could make a few small models out of lightweight cardboard and masking tape. Eventually, we became confident enough in our design modifications to cut plywood. In the end, we preserved the bow dimensions but made the transom slightly bigger than on the original.
Another change we made when constructing Bacio was to use 4mm okoume plywood. Okoume plywood is made from the African hardwood Aucoumea klaineana and is used in aircraft, kayaks, and acoustic guitars. We used this in place of the specified thicker 1⁄4 -inch marine plywood for all the panels with the exception of the bulkheads, bow, and transom. We chose okoume because of its very high strength-to-weight ratio and a desire to reduce weight, though we did so at the expense of rot resistance. Because we used this type of plywood, we sealed every surface of Bacio with epoxy and fiberglass, except for the insides of the flotation chambers. Failing to seal the flotation chambers proved to be a bad decision; eventually, water incursion in the chambers allowed fungus to attack the wood.
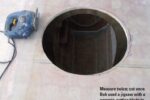
For inwales and outwales, we chose ash, which is light, knot-free, and strong. We stitched the panels together with monofilament line instead of copper wire to save time. We cut curved knees for aesthetic reasons and through-bolted pad-eyes at all four corners of both halves (eight in total) to facilitate lifting and launch. Also, during construction, we placed a thick piece of corrugated cardboard of the exact dimensions of the mating bulkheads between them before we screwed the bulkheads together. This helped create a “soft” center space to guide our saw and prevent damage to the bulkheads when cutting the boat in two, a problem we had had when building Diva.
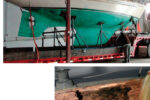
When building Bacio, we eliminated the forward seat, since we rarely used it in Diva and often removed it for carrying provisions or jerry cans of water or fuel. We installed Wichard folding pad-eyes on the aft section to which we attach stainless-steel lifeline turnbuckles via large snap hooks. This allows us to lash Bacio very tightly onto pads on deck. The forward dinghy section is held captive by the aft section and needs no pad-eyes. We estimate Bacio’s weight to be 80 pounds or less.
Practical in practice
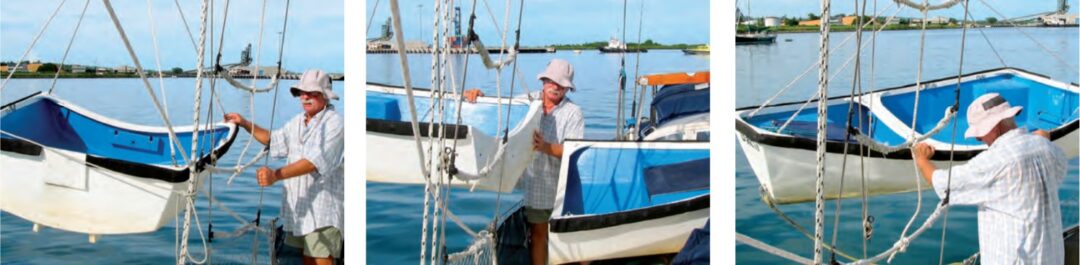
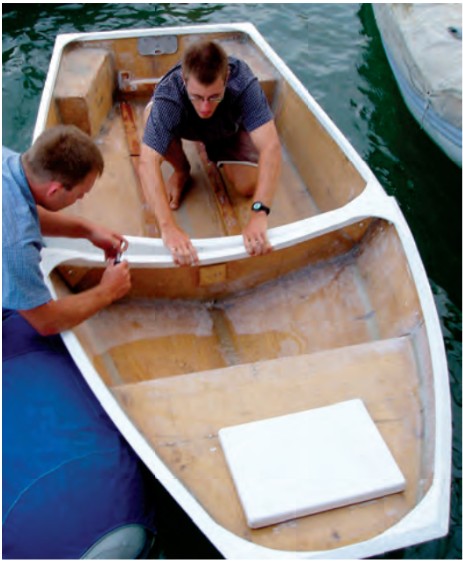
To launch Bacio from her nested position on deck, we flip over the aft half and, using a lift bridle and our main halyard, lift and hang this section outboard and out of the way. Next, we flip over the forward section and lay it athwartships of Carina with its mating bulkhead outboard. We then swing the aft section in and mate the bulkheads with the three 1⁄2 -inch bolts. We use wingnuts that we tighten onto stainless-steel fender washers and also nitrile rubber washers to help seal out water. Once the dinghy is assembled, we move the forward lines of the lifting bridle to the dinghy’s bow and lift the entire dinghy up and over the lifelines and lower it to the water. It takes us about 15 minutes to assemble or disassemble Bacio. (With Diva, we would put both halves overboard in the water and one of us would climb in the aft half, align the two half boats, and bolt them together.)
We can also hang Bacio from a main halyard (resting against a fender slung parallel to Carina’s toerail) for security and to minimize fouling of the bottom and the outboard motor. We use no antifouling paint on her bottom.
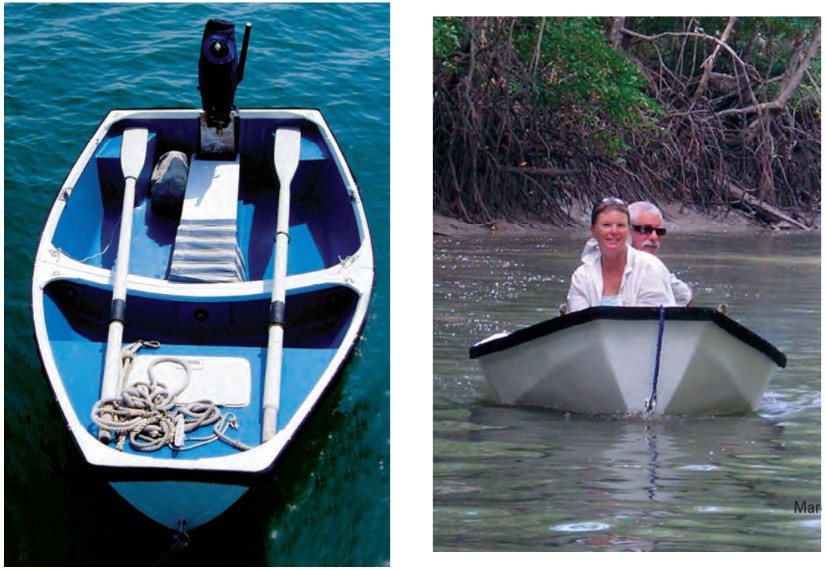
For propulsion, we outfitted Bacio with 7-foot oars and a small 3.3-hp two-stroke outboard, the latter still easily purchased outside the U.S. Though she will not quite get up on plane (most likely due to our amateur design modifications), she still moves along at 5 knots or so under power. By shortening her waterline, we also sacrificed some performance in short choppy seas. We wouldn’t recommend it, but we have transported almost 675 pounds, though only for a short, at-water passage. She’ll easily carry 450 pounds.
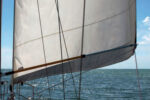
We have used Bacio nearly every day for almost eight years while cruising from our home port in Puget Sound, Washington, through Mexico, Central and South America, and the South Pacific. She has required periodic maintenance but has been a rugged, reliable, and stable tender. Plus she’s a pretty boat with a graceful sheerline. One of us still pines for a sailing rig, especially when she sees a Chameleon under sail, but she still does not have it.
Bacio’s fine finish has degraded some as we have had to do repairs without fiberglass tape or the best epoxies, but she is as tough as ever and still going strong. She’s a working boat, she’s held up well to the elements, and her rugged construction probably saved Philip’s life when he was hit broadside by a speeding powerboat in the Marquesas.
Periodic maintenance
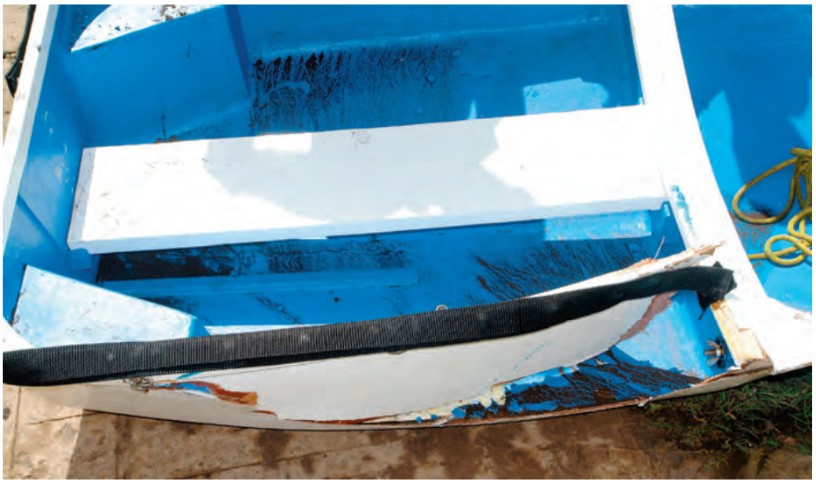
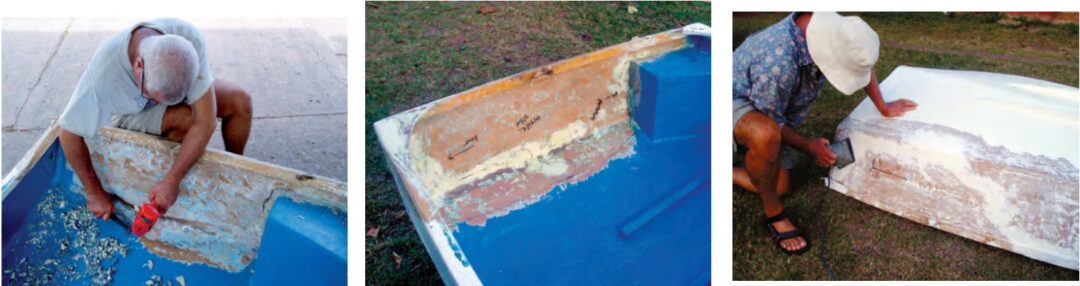
Maintaining our Chameleon has primarily involved keeping her painted, which prevents UV degradation of the epoxy resin. Any spot exposed for even a few months in the tropical sun is subject to delamination. Single-part paints have not proven hard enough for everyday use on the hull, so we’ve resorted to two-part paints with epoxy seeming to be better than polyurethane for durability. For the inside, rubber roof paint seems to hold up best to standing water while single-part paints quickly peel off where rainwater or dew accumulates. A layer or two of fiberglass cloth tape along the keel did not prove to be substantial enough for frequent landings on sand and rocky shores. To mitigate wear, we added an 8-inch-wide strip of 24-ounce coarse woven roving to the keel to strengthen it for impact and to serve as a chafe guard. The surface is not fair but it’s hardly noticeable and does the job.
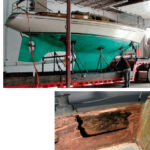
We have had some problems with rot, though much less than you might expect. The first serious case was due to a crack that developed in the seam of one of the flotation chambers in the aft section. Water quickly accumulated during a long wet Central American summer. While doing routine maintenance, Leslie noticed a softness in the panel, began tapping with a screwdriver, and found a large area of rot. With a borrowed Fein tool, we quickly excised the rotten piece (the inner side had not been coated with epoxy) and constructed a replacement, stripped the adjacent paint, and used a filleting blend to install the replacement. Strips of fiberglass cloth reinforced the fix and Bacio was watertight once more.
The other instance of rot involved the forward storage area. Due to ingress around the seal of the commercial hatch we had chosen to install (rather than the hatch suggested by the designer), water accumulated inside. This led to fungus growth that eventually attacked the okoume hull panels of the forward section despite their coatings of epoxy and fiberglass. While in the boatyard for routine maintenance, we stripped the paint from the outside of the hull using a heat gun, dried out the storage area, and re-epoxied and reinforced the fiberglass of the entire forward section. (We also installed a strip of wood forward of the hatch to which we snap a Sunbrella cover that helps minimize leakage.)
Repairable construction
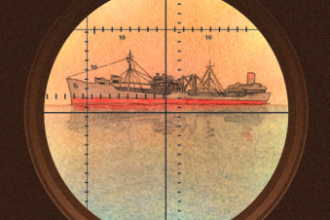
As for major repairs, the collision in the Marquesas crushed in the starboard section of the aft half, shattered one oar, popped the knee, and caused Bacio to capsize and nearly sink. The flotation chambers kept her afloat. (Philip was plucked from the water, unharmed, by the stunned crew of the offending vessel.)
Even though we had limited supplies, we stripped all the paint from the crushed section and gently re-assembled the remaining bits, like a jigsaw puzzle, against a piece of sacrificial plywood, screwing the brace to the damaged piece. We sealed the ragged edges with a liberal application of the locally available epoxy filler (Epi-Fill by International), then faired the surface and glassed both sides with 2:1 no-name epoxy we had purchased in Panama. The bits of knee and gunwale we still had fit together in another puzzle and we built up and sculpted thickened epoxy to fill the gaps left by lost pieces. After a week of work in a hot parking lot on Nuku Hiva, under the watchful eyes of nearly everyone on the island, she was back afloat. We could see her minor scars but no one else seemed able to see the repair.
Nesting dinghy enthusiasts are a small club but we find many Chameleons (and other designs) as primary or secondary tenders in active use by cruising yachts in far-flung ports. In Fiji, we tied up each day next to a Chameleon, made of aluminum, named Rin Tin Twin. This is a well-loved family vehicle for liveaboards who commute to their business ashore.
The two Chameleons we have built and used have proved their worth and we encourage any slightly-resourceful sailor looking for an economical solution to the tender dilemma to consider the Chameleon. With a little skill and a small amount of concentrated effort, anyone can build and maintain a Chameleon that will be joy to own (and sail) while providing years of reliable service.
Philip DiNuovo and Leslie Linkkila came to cruising and boat ownership as adults and quickly developed a passion for small-boat travel. In 2003, they quit their professional jobs and left the Pacific Northwest behind and are now in the South Pacific.
Thank you to Sailrite Enterprises, Inc., for providing free access to back issues of Good Old Boat through intellectual property rights. Sailrite.com