Extracting an engine with grace and ease
Issue 98: Sept/Oct 2014
Under normal circumstances, I would not even think about removing the engine from Hornblower, my 1976 Pearson 35. However, during a summer visit to Long Island in New York, Hornblower received a new engine. The installation, unfortunately, was fraught with problems. The professional diesel mechanic who did the installation took a few shortcuts. Chief among them was that he didn’t bother to change the drive shaft coupling to match up to the new transmission.
On the sail back to my home in Cocoa, Florida, the mismatched drive shaft coupling caused the drive shaft to shear and, not yet obvious, caused internal damage to the transmission. After I replaced the shaft, it sheared again. The trouble with the mismatched coupling was not discovered until the replacement shaft sheared. By the time the correct coupling was installed, it was too late to save the transmission. A few months after Hornblower returned home, the transmission would not shift into gear. As we were now in Florida and the work had been done in New York, it was not desirable, practical, or possible to return to the installer for a fix. My bank account was also very much in the red.
The only good news was that the transmission was still under warranty. The bad news was that I (rather than a professional) would be faced with the job of removing the engine from the cave under the cockpit sole, unbolting the transmission, and turning it in for a new one. I was faced with the need to magically lift the engine off the motor mounts, gracefully move it out of its cave, and gently lower it to the cabin sole where I could easily remove the “tranny.”
I would have to design a crane to go above the engine and suspend from this crane something — cables, rods, or straps — with which to lift the engine up and off the motor mounts. Once the engine was raised clear of the motor mounts and any other obstructions in the engine compartment, the crane then had to be able to move the engine out of the compartment and lower it to the cabin sole. The idea developed slowly, but in the end my crane did all I needed it to do. Since my name is Buck, I named it the Buckaroo engine extractor.
The magic crane
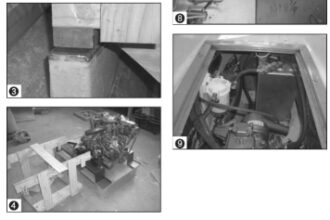
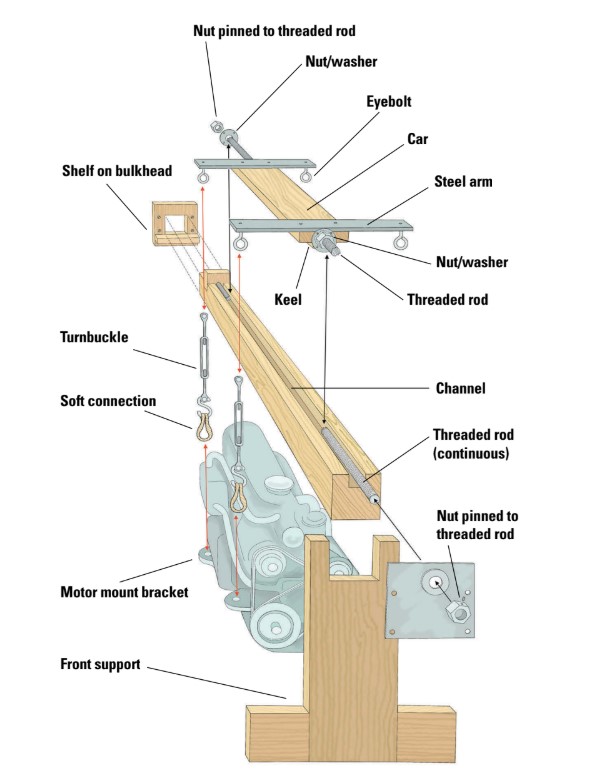
How do you support 300 pounds of engine? I used a 4 x 4 as a beam because I had one in my shop and it was more than adequate for the task. I made it long enough so that, when the engine was hanging from it, the engine could be moved completely out of the engine compartment and lowered to the cabin sole.
The beam is supported at the aft end by a shelf attached to the bulkhead located behind the engine. The forward end of the beam is supported by an inverted T that sits on the cabin sole. To keep the structure stable and positioned, I fastened a screw through the back shelf and into the aft end of the beam. I fastened four long screws through the top of the front support and into the beam to stabilize the forward end of the beam.
The engine is able to move along the beam by means of a car riding on top of the beam. A stabilizing keel on the underside of the car sits in a channel cut into the beam’s top side.
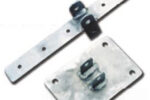
I used a 5⁄8-inch threaded rod to drive the car along the beam. The rod is attached to the car by means of nut/washers (nuts welded to washers). I fastened a nut/washer to each end of the car. Each of the nut/washers has four holes drilled in the washers so they can be nailed to the car.
Before nailing the nut/washers in place, I screwed the rod through the first nut/washer, passed it through the tunnel under the car, then screwed it through the second nut/washer. I tightened the nut/washers against the ends of the car before nailing them to the car. This sequence was important to ensure that the rod aligned with the threads of the second nut/washer.
The threaded rod must be held in place at both ends of the beam, so I made a fence at both the forward and aft ends of the beam. The threaded rod extends through and beyond the fences and is held there by a nut screwed to each end of the rod. The nuts on each end of the threaded rod must be fixed with a pin through the nut and rod so that, when the nut is turned, the rod also turns.
The next trick was to make the connection between the car and the engine. After some trial and error, the solution came to me. I fastened a set of arms or wings to the car that extended out over the motor mounts. These wings are made of steel 3⁄8-inch thick and 3 inches wide. At the points directly above each of the four motor mounts, I drilled and tapped the wings to accommodate eyebolts.
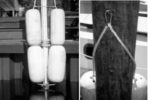
I suspended a turnbuckle from each of the eyebolts. The turnbuckles are the lifting mechanism for raising the engine. To ensure smooth operation, my last step in building the crane was to grease the top of the beam, the bottom of the car, and the threaded rod.
So there it is. I had a magic crane to gracefully lift and extract the engine! In building the crane, I used scrap wood I had on hand. I bought a piece of steel at a local sheet-metal shop for the steel arms and had that shop weld two nuts to two washers so the threaded rod could move the car. The threaded rod, turnbuckles, and eyebolts were available at my local hardware store. The total cost of materials was about $95. I did the cutting, drilling, tapping, and assembling in my shop.
Preparation and operation
We all know that, before an engine can be removed, many hoses, wires, pipes, and the prop shaft must be disconnected and moved out of the way. The first step was to get a notebook and write down each piece as it was removed from the engine. I numbered each step as I performed it and made a special note of the wrench size I used in each step. (That saved time when I reattached all the accessories). I taped flags to the wires so I knew where they would go when I reassembled everything. I did not trust any item to my 73-year-old memory.
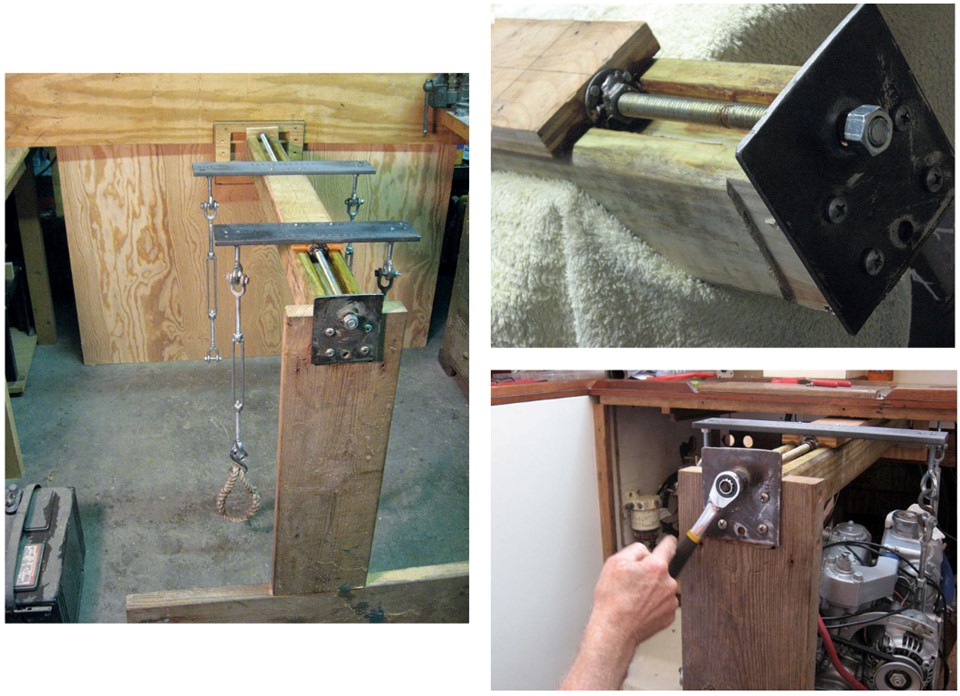
The moment finally arrived when I would put the magic crane to work. I installed the beam with all its accessories. When I removed the nuts from the tops of the motor mounts I was careful not to disturb the two nuts that were locked together on the undersides of the motor mount brackets. (This step would make it easier to perform the prop shaft alignment after I reinstalled the engine and transmission.) I attached the turnbuckles to eyebolts I’d fitted to the motor mount brackets on the engine (I was able to drill holes in the motor mount brackets to receive them). I had some difficulty getting the turnbuckles to clear the engine accessories, such as the alternator, fuel lift pump, and throttle cable bracket, so I used short lengths of 3⁄8-inch line with eye splices in each end to make “soft” connections between the the motor mounts and the turnbuckles.
It took some time to tighten each turnbuckle and keep the engine in an even plane and balanced on the beam, but the task went without a hitch. I was able to lift the engine off the motor mounts and elevate it enough to clear the obstructions. The best part was using one finger to swing the wrench to turn the screw rod. The engine moved out of the compartment one thread width for each turn of the wrench. It was magical and graceful. It was so easy to move the engine hanging from the crane that I wanted to just keep turning the wrench!
Since I built my crane, I’ve thought of other designs that might work when there is no room above the engine for this design. One involves the use of two steel beams, mounted one on each side of the engine, with a screw rod and car on each beam and the turnbuckles suspended from the two cars.
Easy out and easy in
It only took about three and a half hours from the time I started disconnecting engine accessories and installing the crane to the time I finished lowering the engine to the cabin sole. I am no longer intimidated by the idea of pulling a sailboat engine. When the time came, returning the engine to its motor mounts was as easy as the extraction.
Brian Buck, a retired airline pilot, lives in Cocoa, Florida. He and his wife, Carol, sailed the ICW to Florida in a 23-foot Seafarer. He has sailed his co-owned Pearson 35, Hornblower, to Long Island and back to Florida via the ocean route and now sails on the Indian River and occasionally ventures to the Keys. He has refurbished several sailboats, including Hornblower.
Thank you to Sailrite Enterprises, Inc., for providing free access to back issues of Good Old Boat through intellectual property rights. Sailrite.com