Fearless cruisers defy the prophets of doom
Issue 79: July/Aug 2011
Reading Karen Larson’s editorial on overcoming fear in the May 2010 issue brought back memories of some of the fear-inspiring projects we undertook during our big refi t several years ago. Some of the endeavors we tackled were considered extreme by almost every one of the omnipresent self-appointed boatyard advisors, and there was never a shortage of naysayers.
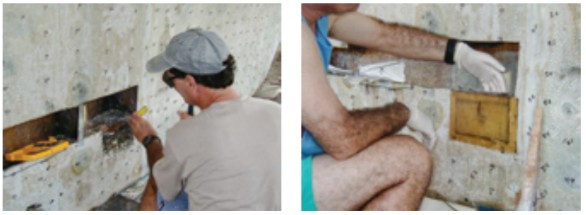
One project in particular comes to mind. The horror the advisors professed when they learned of our plan to hack a hole in the side of our hull, below the waterline no less, did little to bolster our confidence. But we knew the result we wanted and there was simply no other way, so we put aside our fears and plunged ahead.
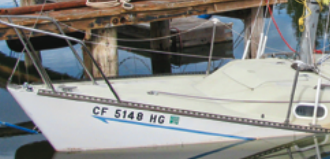
Caribee had been plagued for years with recurring osmotic blisters. She’d already had two “lifetime repairs” to fi x the problem, but the blisters kept coming back. We were determined this repair — virtually a partial hull replacement — would be the last. If this didn’t do the trick, we’d face the fact that the problem was incurable.
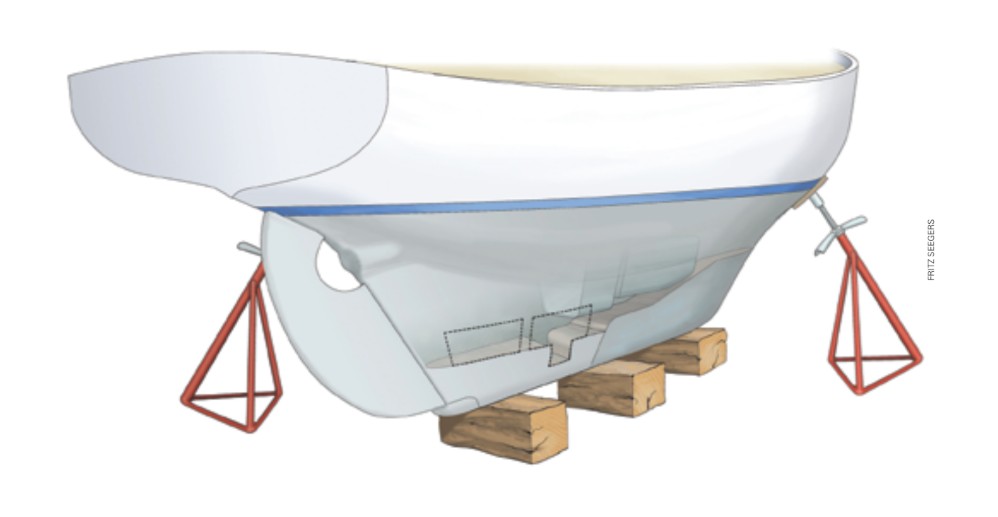
We had discovered years before that water dripped from the aftermost part of her keel whenever she was hauled out, and the drip would apparently persist indefinitely. We knew that water was somehow trapped in the laminate at the bottom of the sump area of the keel aft of the molded-in lead ballast. We also knew this was a major contributing factor to the problem and had to be dried out before the osmosis could be permanently cured. That meant sealing off the laminate from the inside, and the only way to gain access to the very deep bilge was to cut a hole into the side of the keel.
The incision
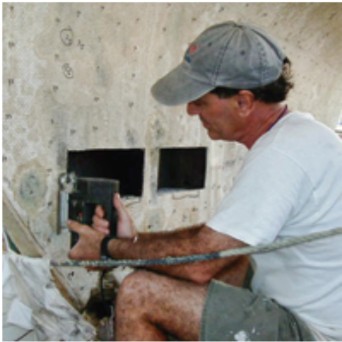
Over the years, we had acquired a good deal of experience working with epoxy and fiberglass, and had a lot of respect for the tremendous strength and adhesion of a properly executed repair or patch. So in truth, I actually had comparatively little trepidation as I drilled the first hole to make an entry point for the jigsaw blade. Nevertheless, it’s easy to fall prey to the negativism of the boatyard pundits, who uniformly predicted disaster. Still, we were able to have a bit of fun with them as we pretended total nonchalance and I started sawing away.
What we wanted to accomplish was twofold. First, we had to seal off the bottom of the existing sump area with epoxy and fiberglass cloth to make sure it was completely watertight. Second, we wanted to create a lower, smaller sump, just large enough for two bilge pumps. This sump would contain the inevitable bit of bilge water in one small space and keep the rest of the bilge dry most of the time, helping ensure that no water could penetrate the laminate over the long term.
After we made a hole big enough to access the bottom of the existing cavity, we dug out an area for the new sump using a hammer and chisel. We were amazed to find dry pieces of fiberglass cloth, sawdust, wood chips, and even gravel and cigarette butts embedded in the composite of the lower keel. It looked like somebody had taken a scoop shovel to the sweepings on the shop floor, dumped them in, and poured resin over them. Maybe the hull was laid up on a Friday. Little wonder the keel was a trap for water that then wicked into the hull and contributed to the blistering.
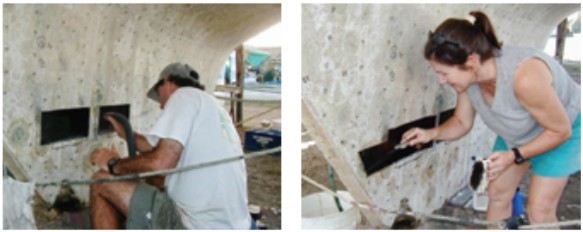
After digging out the new sump (and after a meticulous cleaning with solvents), we let it all dry out for several days. We then proceeded to seal the entire lower keel cavity with multiple layers of biaxial glass cloth and epoxy, finishing off with several coats of epoxy and barrier-coat additive.
We took the opportunity to add a garboard drain plug for convenience and safety when hauled out: convenient because we would never have to pump out water when hauled (when washing out the bilge, for instance) and safe as no rainwater could collect below if we stored the boat dry and unattended for a long period.
The closure
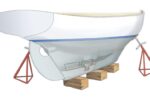
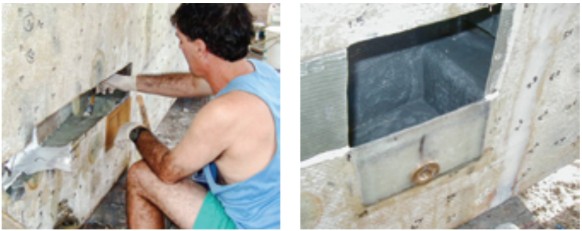
Next came the reconstruction of the section of hull we’d cut away. We wanted to make sure it was plenty strong from the patch alone, but we were comforted by the knowledge that, as a part of our blister-repair job, we would be covering the entire keel, including the reconstructed area, with several layers of epoxy and heavyweight biaxial cloth. We were planning to replace a lot of material that had been stripped away by a gelcoat peeler in two successive peel jobs done in the earlier attempts to dry out the hull.
First, we ground back the edges of the hole to about a 12:1 bevel inside and out. Then we laid epoxy-saturated cloth over the hole, overlapping the edges by several inches, starting on the inside. In some places, we glued thin pieces of fiberglass (well waxed) to the hull as a temporary form to hold the new laminate in place until it cured. To close the last part of the opening, we epoxied an unwaxed fiberglass backing plate, which would remain in place, to the inside.
After the hole was sealed, we switched to the outside and laid several layers of glass over the inner layers, bringing the level out to flush with, or slightly proud of, the hull. We next faired off the excess with an angle grinder and smoothed it over with an epoxy fairing compound, finishing it smooth with an orbital sander. We then simply waited until the rest of the hull and keel was sheathed with epoxy and glass, forming it all into one integrated structure. It ended up perfectly smooth; it’s impossible to tell by looking at the keel that the repair was ever done.
Blister free
The project has been a resounding success. We always have a dry bilge, except for the small sump, so long as we remember to pump occasionally. We’ve had no blister problems for six years. When we store the boat on the hard, we just unscrew the garboard drain and put a small piece of nylon screen in it to prevent insects from entering, secure in the knowledge that if we get rainwater below, it will drain out and leave everything dry.
By all means, do your research and try to anticipate any possible problems before attempting any seemingly radical project. Once you feel confident, don’t be too easily dissuaded by the opinions of others. Sometimes you just have to disregard the fear and the naysayers, trust your instincts, and forge ahead. After all, it’s your good old boat.
Randy and Cheryl Baker have been living aboard and cruising Caribee, their 1968 Nicholson 32 sloop, since 1992. They completed a three-year refit in Trinidad in 2004, transited the Panama Canal in 2008, and are now cruising the Pacific.
Thank you to Sailrite Enterprises, Inc., for providing free access to back issues of Good Old Boat through intellectual property rights. Sailrite.com