A weatherproof housing for cockpit electronics
Issue 72 : May/Jun 2010
I recently swapped out my 22-year-old, obsolete Autohelm 3000 wheel pilot. Neither original nor aftermarket parts were available any longer. The only place left to find a spare part was on eBay. I could have wound up bidding for one of the few remaining relics at a severely inflated, collector’s-edition price. Instead, I decided to replace my old autopilot with a new Raymarine SmartPilot X-5 wheel autopilot. Now, when the time comes to replace a part, I’ll have some reasonable options.
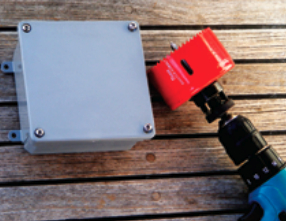
The new autopilot arrived with an ST6002 control-head display. This was a welcome feature, but it didn’t include a pod-style weatherproof enclosure suitable for mounting in an open cockpit. To mount the control-head display, I would have to cut a 3 1⁄2 inch-diameter hole in the cockpit coaming or bulkhead or purchase a commercially available waterproof instrument enclosure that I could mount in the cockpit without drilling large holes in the boat.
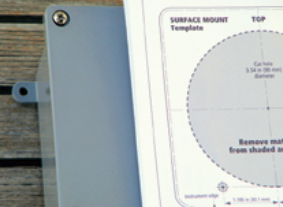
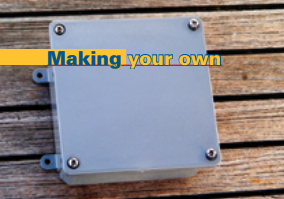
After reviewing these options, I decided on a third path, which was to mount the instrument in a custom-fabricated weatherproof enclosure. This would lower the cost of my installation by about $200 and eliminate the need to add a large, permanent, and undesirable hole in the cockpit coaming. I made the enclosure from a weatherproof non-metallic electrical junction box.
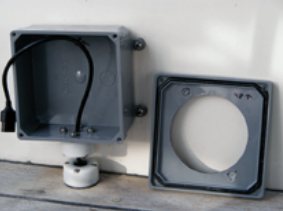
A simple junction box, or j-box, is an excellent alternative to an expensive purpose-made instrument pod. J-boxes of different sizes, shapes, and material construction are available at electrical supply stores, including the large chains, such as Home Depot. You can typically find the right j-box for any application. Mounting a j-box to a coaming or bulkhead requires only four small screw holes and one larger hole, only about 1⁄8 inch in diameter, for the through-deck power or data cable. This was a significantly better proposition than a 3 1⁄2-inch void.
A convenient size
For the Raymarine ST6002 control-head display — commonly used in conjunction with the brand’s S- and X-series autopilots — I needed a j-box measuring approximately 5 x 5 x 2 inches. To test my concept, I bought a Carlon E989PPJ 5 x 5 x 2 PVC junction box for $12, and it proved to be just the right size. The Carlon box seems as if it were specifically designed for the application: its size, shape, and even color are nearly an exact match. In fact, all the control-head displays and data repeaters in the Raymarine ST series are of a standard size and fit the same Carlon 5 x 5 x 2-inch non-metallic j-box.
Installation
The most important concern when installing an electronic instrument in an exposed cockpit is protecting the instrument from the elements. It takes just a few simple steps to install the control head in a j-box.
Step 1. Choose the correct size. Make sure that the j-box is at least 1⁄2 inch larger in width and length than the control-head display and that the depth of the j-box is sufficient to accommodate the cable connections on the back side of the instrument. Measure the depth from the back side of the instrument’s faceplate to the back side of the instrument and add about an inch to accommodate electrical connections such as plug-in USB cables.
Step 2. Mark the hole locations on the j-box faceplate (the removable cover). Use the instrument’s cutout template, if you have one, or use the instrument to carefully locate and mark the centers of all the holes you will have to cut or drill.
Step 3. Cut and drill the holes. It helps to use a vise to hold the j-box while cutting.
Step 4. Weatherproof the entry/exit holes for power or data cables. Fit a Cable Clam (from Blue Seas) to the outside of the j-box at each entry/exit hole. Alternatively, you can seal each hole with silicone after leading the cables through the hole. I like the Cable Clam because it provides a clean, weatherproof seal and the cables can be inserted or removed later without the need to remove and re-apply sealant.
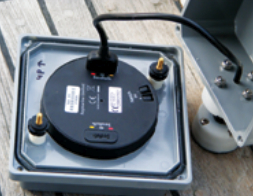
Step 5. Insert the instrument into the modified j-box faceplate and fasten it securely with stainless-steel bolts, nuts, and lock washers.
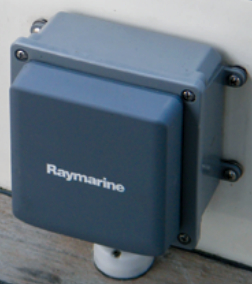
Step 6. Run the cables from the electrical connectors on the back of the instrument through the j-box and out through the Cable Clam. Fasten the faceplate to the j-box with the provided stainless-steel screws. If you’re running the cables through the deck, use another Cable Clam for a watertight through-deck connection.
Step 7. Mount the j-box to the coaming or bulkhead. Use the four reinforced mounting tabs provided at the corners of the j-box. If you are mounting the j-box on the steering- pedestal railing or any other rail-type location, rather than the cockpit coaming, you can attach the j-box to a Ram-Mount fitting and then attach the adjustable-angle Ram-Mount to the rail.
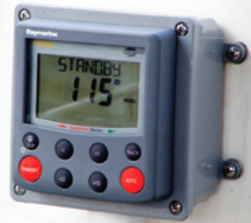
The j-box pod is an attractive, versatile, protective, low-cost solution for mounting electronic instruments in the open. I was particularly pleased because by using this technique I avoided cutting another large hole in my cockpit.
Rich Ian-Frese has a background in research engineering and computing. His wife, Cat, is a primary school teacher. They spent 10 years refitting their Tayana 37 cutter, Anna, for long-distance voyaging, with Patagonia in mind. In 2007, they took a one-year sabbatical and completed an 11,000- mile North Pacific loop. In 2008, they did another loop of 2,500 miles that included a visit to the ice and outer islands of southeastern Alaska.
Thank you to Sailrite Enterprises, Inc., for providing free access to back issues of Good Old Boat through intellectual property rights. Sailrite.com