Procrastination pays off in mahogany and bronze
Issue 77 : Mar/Apr 2011
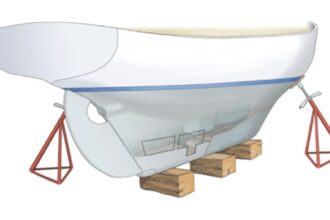
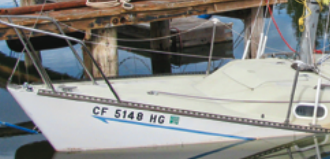
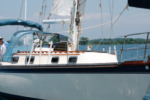
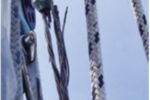
The restoration of the Vera May, the 33-foot Hallberg-Rassy Mistral that I belong to, began about four years ago. After moving her into the warehouse/refit shop, cleaning her up a bit, and removing all the deck hardware, I decided her partially rotten toerail should be removed and repaired. Like many of my well-intentioned plans, this one seemed simple enough at the time. However, this was my introduction to the holding power of adhesive sealants.
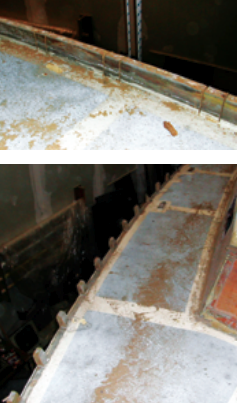
What started out as the removal and reconditioning of two long boards turned into a cutting frenzy with a circular saw. I got the toerails off . . . but in a multitude of 6-inch pieces, which I individually identified by their original locations and stored in boxes marked starboard and port. The old “left brain/right brain dyslectic thing” had happened again: recklessly tear things apart then carefully record what you did. For the next two years I pondered about how I was going to fix it.
For a time, I considered an extruded aluminum toerail, but that was expensive, didn’t really fit with the hull-to-deck joint, and wasn’t going to add that touch of class that a nice wooden toerail does. Furthermore, when investigating the pieces of the old toerail, I noticed that, as it ran the length of the boat, its profile progressively changed to conform to the deck angle and to align with the surface of the hull. This greatly increased my respect for the shipwrights of the early 1970s as, to accomplish this, somebody had hand-planed a continuous 34-foot board. That skill would be hard to find. It was not something I wanted to stumble up the learning curve on.
Shaping simplified
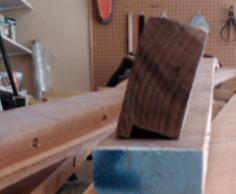
After a move to Houston and finding an ample supply of Honduras mahogany, I decided to produce a number of toerail cross-sections on my table saw and place them on the boat to see if I could find a single profile shape that would work reasonably well in all locations. To my surprise, I found one that did look pretty good everywhere except for the first 4 feet at the bow. This meant that I would only have to hand-plane a couple of short pieces and somehow blend them into my standard profile shape.
With this game plan, I purchased some beautiful 5⁄4 mahogany boards (Note: Yep, 5⁄4-inch boards. –Eds.) from Houston Hardwoods and began making 10-foot lengths of my standard toerail profile. Ahhh, the joy of making sawdust in the garage and tracking it through the rest of the house! However, I was still concerned about how I was going to scarf these boards into a single rail for each side and how I was going to mount such a long and unmanageable thing on the boat without a lot of help.
I figured the installation required that each toerail be dry-fitted, drilled, bolted to the deck, removed, then remounted with 3M 5200 sealant/adhesive, and the bolts reinstalled. I didn’t want to do all that with two 35-foot pieces, so I thought about fitting the 10-foot lengths and simply leaving gaps between them.
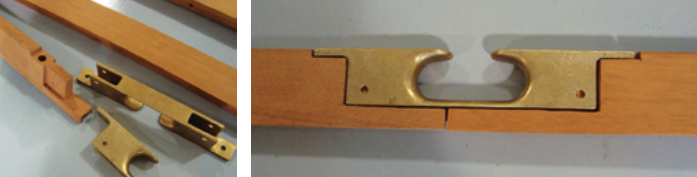
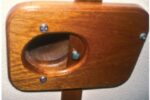
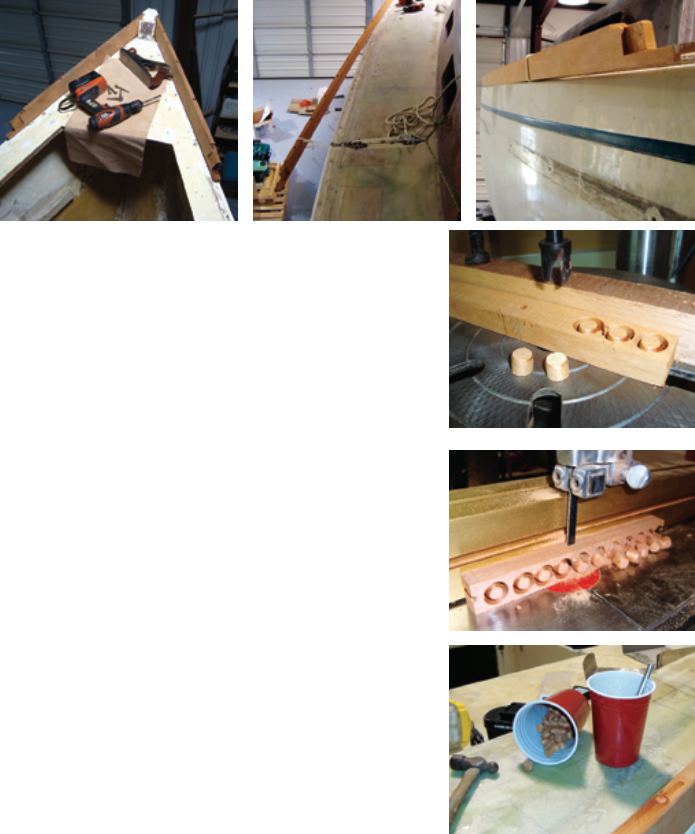
Reading about someone else’s toerail adventure online, I noted that he was using an integral rail chock from Hamilton Marine. Here was the solution to a number of problems! The chocks could act as my toerail joints, hide the transformation from the bow section to the standard profile, and enable me to install the toerail in 10-foot sections! That these chocks were made of bronze and would enhance the toerail appearance was a bonus. All I needed to do was shape the ends of the toerail boards to fit the integral chocks.
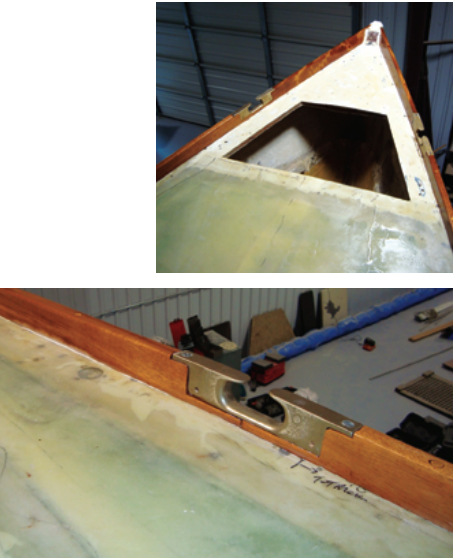
I studied the locations of the hull-to-deck joint bolts and determined that an 8-inch mounting-bolt spacing in my toerail would miss the majority of the hull-to-deck bolts. I drilled and countersunk holes for the new 5⁄16-inch stainless-steel bolts from West Marine on all the boards, then chiseled the ends of the boards to mate with the bronze rail chocks. After dry-fitting all the components on the shop floor, I was ready to begin dry-mounting the toerail on the Vera May.
Bending and bolting
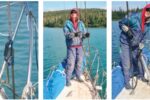
Beginning at the bow, I installed the special forward pieces by bolting them at the bow and drilling and installing each bolt as I moved aft. Next, I loosely mounted the first rail chock. To this point the toerail was almost straight, but bending would soon be involved.
I was initially concerned that the dry lumber would not take the bend and that I might have to steam the boards. However, I found that by fixing one end with the first two bolts and using a handy billy block and tackle to hold up the far end of the board and pull it inward, I was able to create the right curve before drilling each successive hole.
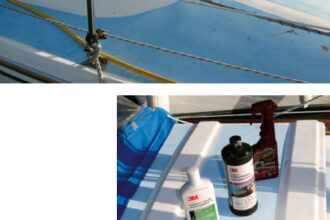
I progressed along the sheer, drilling each hole in turn and inserting a bolt to hold the curve as I moved to the next one. It went remarkably fast and was a fairly easy job for just one person. However, this was just a dry-fitting to correctly position the bolt holes in the deck. I had to remove everything so I could reinstall it with that amazing 5200 sealant/adhesive. This time, though, it was going to be working in my favor.
The installed toerails already looked great, but I still had the countersunk holes to plug. I purchased a plug cutting tool from Lee Valley Tools and used some of the extra toerail material to make bungs that were sure to match. I drilled the plug cutter into a board just a little thicker than the plug depth, then cut through the board with the band saw to to free the plugs. This went so well I made extras. I epoxied the plugs into the toerail holes and sanded the top smooth. The finished toerail presents just the right classical highlight I had been dreaming about.
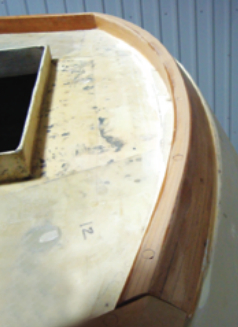
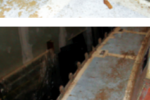
Last but not least, I had to create the aft or, as I call it, the “booty rail” (as in “shake your booty”). This had a significant arc to it, and I had noticed the original was made of vertical laminations. I decided to follow Hallberg-Rassy’s lead and cut a number of 1⁄4-inchstrips the height of my standard toerail profile. I epoxied three of them together while clamping them to blocks on my workbench to form the required curve. Then, over a few successive nights, I laminated additional boards with a taper cut on top so the outside of the curve would slope down at the same angle as the transom. Clever, eh? Well, not really. When I went to mount my beautiful booty rail on the boat, I discovered that the deck was not flat, like my workbench, but crowned! There’s nothing quite like owning a belt sander and getting that itchy fiberglass feeling.
After purchasing a plug cutter, Stephen used it prolifi cally, below, and plugged over the countersunk heads of the toerail bolts, at bottom.
This refit had begun with a cutting frenzy and ended with a sanding mania. Nevertheless, I got the booty rail to settle in and it’s mounted with bunged bolt holes along with a healthy amount of that forever 5200 sealant. All that’s left is a little finish sanding and some varnish. Ahhh, the joy of a procrastinated job well done!
Next, I think I’ll rebuild the cockpit and then surface the deck. Seems simple enough . . .
Stephen Thompson is a professional 4mechanical engineer. Sailing on inland lakes as a boy had its effect and, at 50, Stephen successfully built a small sailboat from scratch and caught the bug once again. Vera May is now restored and has been launched. Stephen sails her on Galveston Bay and the Gulf of Mexico.
Thank you to Sailrite Enterprises, Inc., for providing free access to back issues of Good Old Boat through intellectual property rights. Sailrite.com