A hydronic system extends the sailing (and showering) season
Issue 86: Sept/Oct 2012
Our C&C 35, Secret Plans, was previously used as a racing boat, so the hot-water system was stripped out at some time before we purchased her. As I’m not a fan of cold showers, this had to be addressed. We also wanted to be able to heat the boat so we could extend our cruising season a bit longer into the spring and fall. We keep the boat on a mooring, so shorepower is not typically available. The available fuel sources were diesel and propane, and we wanted to install only one system.
We considered and rejected an “on-demand” propane-fueled water heater. This would give us hot water for dishwashing but we would need a second system for heating the boat. Furthermore, the “on-demand” systems are not officially marine units, so we might run into trouble with the insurance company. We also considered connecting the heat-exchanger loop of a hot-water tank to the boat’s engine’s cooling system, but that would mean running the engine to generate hot water — not very efficient — and we’d still need a second system to heat the boat.
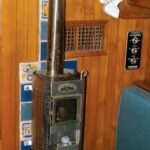
Several reputable companies manufacture boat heaters. Investigating Webasto, Hurricane, and Espar led us to a diesel-burning hydronic heater that heats and circulates a mix of water and antifreeze to provide hot water and cabin heat. These heaters are often used in transport trucks to keep the truck cab warm when the engine is shut down and to pre-warm the engine. They are also used in boats.
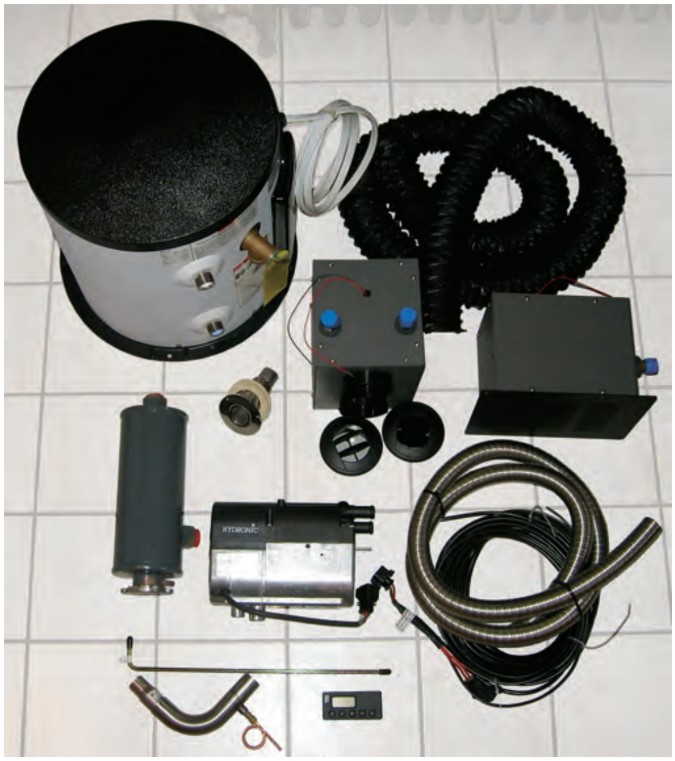
The system we selected and installed consists of an Espar D5 hydronic heater coupled to a Raritan (wash) water heater, an expansion tank, and a pair of Heatercraft radiators. Note that this heater is not ignition-protected and cannot be used in the engine or fuel areas of a gasoline-powered boat. This was not a concern in our diesel-powered boat.
Installation requirements
The heater needs to be close to where the exhaust will exit the boat (typically the transom), in as protected an area as possible, and lower than the expansion tank. The radiators should be located so the hose run to connect them will be fairly easy. In my case, that put both radiators on the same side of the boat as the water heater to keep the hose runs as short as possible.
Once locations have been chosen for the components, the installation job can be broken down into five tasks: mounting the hardware, wiring, plumbing, connecting the fuel lines, and running the exhaust hose.
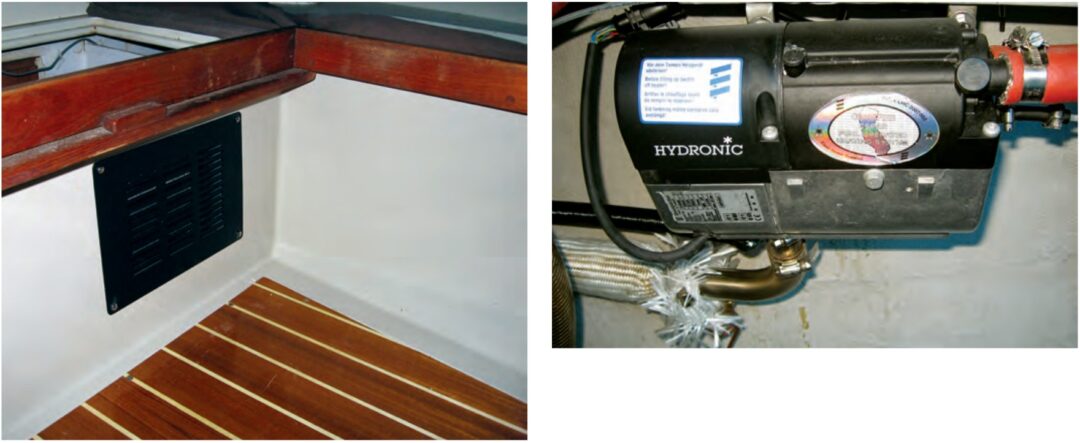
Installing the hardware consists of cutting the required holes, fabricating brackets to hold the heater, and fastening everything in place. The brackets are homemade of stainless-steel strap (1 x 1⁄8-inch) and require some basic bending and drilling. Because we wanted the exhaust to exit at the transom, the Espar heater had to be at the aft end of the cockpit locker to keep the exhaust short. The intake duct that supplies air to the burner is terminated inside the cockpit locker where there is adequate ventilation since the locker shares venting with the engine.
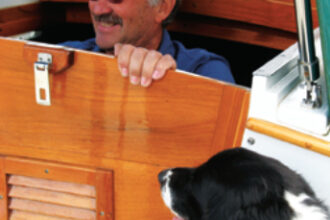
The new Raritan water-heater tank went where the original had been (we bought the same type and size the boat had originally so it fit without problems). This is up against the bulkhead at the forward end of the cockpit locker. I also made a step that covers the tank top and prevents us from stepping on the water tank.
The expansion tank accommodates the circulating fluid as it expands when heated. It has to be higher than the rest of the system so the fluid won’t escape. The expansion tank is at the highest point of the cockpit locker, about 2 feet higher than the heater and directly over the water heater.
We selected radiators that would fit in the available locker space in locations where we wanted heat and where we could run hose. One “gotcha” that almost got me is the barb size on the radiators: 5⁄8-inch versus 3/4-inch. I almost bought the wrong size hose.

A Heatercraft 5H radiator is located under the settee in the main cabin. It pulls cold air from the companionway side and feeds warm air out under the settee table. The second radiator, a Heatercraft 2H, is located under the V-berth, forward of the head. This radiator feeds two air ducts: one into the forward cabin and the other into the head. Both radiators use fans to move air, maximizing the heat transfer. I also had to install some grilles to allow for return-air flow into the locker to the radiators.
Wiring and plumbing
The wiring is pretty straightforward and the directions were clear. The heater and fans are wired into the main electrical panel with dedicated circuit breakers. This takes up two circuit-breaker locations, as we wanted to be able to leave the fans turned off when we didn’t need cabin heat. It would also be possible to connect everything to one breaker, but good practice says each device needs a fuse. We discarded the supplied Espar inline fuse and used a breaker on our main panel so we also had an easy on/off switch.
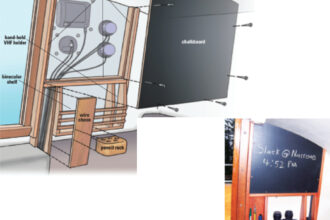
The heater comes with a wiring harness that we tied in place and plugged in at the heater. Then we trimmed the harness to the required length and attached the supplied connectors to the wires to mate with the controller and fuel pump. I installed the heater controller in a cutout in the galley bulkhead. The fans are on a separate circuit and I added a switch in the V-berth to allow that fan to be turned off. The hot-water tank was also connected to AC shorepower for the times we are plugged in and has a dedicated circuit breaker in the AC panel.
The main plumbing job was to run 50 feet of hose through the boat to connect the components. The hose is 3/4-inch inside diameter, which translates into a lot of 1 1/4-inch holes drilled through bulkheads and lockers. The hose has to be impervious to heat and antifreeze and reasonably flexible. A local industrial-hose shop set me up with the materials. The hose is routed from the heater outflow to the hot-water-tank heat exchanger, forward to the radiators in the cabin, back aft to the expansion tank, and then it returns to the heater. The only cabin space where the hoses are exposed is under the oven. I made a teak panel to hide and protect them. Otherwise the hose is hidden in lockers.
Fuel and exhaust
I was lucky that our fuel tank had an unused opening available. Once I obtained the correct adapter, I cut the fuel pickup to length and installed it in the tank. The calibrated fuel pump that comes with the Espar unit is better at pushing fuel than pulling it, so the fuel pump has to be within 6 feet of the tank.
The exhaust installation has specific requirements. One key restriction is that the exhaust pipe must be at least 2 inches from any combustible materials, so the pipe is fastened every foot or so with brackets or restrained with seizing wire to keep it in place. I also installed a fiberglass insulating sleeve over it for extra protection.
The pipe runs aft and out the transom, where it has to be at least 12 inches above the waterline and higher is obviously better. You don’t want water blocking the exhaust even momentarily.
The exhaust pipe also has to have an upward slope immediately inside the boat so any water entering the transom fitting will run back out. A hump bend works best for this; just inside the transom the pipe goes up as far as possible and then back down. The transom fitting is a double-walled exhaust fitting that reduces the amount of heat transferred to the transom. The Espar marine exhaust pipe is 4 inches larger than the truck exhaust pipe, constructed of double-walled stainless steel, and has a drain to remove any water that may have found its way in or that condenses in the exhaust pipe.
When the installation was complete, I filled the hose system with water and antifreeze. There is a bleed screw on the Espar unit to allow air to escape. When I fired up the system, I added more fluid as air burped out. It’s very important to keep the heater from running dry. Since then, I’ve periodically checked the fluid level, but the system has so far been maintenance-free.
Warm feelings
We have been very happy with this setup as it gives us the heat we want with minimal electrical and fuel requirements and it has worked flawlessly. Running the heater for about 20 minutes will heat the hot-water tank and make the boat nice and toasty warm.
The project cost approximately $2,200 for the heater, wire, hose, and radiators and another $600 for the hot-wash-water tank. Installation required a couple of days’ work. The hardest part was pulling all the wire and hose through the boat. When I’m washing dishes using hot water or sipping coffee in a warm boat on a cool fall morning, I know it was worth every penny and every minute.
Graham Collins is an obsessive boat modifier, a woodworker, and a manufacturing engineer of military electronics.He sails Secret Plans, a C&C 35-3, on the waters around Halifax, Canada, with son, Sam, and wife, Jill.
Thank you to Sailrite Enterprises, Inc., for providing free access to back issues of Good Old Boat through intellectual property rights. Sailrite.com